
The Fantail stitch is a quick and beautiful crochet stitch. Sounds great, right? Yup, it is great. I don’t even know how many times I’ve used it.
Unfortunately, fantail doesn’t work terribly well with non-elastic yarns. Cotton and rayon fibers (for example) have little-to-no elasticity. How do I know? Yup, I tried it. As an aside, there are other factors that play into elasticity, but fiber content has the largest effect.
- What’s the difference?
- Overview of a Fix
- Detailed Steps for Said Fix
- The Big Question: Is it worth it?
- Video for all the Fantail rows
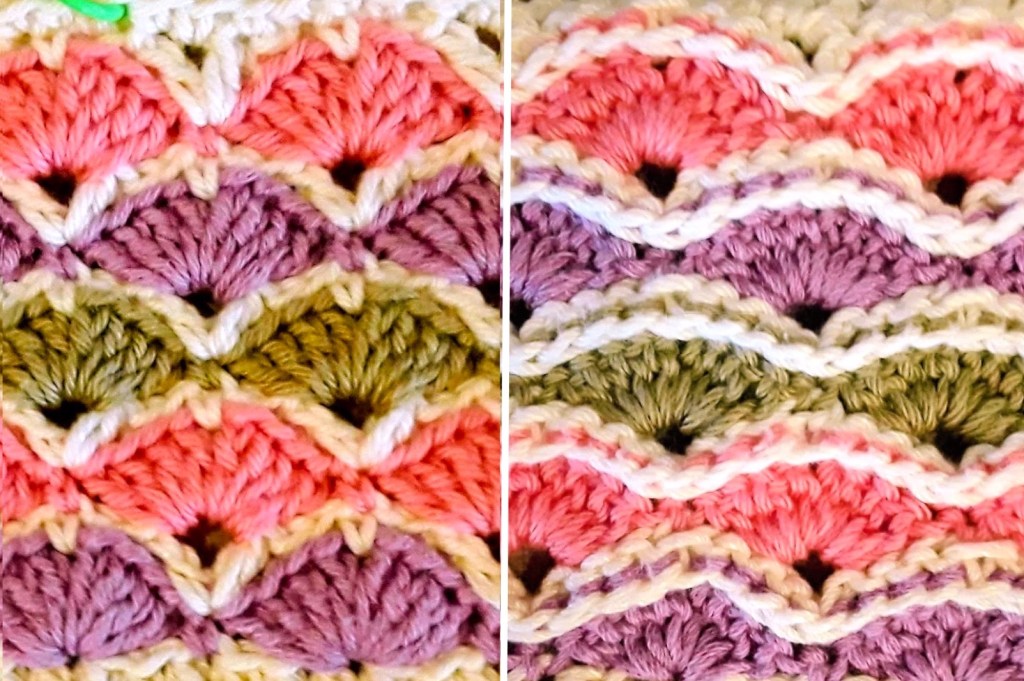
So What’s the difference?
Well, here’s an example of the stitch worked with a nice elastic acrylic yarn.
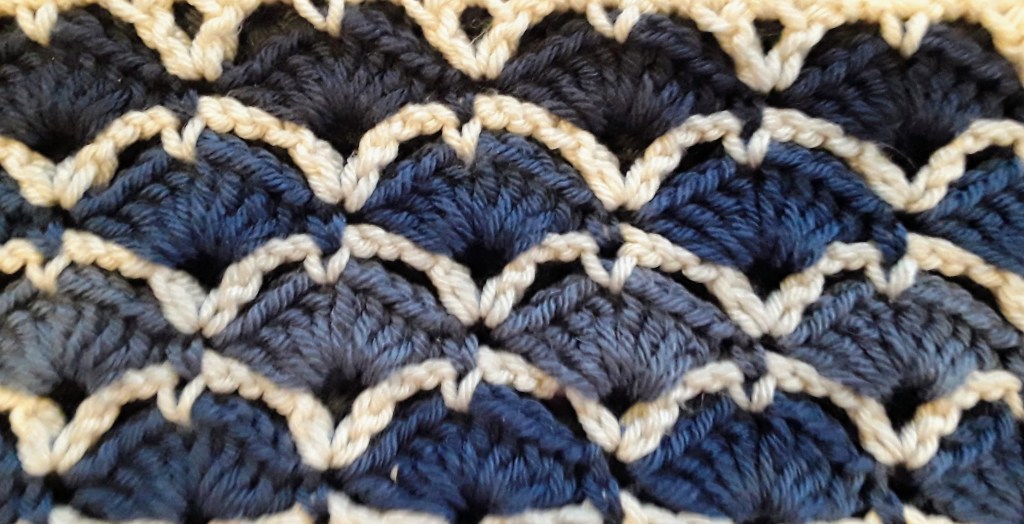
This is part of a stripe in a full sized afghan. The blanket is rather heavy. It’s been washed, dried, and generally well used. And as you can see, this stitch has held its shape nicely. (Win!)
When I made the same stitch in a cotton/bamboo blend, it didn’t look so great. And this is with it lying on a horizontal surface, not even stretched out.
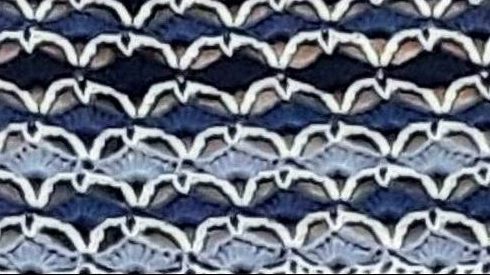
Since I really wanted to use fantail stitch in an afghan I was designing, I needed a way to keep it from stretching out. Guess what? (How did you know?) I did it!
Overview of a Fix
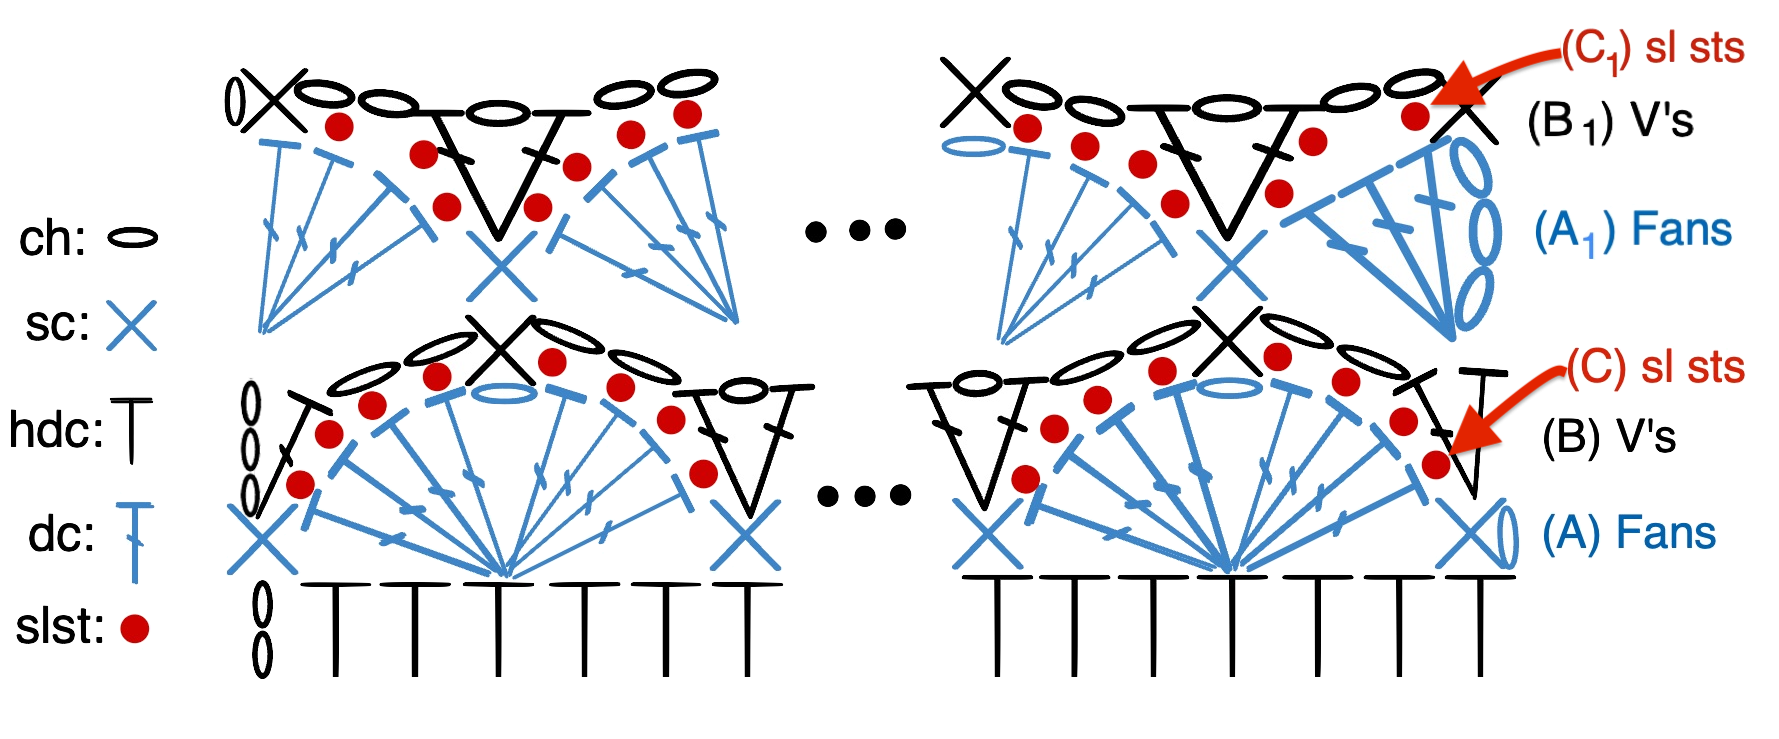
To begin with, I did use more double crochets than the usual fantail stitch. I’ve written up how to make a basic fantail stitch with 8 dcs, and V’s made from dcs as well. The reinforced fantail uses all the rows from the basic fantail, but adds 2 additional rows for reinforcement.
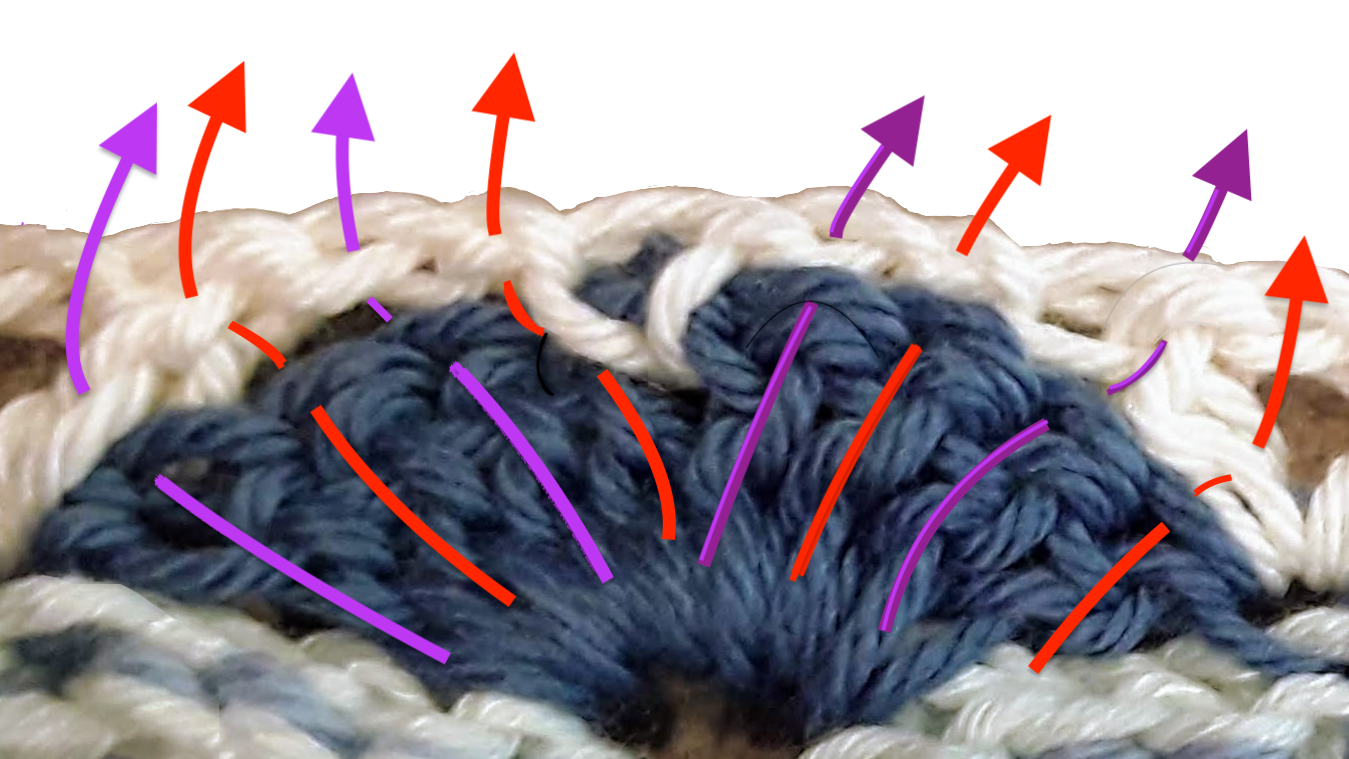
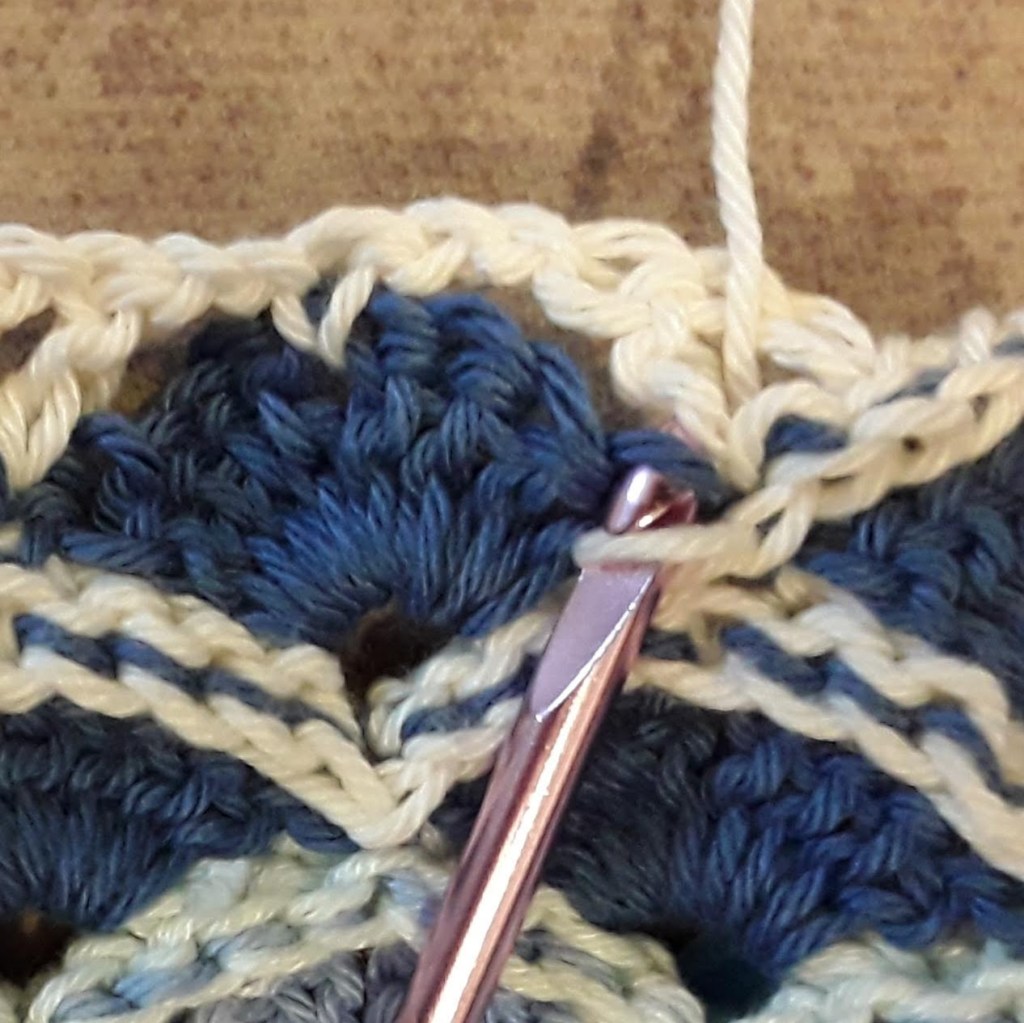
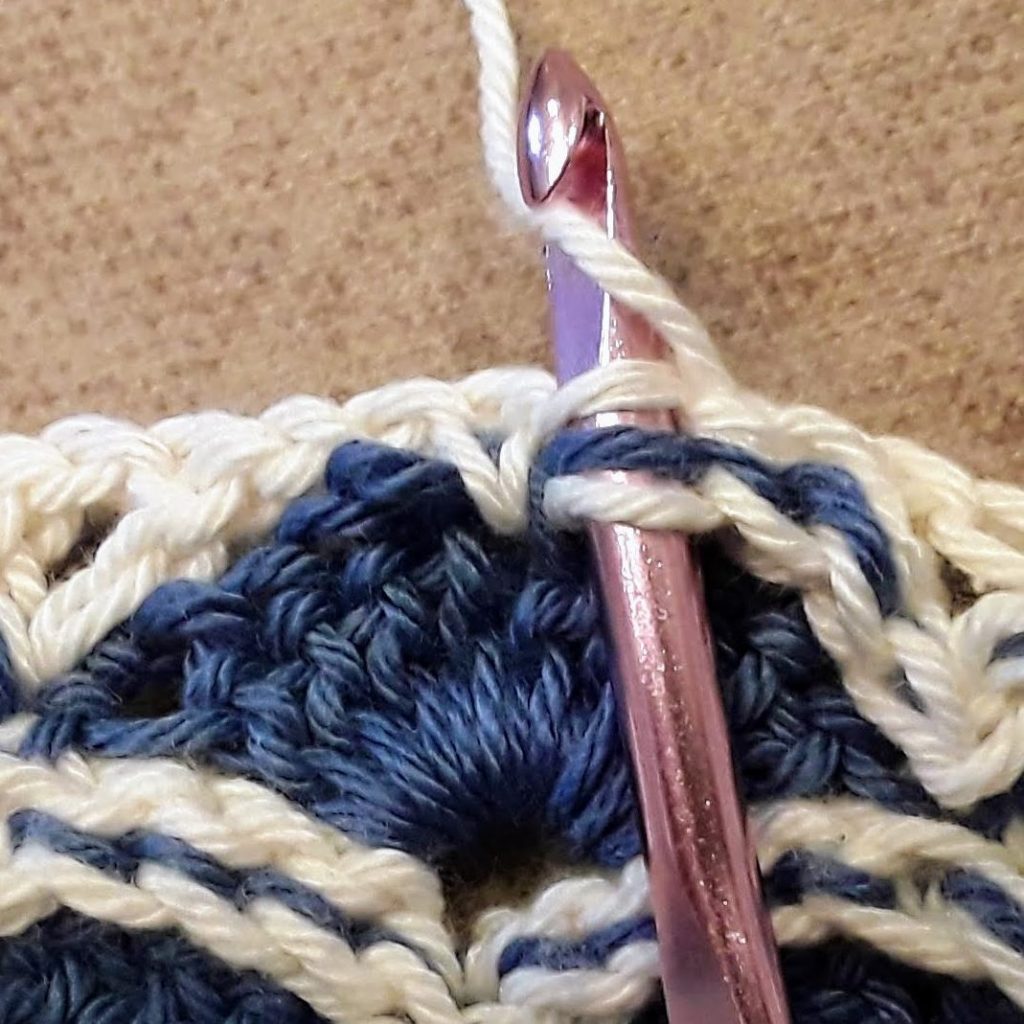
The basic idea for this reinforcement is to add slip stitches connecting every stitch of the Fan to the V row above it.
| Tip: In the V row before you work these slip stitches, make the chains a bit loose. This way you can easily work the slip stitches into those chains. |
Quick summary:
Work on the Wrong Side. All steps work in the front loops of the Fan‘s double crochet stitches.
- Attach the first 2 dcs of a Fan through the post of the dc of the nearest V.
- Attach each of the next 2 dcs through the each of the 2 ch sts; skip the sc of the V row (the one that’s worked into the chsp at the top of the Fan.)
- Attach each of the next 2 dcs to the next 2 ch sts
- Attach the last 2 dcs of the Fan to the dc of the next V.
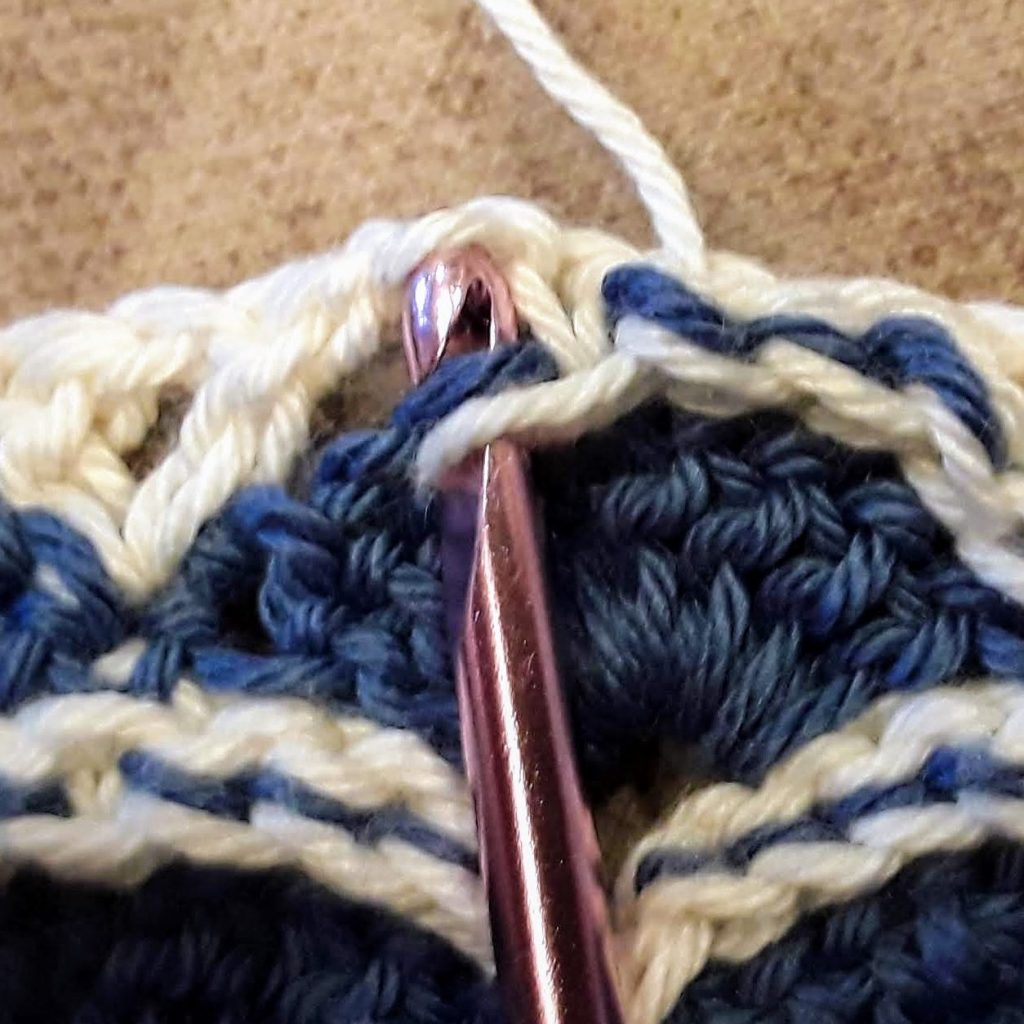
Detailed Steps for Said Fix
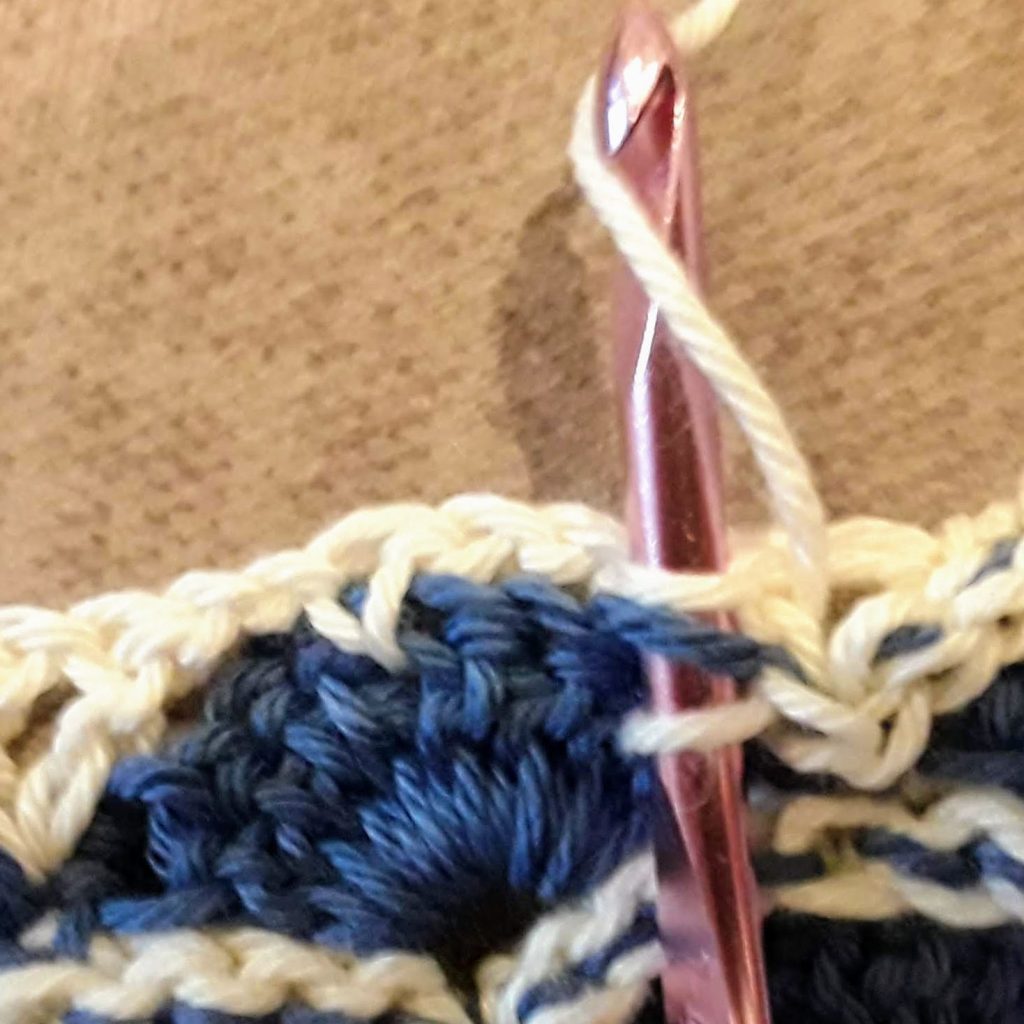
Work on Wrong Side. For FAN dcs, you’ll insert your hook through Front Loops Only (aka FLO.) The “Front loop” is the loop nearest you. When inserting your hook into chain stitches, use the back bump. Here are the steps for a full fan (most of what you’ll do.)
- Work a slip stitch through the first dc (FLO) of a Fan and a lower loop from the side of the nearest dc of the V row above it.
- Slip stitch through the 2nd dc (FLO) of Fan and a higher loop from the side of same dc (of same V).
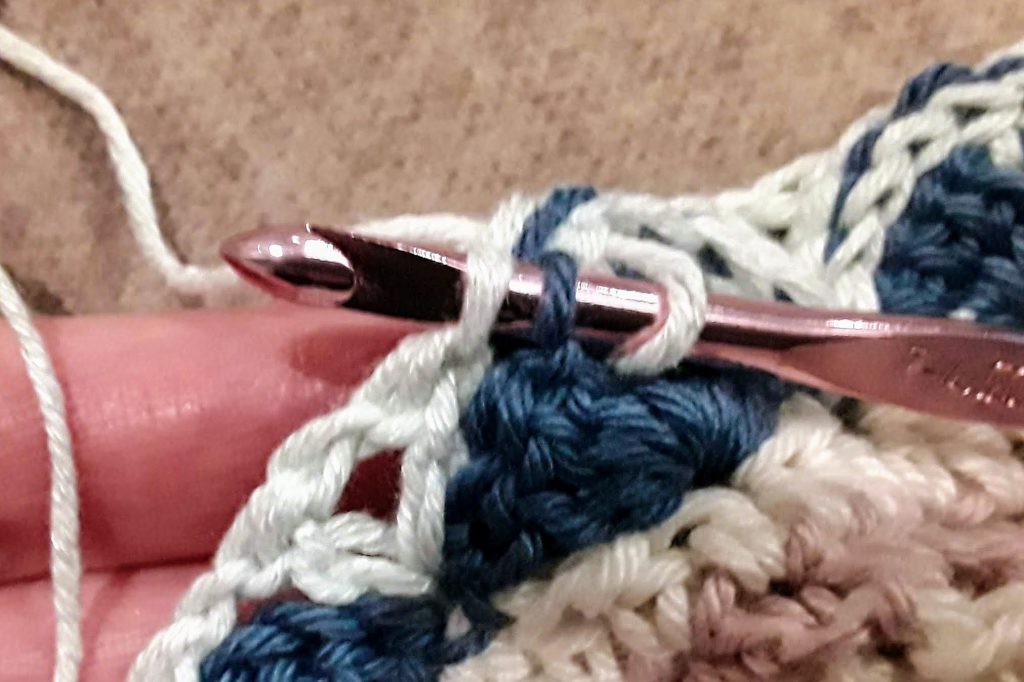
- Slip stitch through 3rd dc (FLO) of Fan and the back bump of the next chain st of the V row.
- Slip stitch through the 4th dc (FLO) of Fan and the back bump of the next chain st of the V row.
- Skip the sc of the V row (and ch sp of Fan);
Slip stitch through the 5th dc (FLO) of Fan and the next chain st of the V row. - Slip stitch through the 6th dc (FLO) of Fan and the next chain st of the V row.
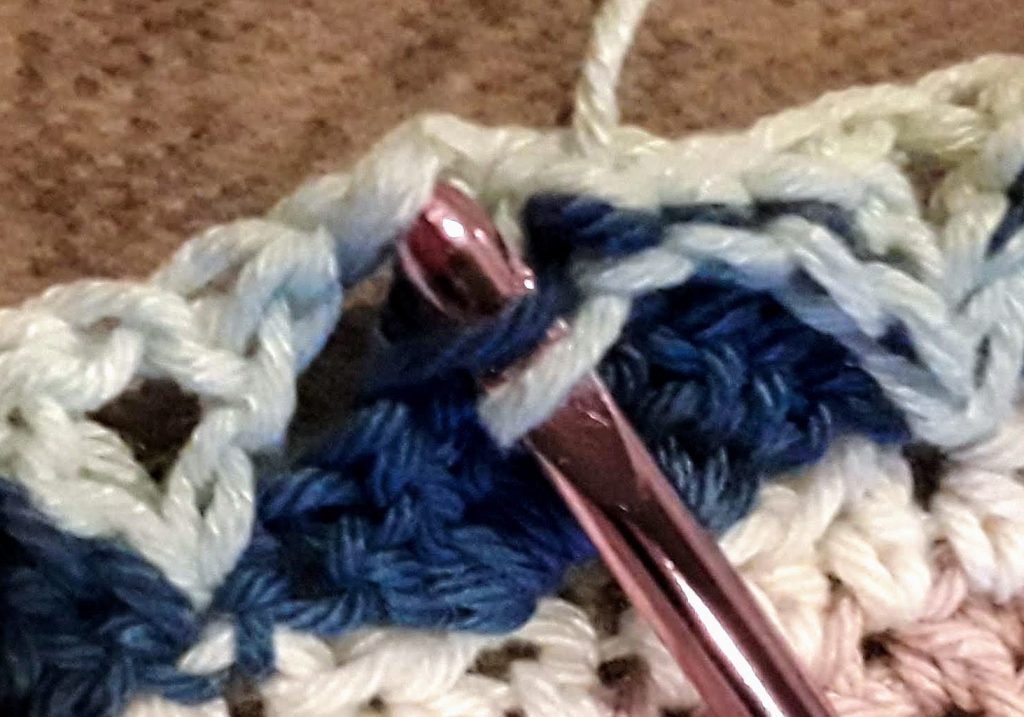
- Slip stitch through the 7th dc of Fan and a higher loop from the side of the next dc (of next V).
- Slip stitch through next dc of Fan and a higher loop from the side of the same dc (same V).

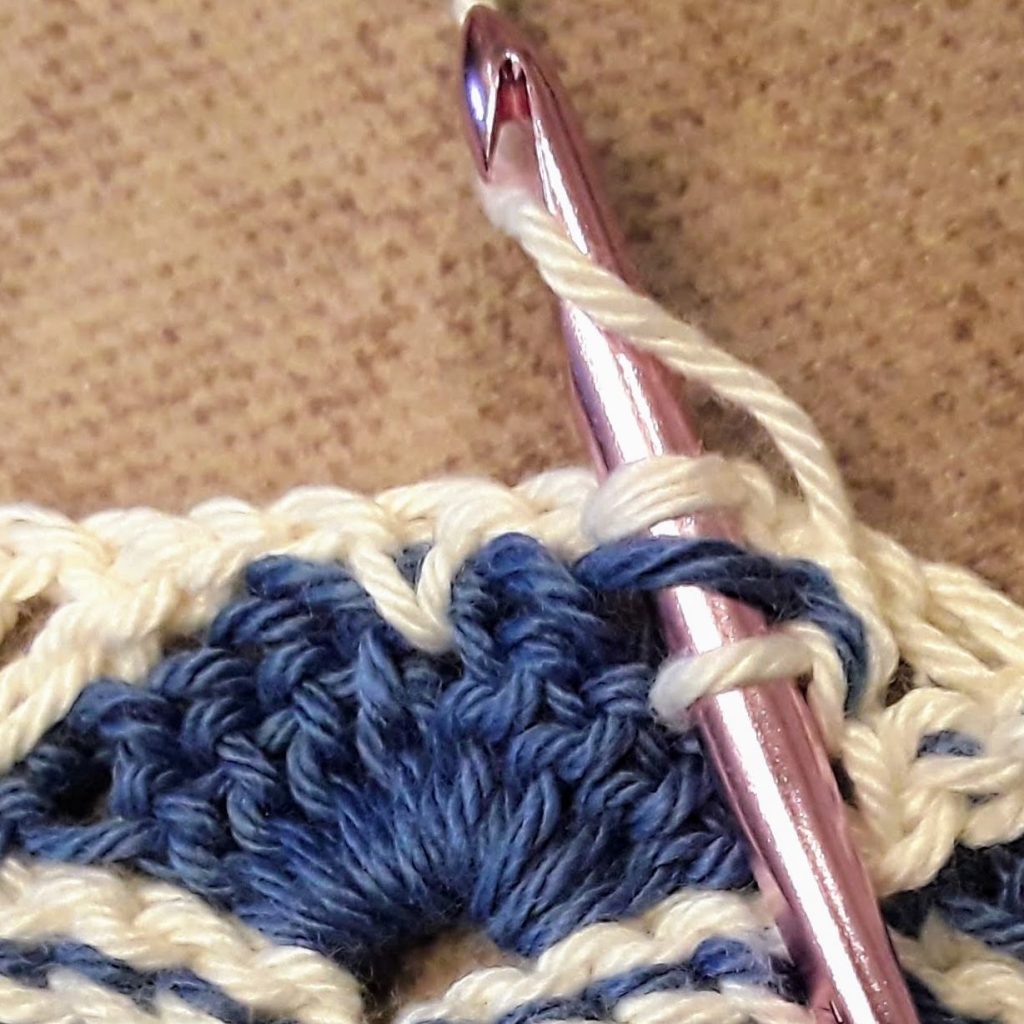

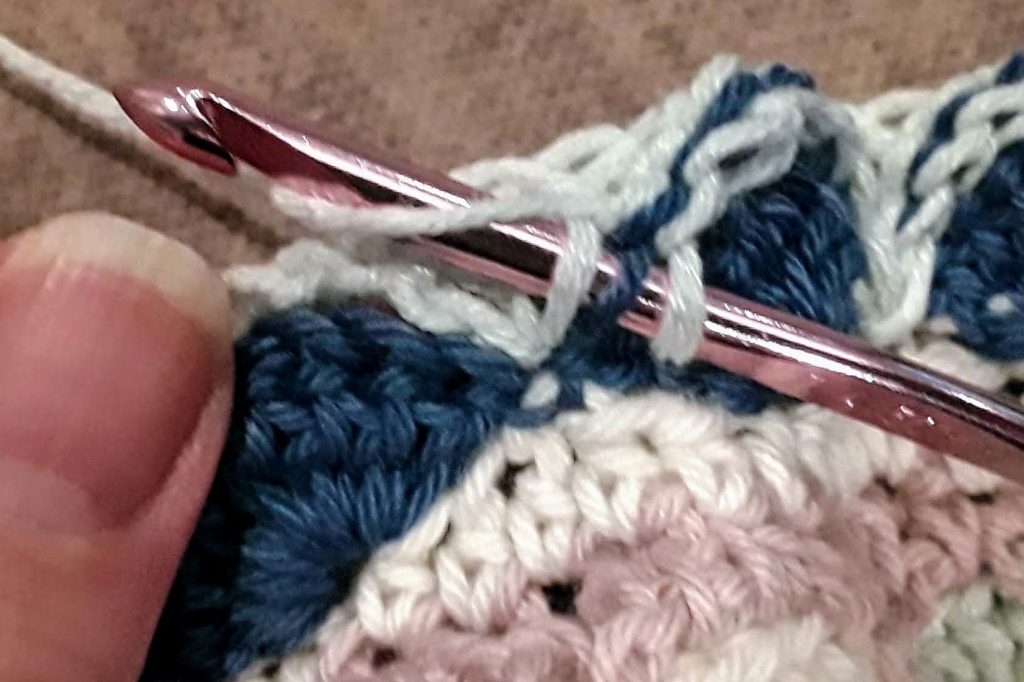
If you have a half fan at the beginning and end of the row, then what? Your half fan could be 5 dcs, and then everything would be the same. but I’ve been making them with 4 dcs, and the first dc is already worked into a single crochet from the previous row. So what then?
I’ve been working through the chain stitch nearest the sc, skipping the other chain stitch, and working 2 slip stitches through the nearest dc of a V. So for the beginning of the row:
- sl st the first dc of the half-fan (the one right after the turning ch) to the back bump of the first ch in the V row
- sk the next ch of the V row; sl st the next dc of the half-fan to the top of the first dc of the V row
- sl st the last dc of the half-fan to the bottom of the first dc of the V row.
For the end of the row:
- sl st the first dc of the half-fan to the bottom of the first dc of the V row.
- sl st the next dc of the half-fan to the top of the first dc of the V row
- sk the next ch of the V row; sl st the next dc of the half-fan to the back bump of the first ch in the V row
And Now the Big Question: Is it worth it?
Sounds like a lot, I know. It kind of is. Especially if the chains in your V rows are tight (so don’t do that.) But the results can be stunning. Check out the right and wrong sides of the stripe I just made. Even with my terrible photography, it looks pretty great if I do say so myself.
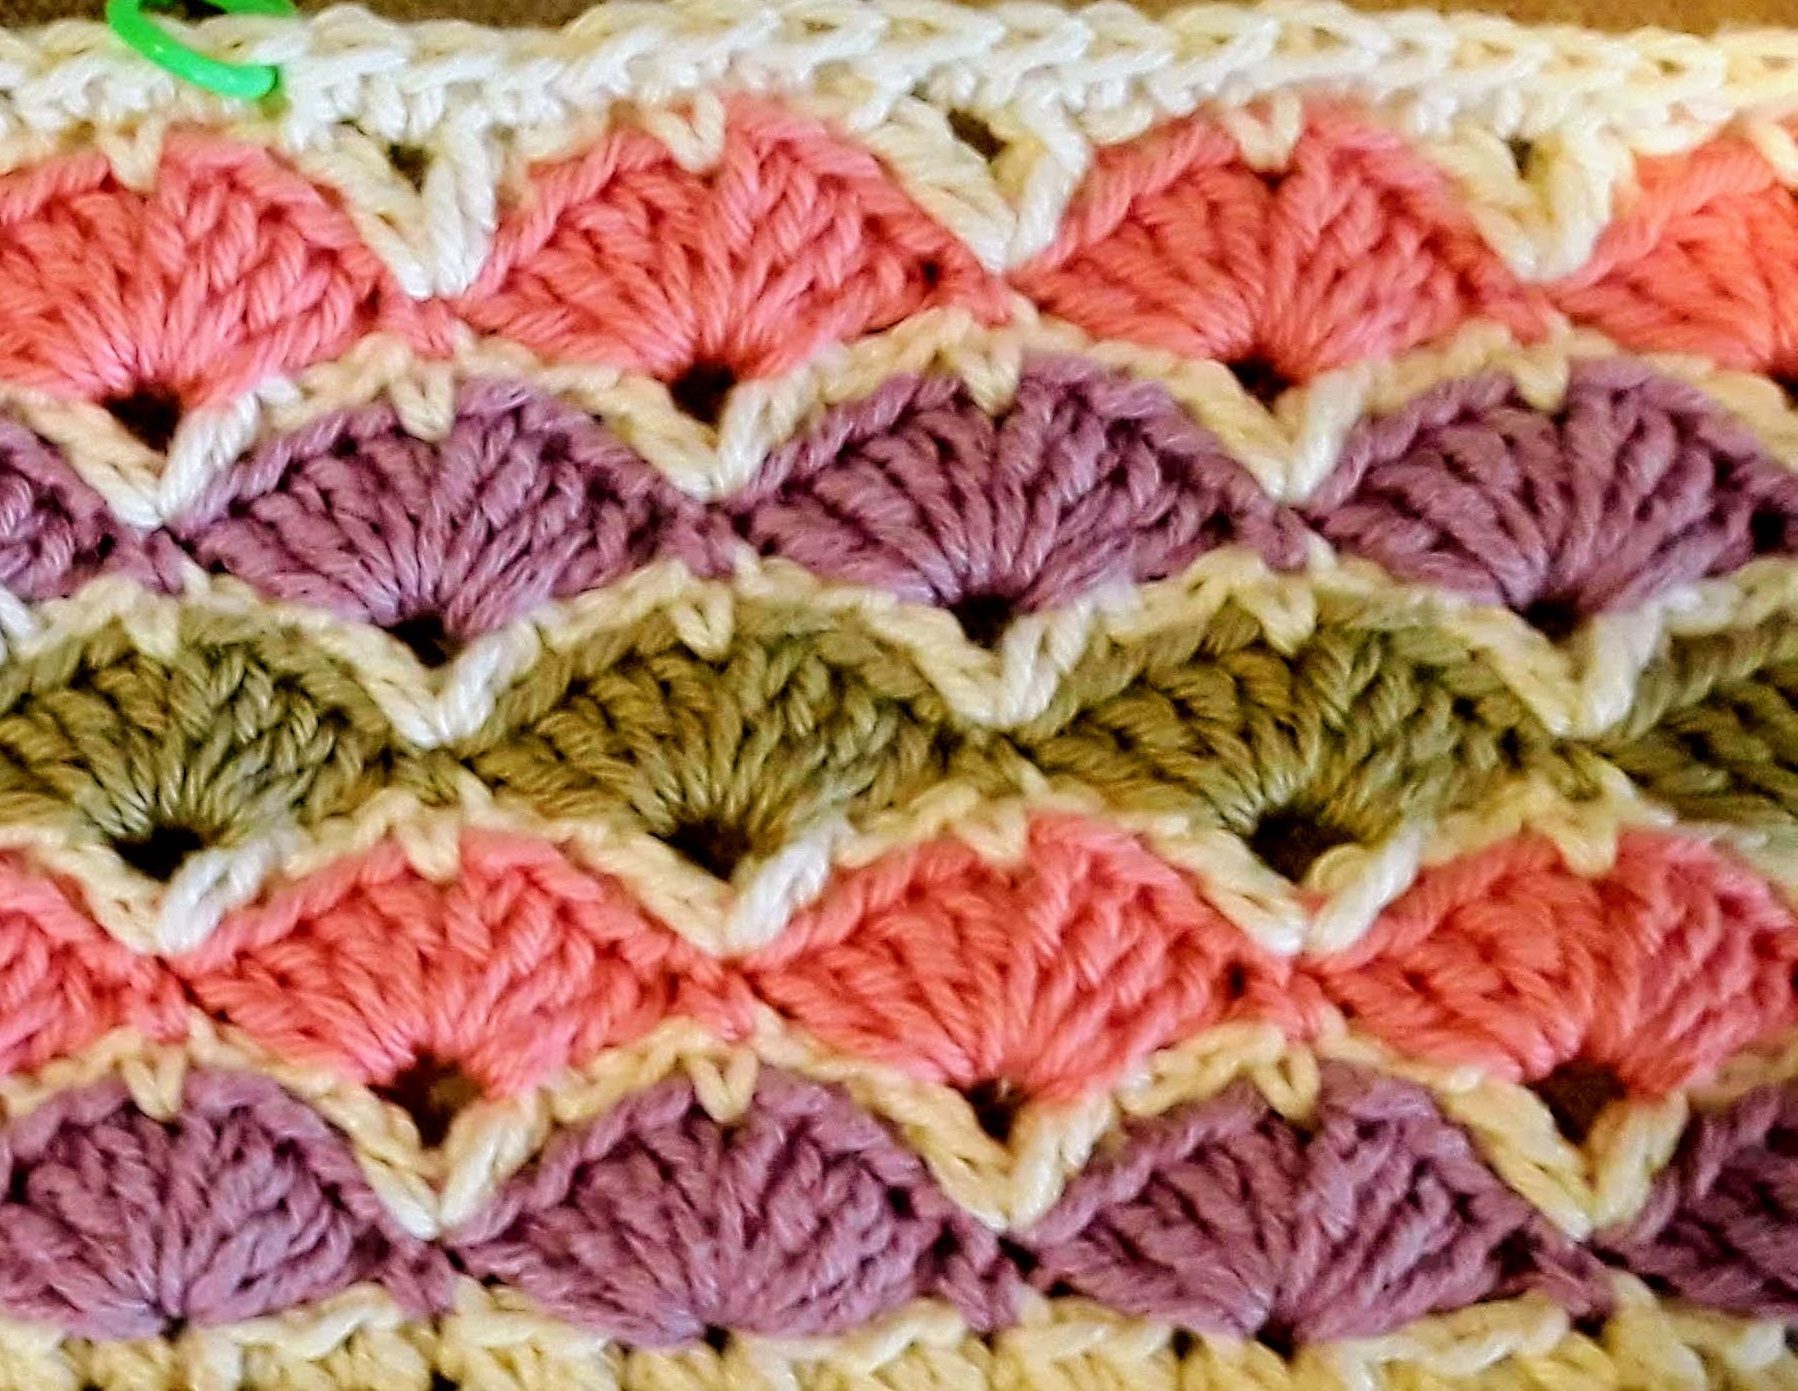
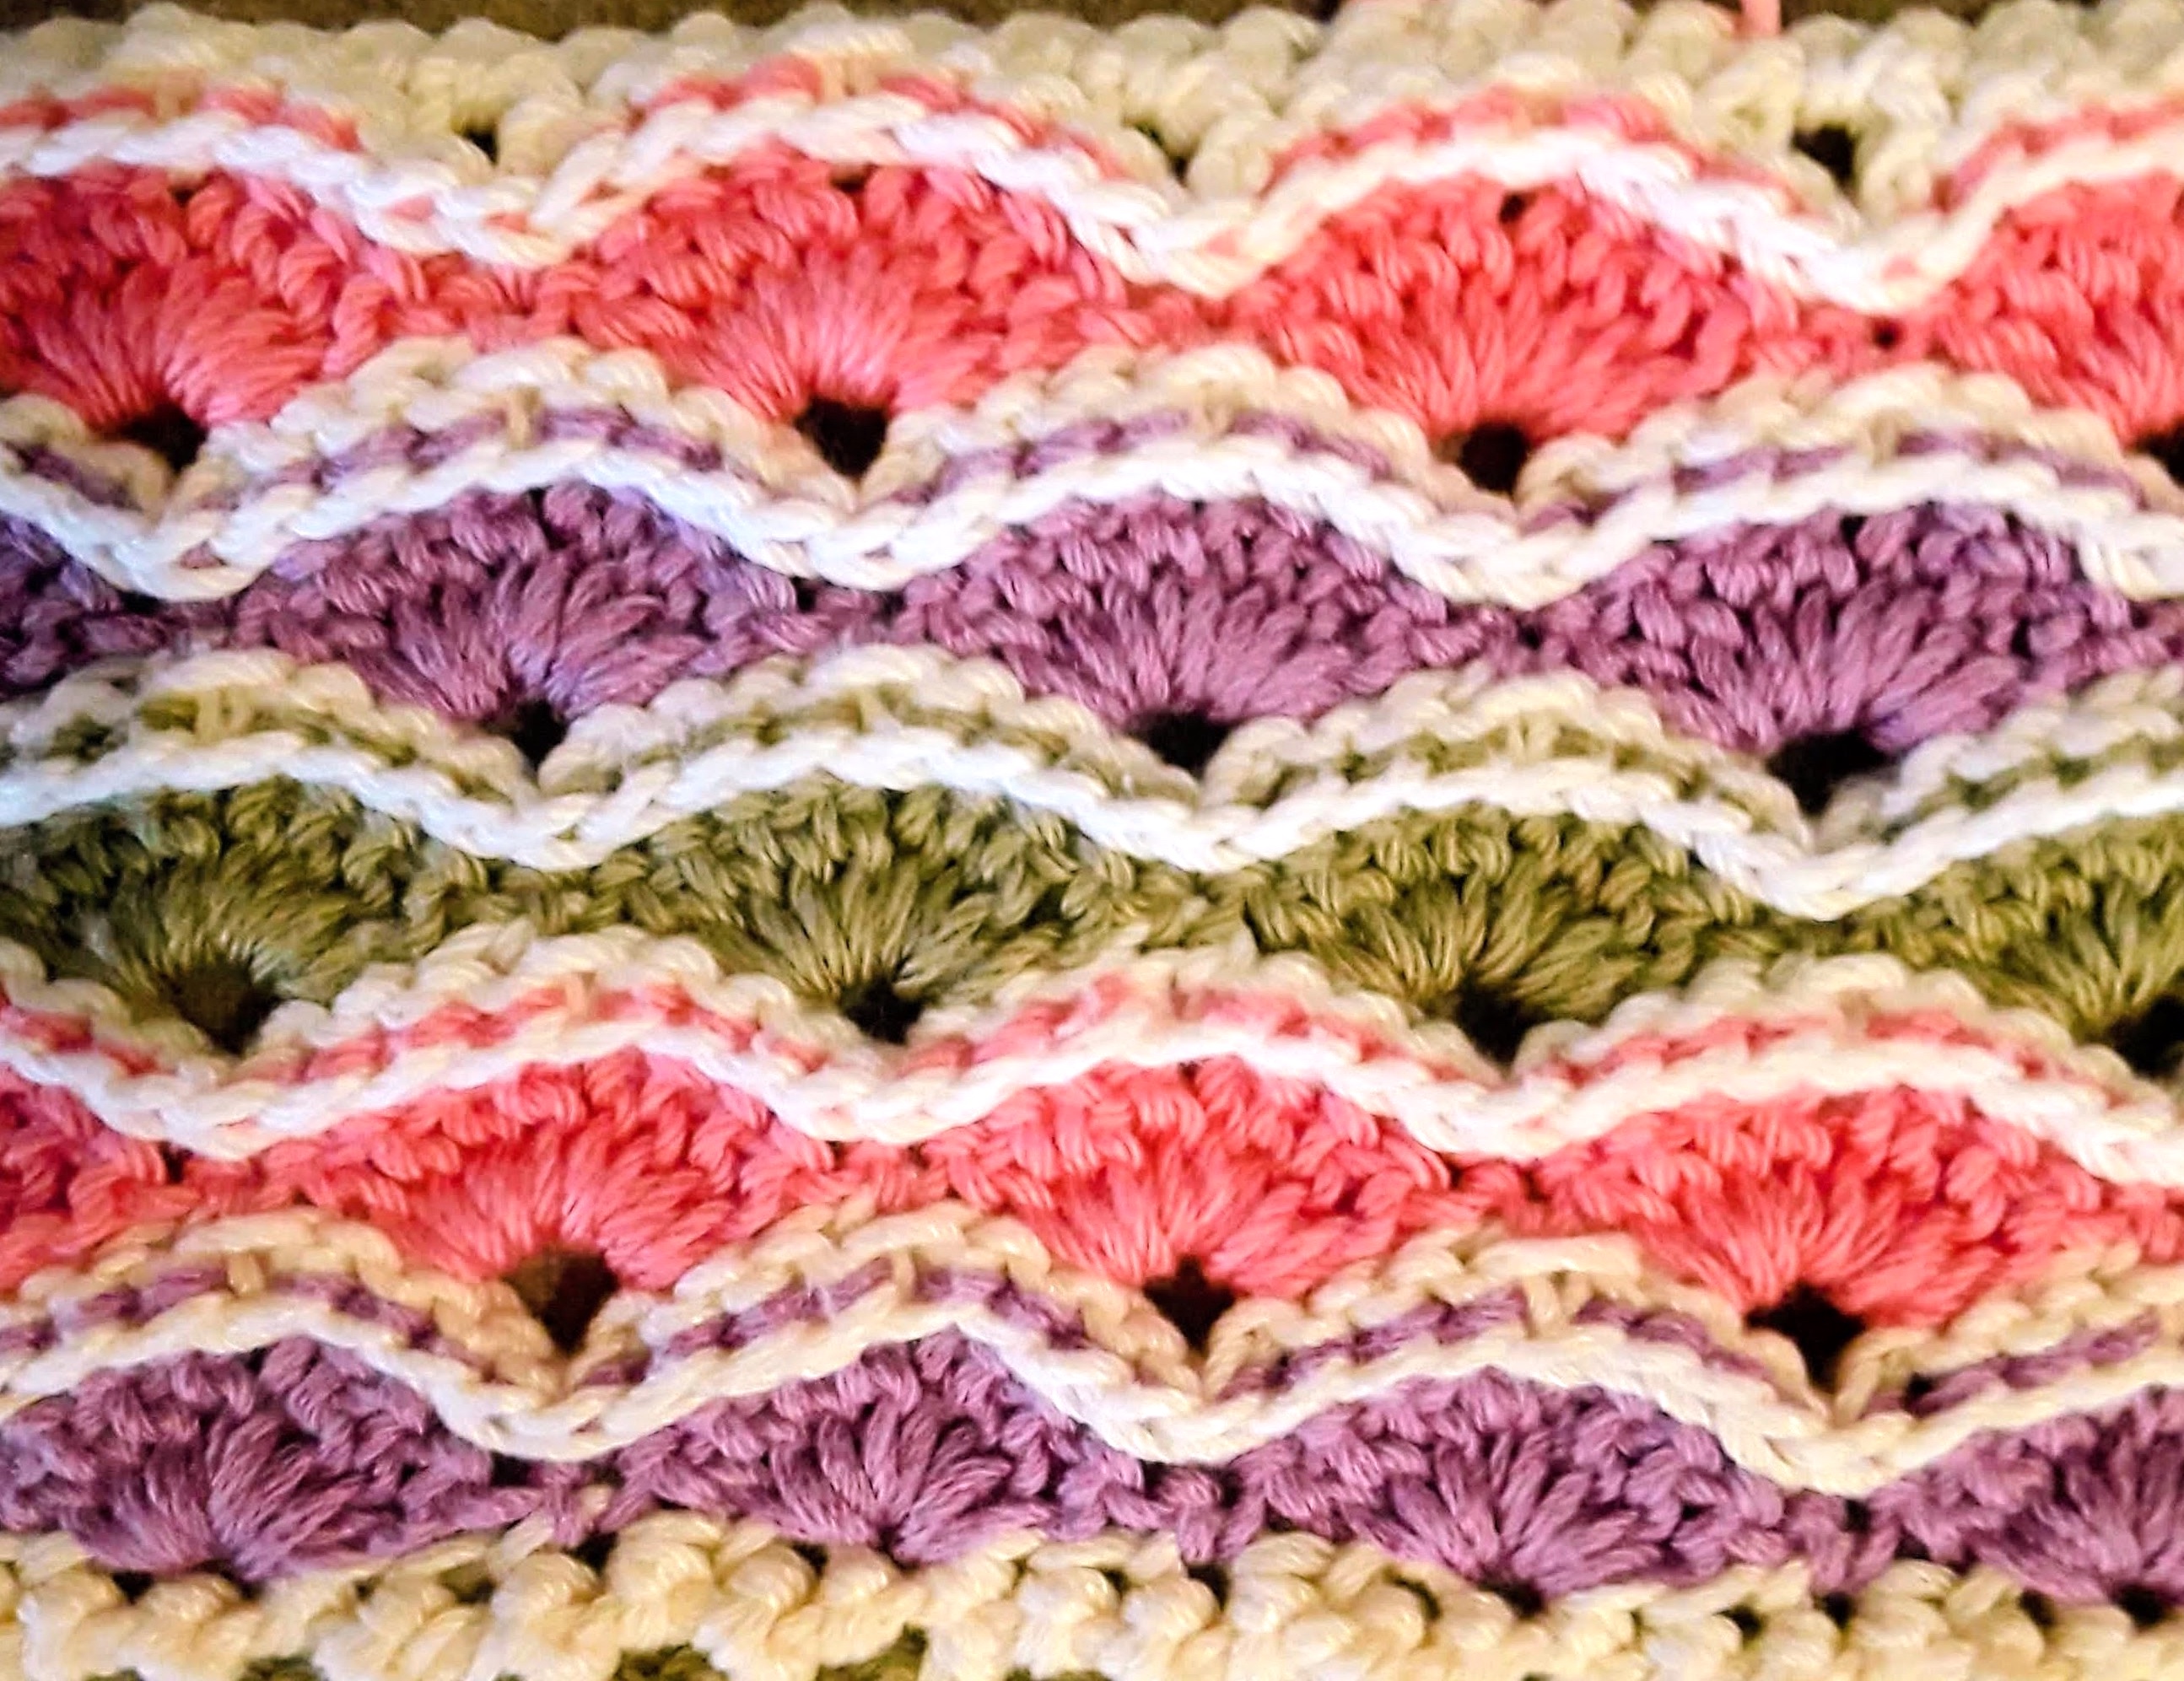
In fact, I couldn’t be more pleased. More importantly, the person I’m making it for loves it.
What do you think? Would you try adding this row to a stitch that’s otherwise super quick and easy? Just so you could make this stitch with a yarn you loved?
Apparently I would.


Leave a comment