
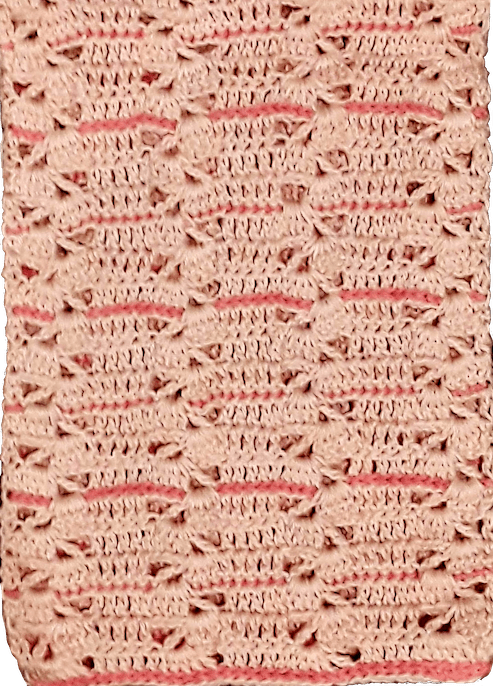
Last Christmas I wanted to make my daughter a decorative scarf. It worked out well, so I’d like to share with you.
After looking around for ideas, I decided on the style of this pin. I’ve seen charts for similar designs, and this is my favorite. It’s beginner friendly in every way, with a yarn that will work up quickly. If that’s what you want, I encourage you to head on over to the web page with the pattern.
I wanted something just a bit different. A scarf in a soft color to stand out against the black clothes my daughter typically wears, with a highlight color to make it pop.

Don’t judge me for pushing color on someone who wears black. She likes color. She mostly wears black because it’s easy. She gets that from me.
Also, I wanted a lighter weight yarn, for something a bit lacier and nice for spring. It’s not quite as beginner friendly, but not difficult either.
But enough jabbering. I know what you really want is the pattern. So here goes.
Materials:
- Yarn:
- Hooks: 3.75 mm
- Tapestry Needle (I used size 16)
Instructions
Special Stitch
2 dc cluster (CL): Same as dc2tog, except all in one stitch.
- yo, insert hook in specified st, grab the yarn & pull through,
yo & pull through 2 loops (2 loops left on hook) - yo, insert hook in same st, grab the yarn & pull through,
yo & pull through 2 loops (3 loops left on hook) - yo & pull through all 3 loops on hook.
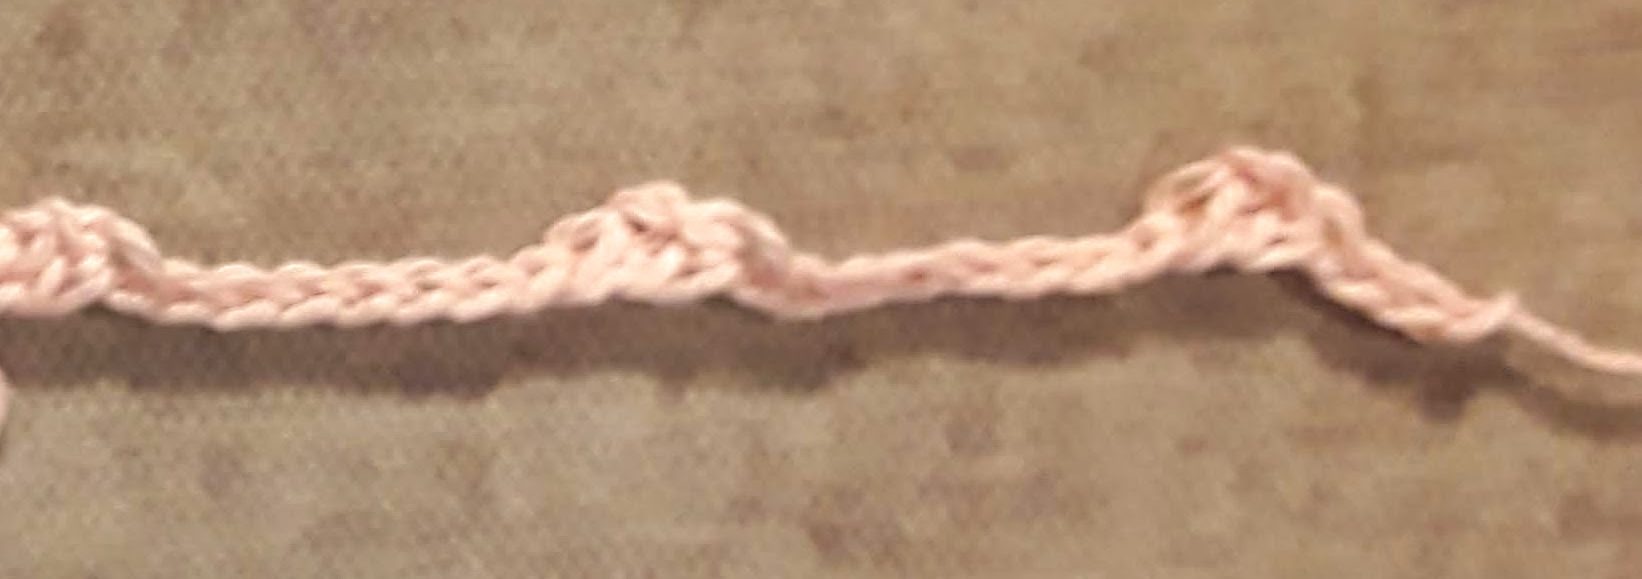
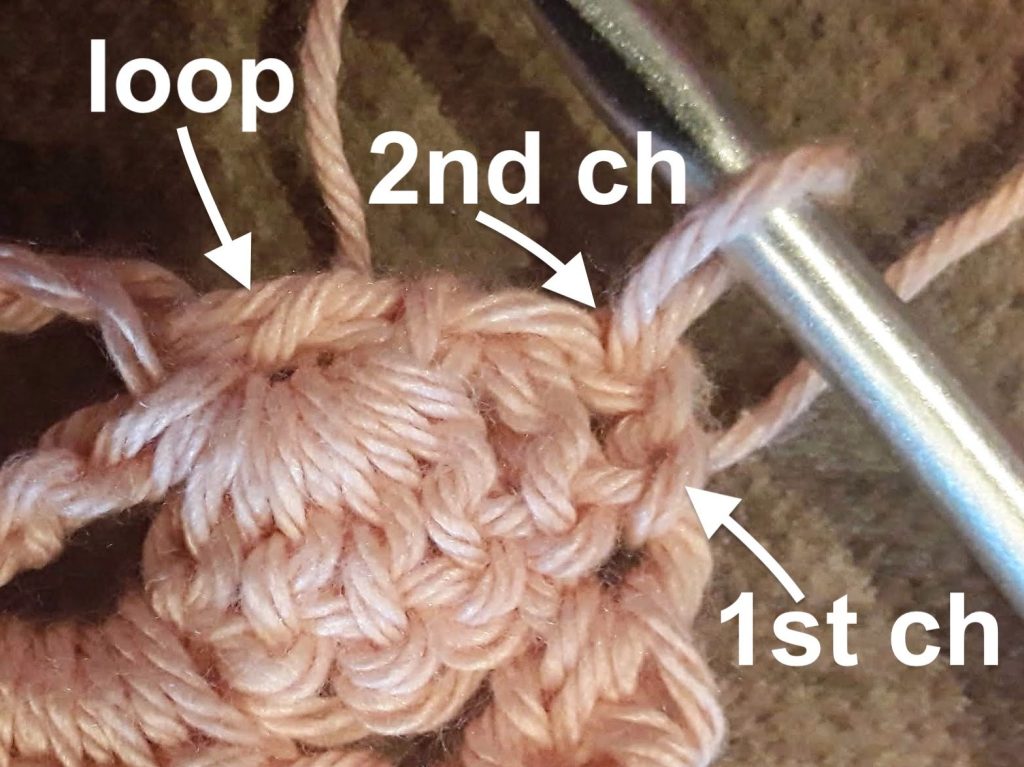
Foundation
ch6, dc in 3rd ch from hook to make a loop,
*ch10, dc in 3rd ch from hook*, rep between *’s 2 more times, ch3.
Working the first half
Row 1
Working in the back bumps of the chains,
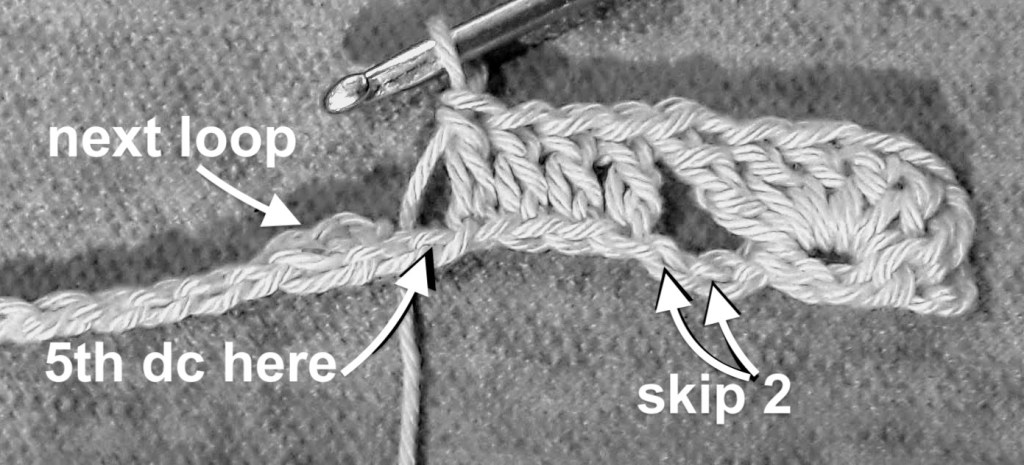
dc in 3rd ch from hook, *work [4 dcs, ch1, tr] in next loop,
sk 2 chs, dc in each of next 5 chs*,
rep between *’s 2 more times, work [4 dcs, ch1, tr] in the next loop,
sk 2 chs, CL in last ch.
Row 2
ch2, turn, dc in first st, sk next tr,
*work [4 dcs, ch1, tr] in next chsp, sk next 4 sts,
dc in each of next 5 sts, sk next tr*, rep between *’s 2 more times,
work [4 dcs, ch1, tr] in next chsp, sk next 4 sts,
CL in last dc; drop the main color (do not fasten off)
Row 3

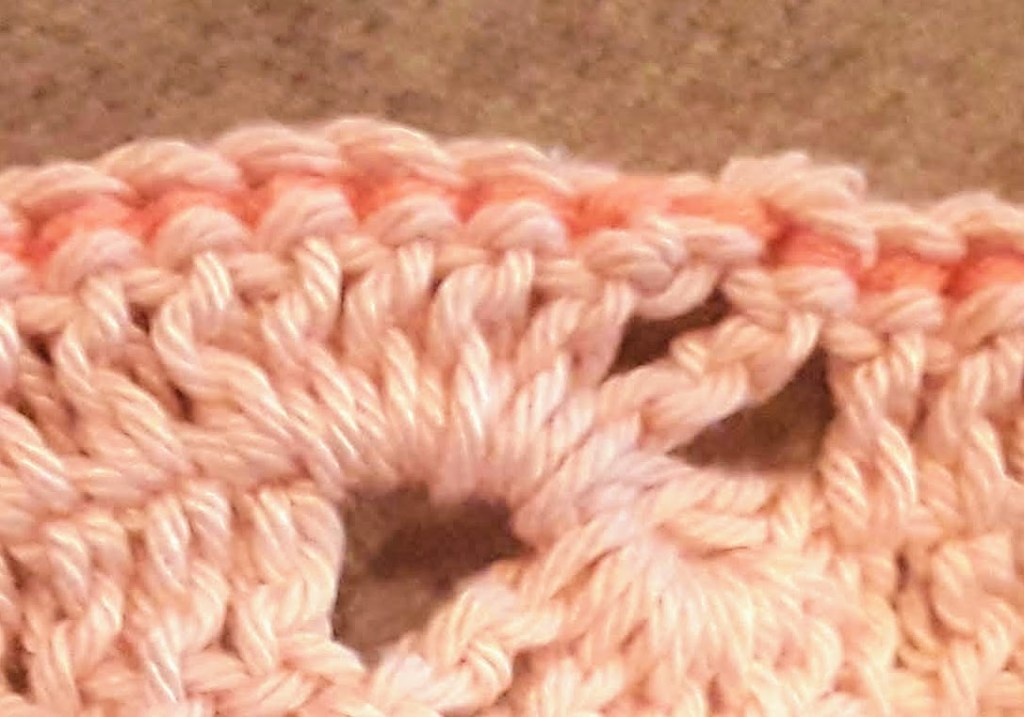
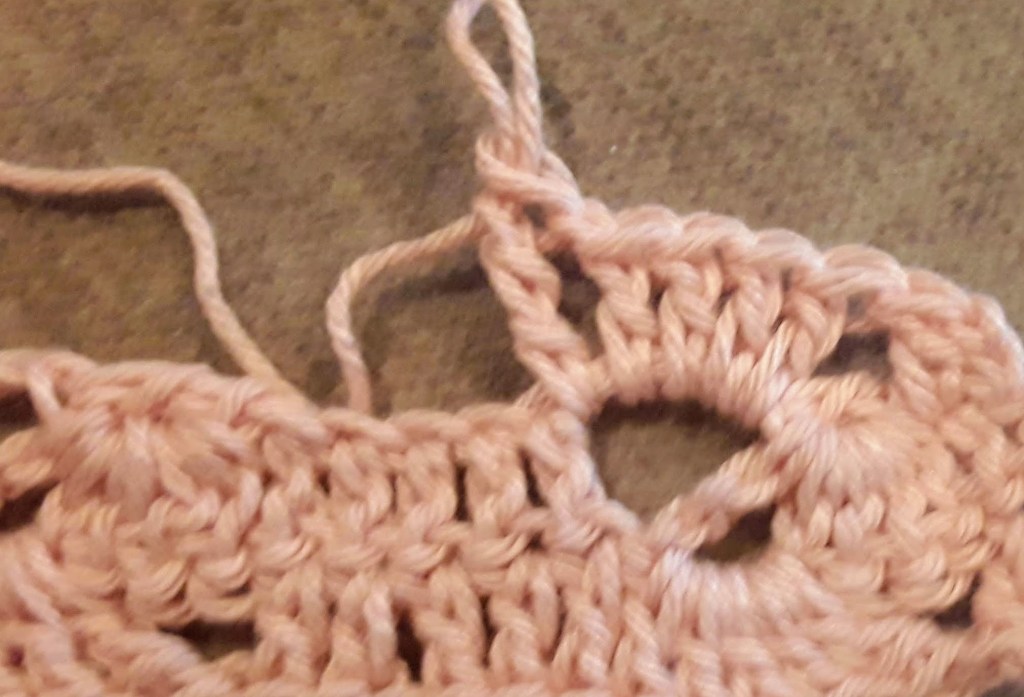
| 📔 The back may look a bit wonky at the chsp. Don’t worry, folks! The next row will cover it up anyway. Do make sure not to work the sl st into the chsp. That would make it too bulky. |
With top 2 loops of dcs facing you, join highlight color in first st,
sl st in first st, sl st in each of next 4 dcs, sl st in front loop of ch,
dc in next tr, continue to sl st in this same manner across to last st.
Fasten off the highlight color. Do not weave in yet.
Row 4


ch2, turn, working into row 2 above the sl sts, dc in first st, sk next tr,
*work [4 dcs, ch1, tr] in next chsp of row 2 (so around the sl sts),
sk next 4 sts, again working above the sl sts,
dc in each of next 5 sts, sk next tr*, rep from * 2 more times,
work [4 dcs, ch1, tr] in next chsp as before, sk next 4 sts,
CL in last dc of row 2.
Row 5
ch2, turn, dc in first st, sk next tr, *work [4 dcs, ch1, tr] in next chsp, sk next 4 sts,
dc in each of next 5 sts, sk next tr*, rep from * 2 more times,
work [4 dcs, ch1, tr] in next chsp, sk next 4 sts, CL in last dc.
| 🟡 This would be a good time to make sure the last 4 rows are good, and weave in your accent color. Whip stitch around the back of the sl sts until you get to the first group of stitches in the chsp. Then work your needle through the next 5 stitches, catching a bit of the slip stitch as you go, work your thread back through those same stitches twice more. Make sure the accent yarn in the group of 5 stitches is hidden, then trim the yarn. Do the same on the other end. |
Rows 6 and forward
Repeat rows 2 – 5 until you have reached approximately half your desired length. If you want to use just 2 skeins of yarn, then stop when the first skein is nearly run out.
Last 3 rows
- ch2, turn, dc in first st, sk next tr,
*work [4 dcs, 2 trs] in next chsp, sk next 4 sts,
dc in each of next 5 sts, sk next tr*, rep between *’s 2 more times,
work [4 dcs, 2 trs] in next chsp, sk next 4 sts,
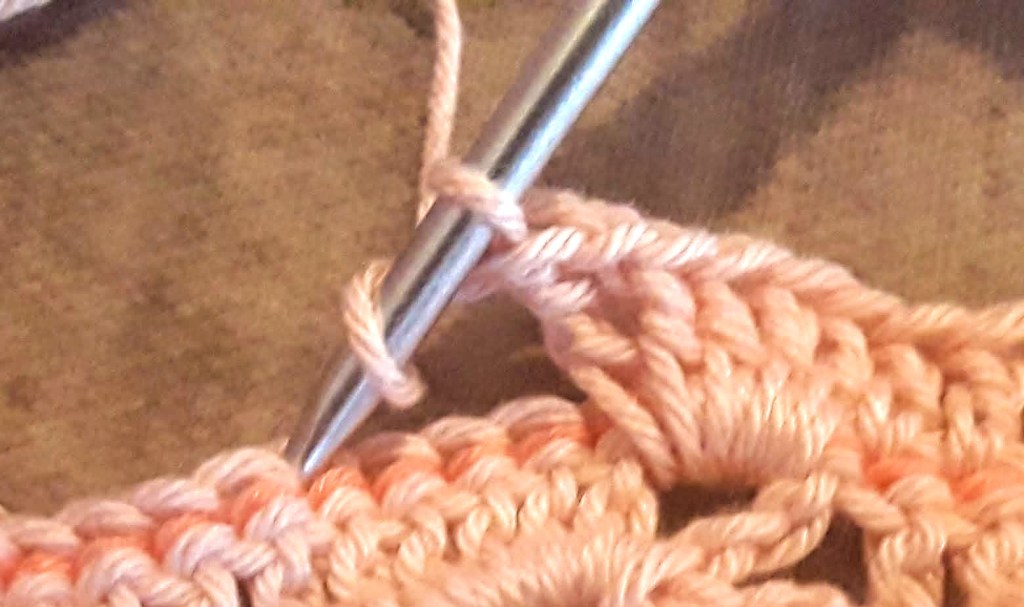
CL in last dc; drop the main color. - Using accent color, sl st in first st and each st across. Do not fasten off.
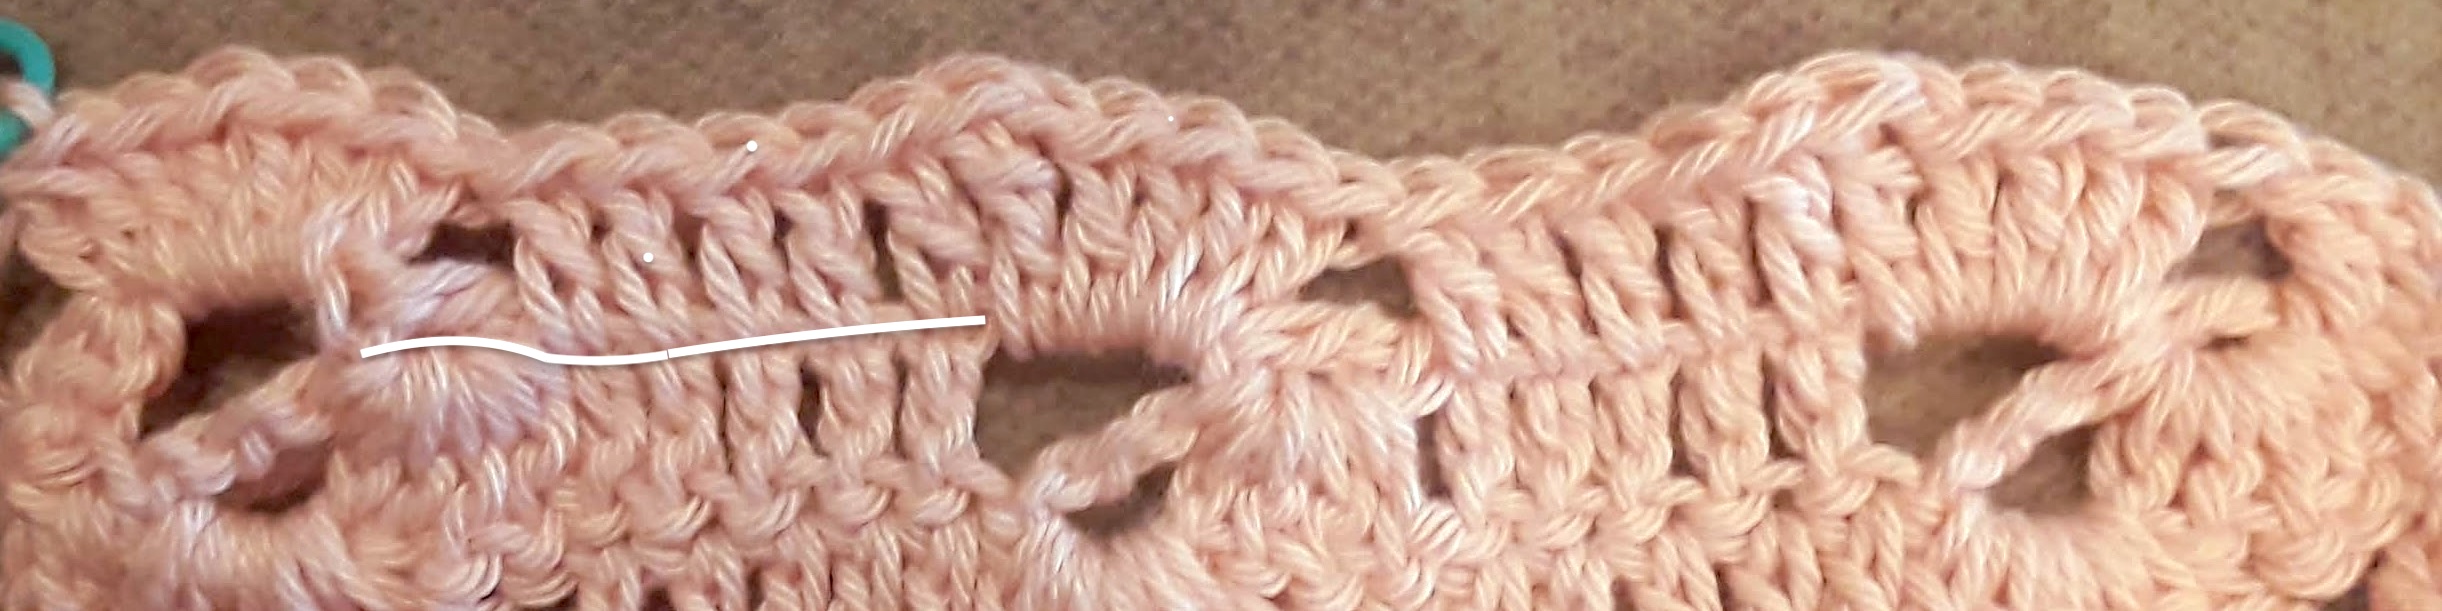
- Turn the work; sl st in each st across. See pictures for row 4 to see how to insert the hook.
Weaving in last 2 rows
At the very end, you will need to weave both ends of the accent color into slip stitch rows. This will make the stitches very thick. I suggest keeping the weave-in to just the last 5 stitches (working through them 3 times.) Then, to balance things out, cut a length of the accent color and just weave it in on both sides of the 5 stitches at the other corner. Now you have an intentionally thick bit of your accent color on each of the 2 corners at the end of your first half.

Working the 2nd half
First row
Working into foundation,
join main color in 2nd ch made, ch2,

dc in next ch, sk next loop,
work [4 dcs, ch1, tr] in next ch2 sp,
*dc in each of next 5 chs, sk next loop, work [4 dcs, ch1, tr] in next chsp *, rep between *’s 2 more times, CL in last ch.
Remaining Rows
The next three rows are the same as rows 3–5 in the first half.
Then repeat rows 2 – 5 until you’ve reached the desired length, making sure you have enough yarn remaining for one more row of the main color
Finally, follow the instructions for the last 3 rows.
That’s it — easy, peasy. I hope you enjoy.


Leave a comment