
Shoring up the waves from the Beach House Afghan pattern
In the post, I’ll write up the details how I solved the problem with drape that I ran into using bamboo/cotton yarn with a 4.5mm hook.
Appearance Before and After
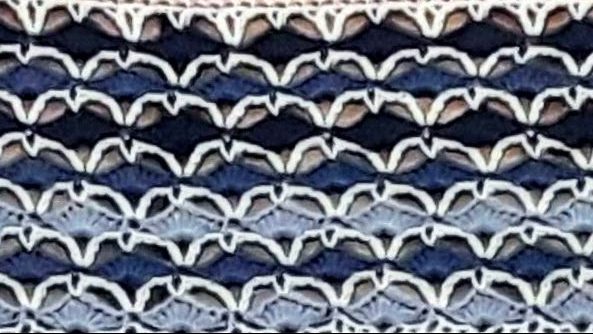
Before doing these steps, the “waves” looked like this:
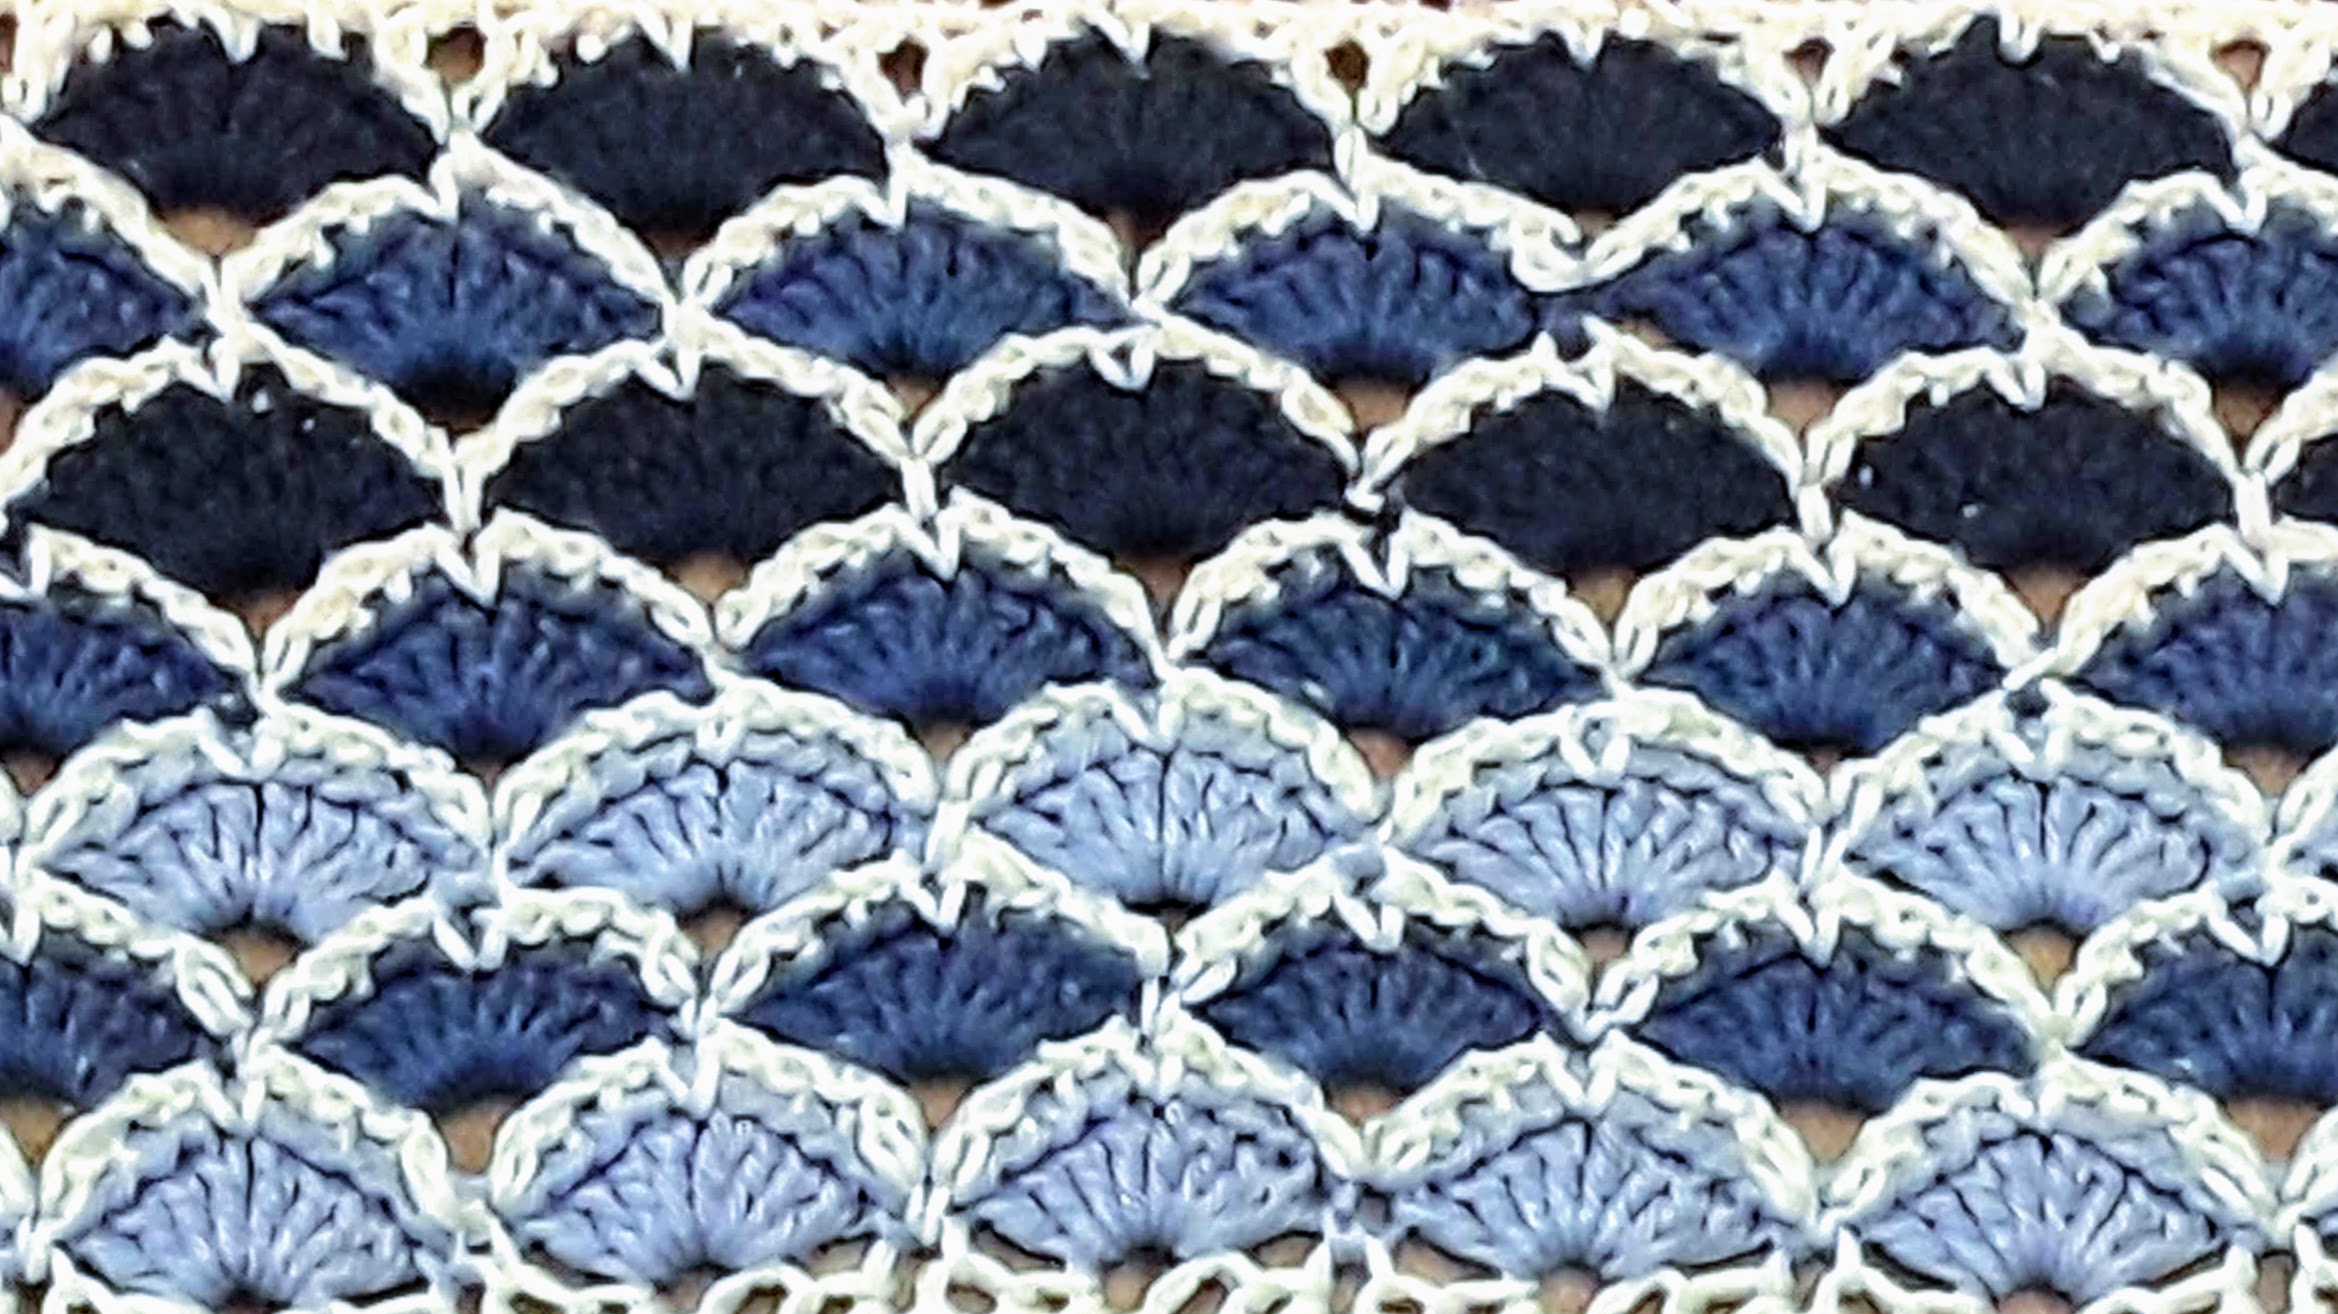
After, they look like this:

Overview
The basic idea is to add slip stitches connecting every stitch of the Fan to the V row above it. We can do this at any point (I did it after making the majority of the “waves” stripes, since I didn’t see an issue right away), but it is a little easier and looks better if you do it right away after each V row.
Quick summary:
Work on Wrong Side — All steps work in front loops of the Fan dcs:
- Attach the first 2 dcs of the Fan through the side of the dc of the nearest V.
- Attach each of the next 2 dcs through the next 2 ch sts; skip over the chsp in the center of the Fan (also skip the sc of the V row).
- Attach each of the next 2 dcs to the next 2 ch sts, and the last dcs of the Fan to the dc of the next V.
I’ve also been attaching the row I’m working on to the V row below it between the fans (left-most red arrow.) That one’s optional.

Detailed Steps
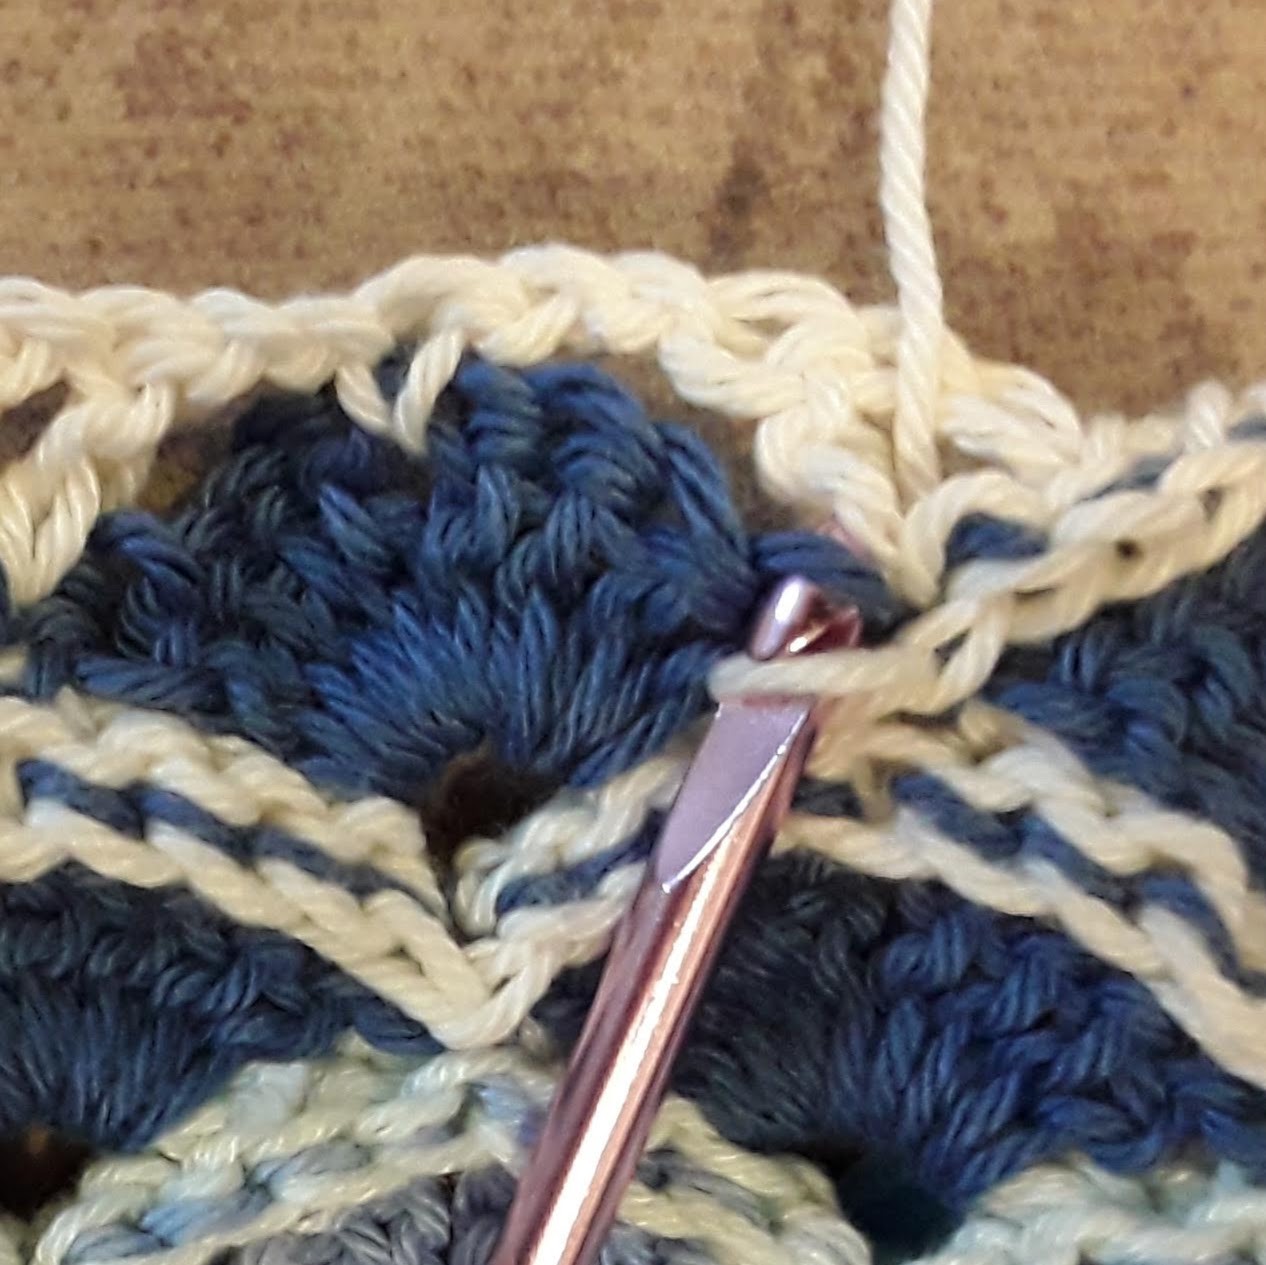
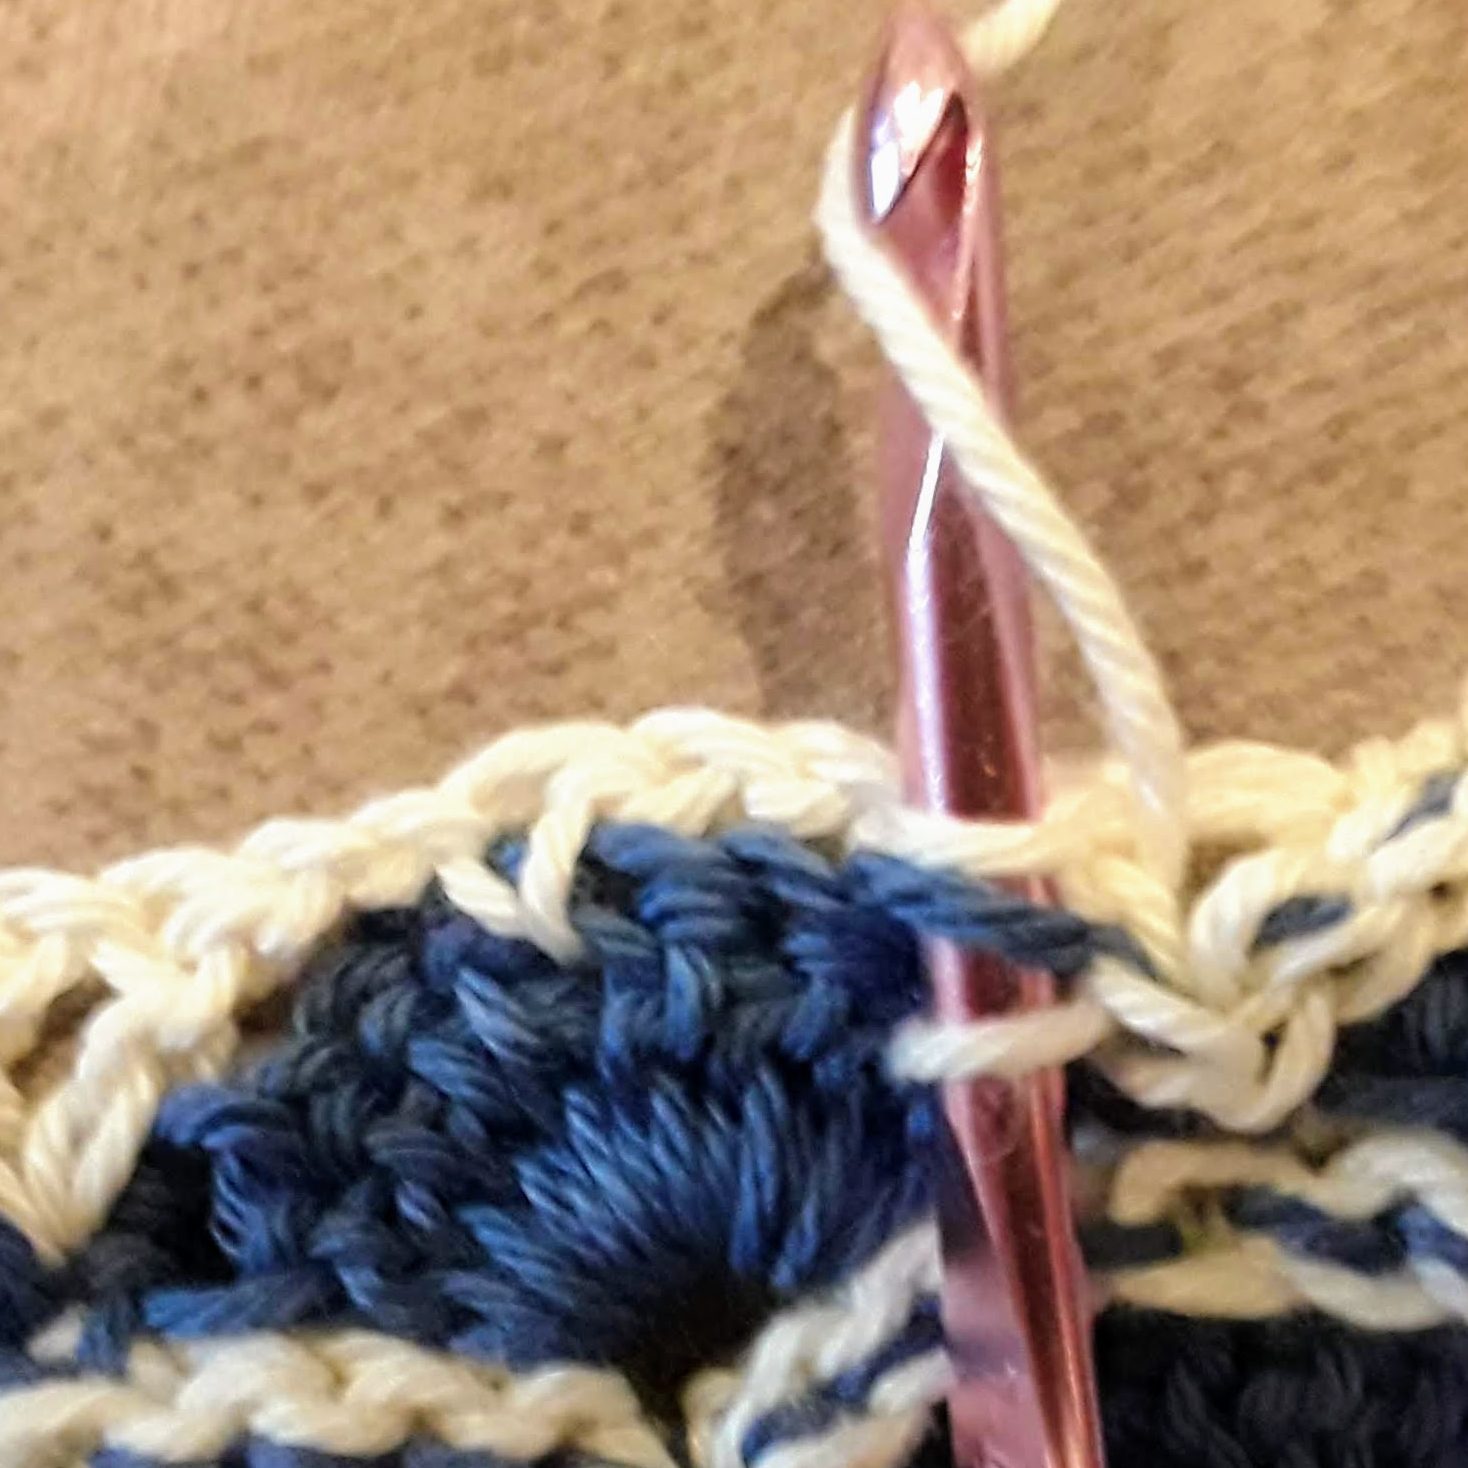
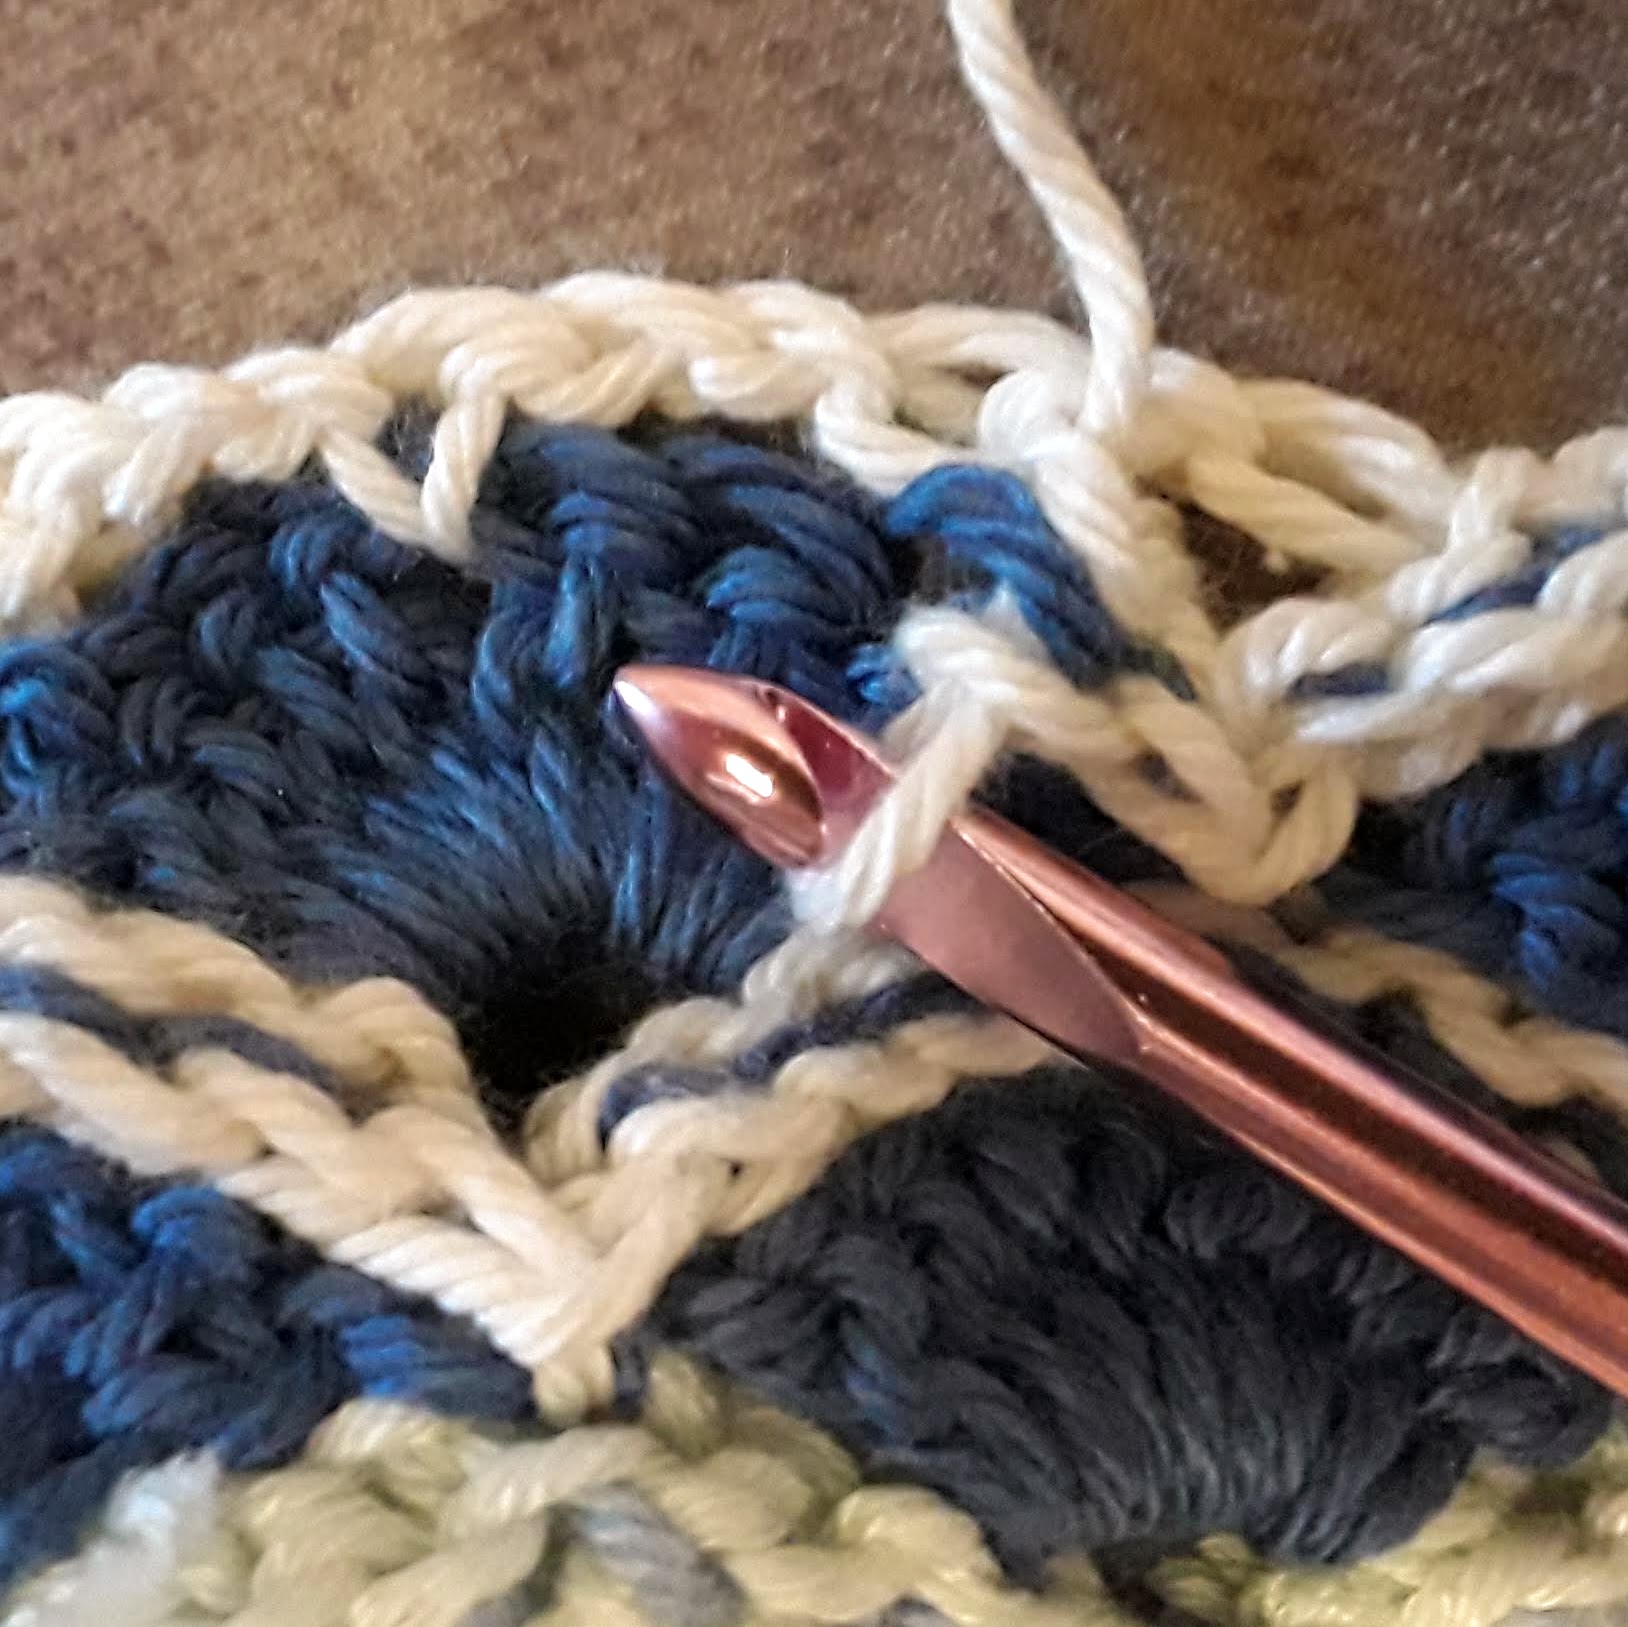
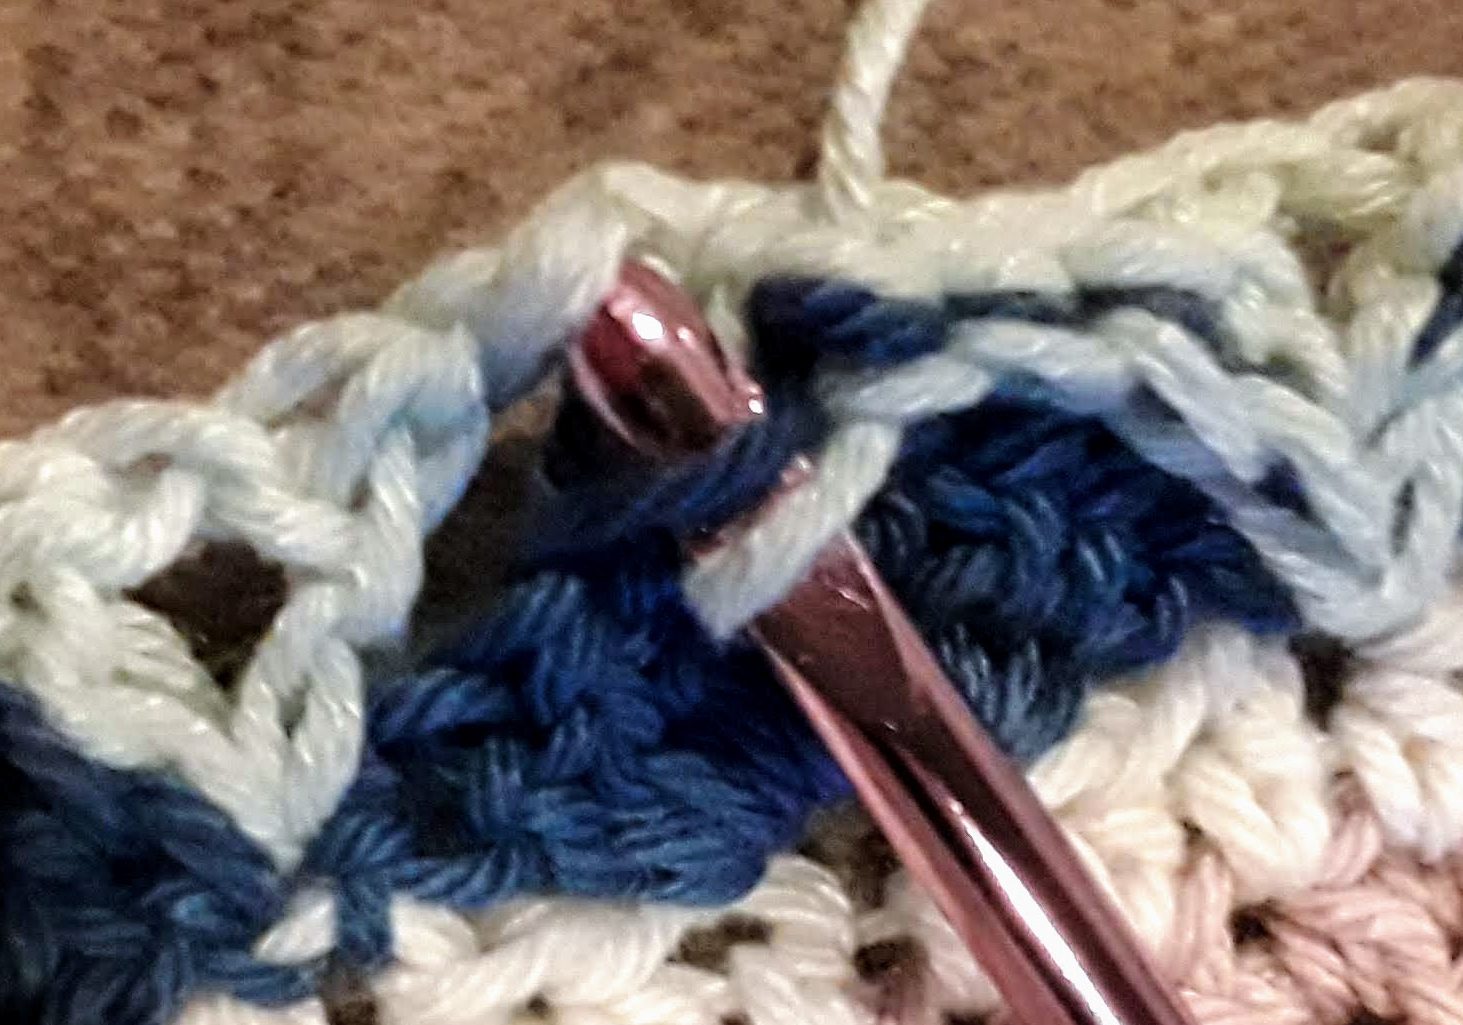
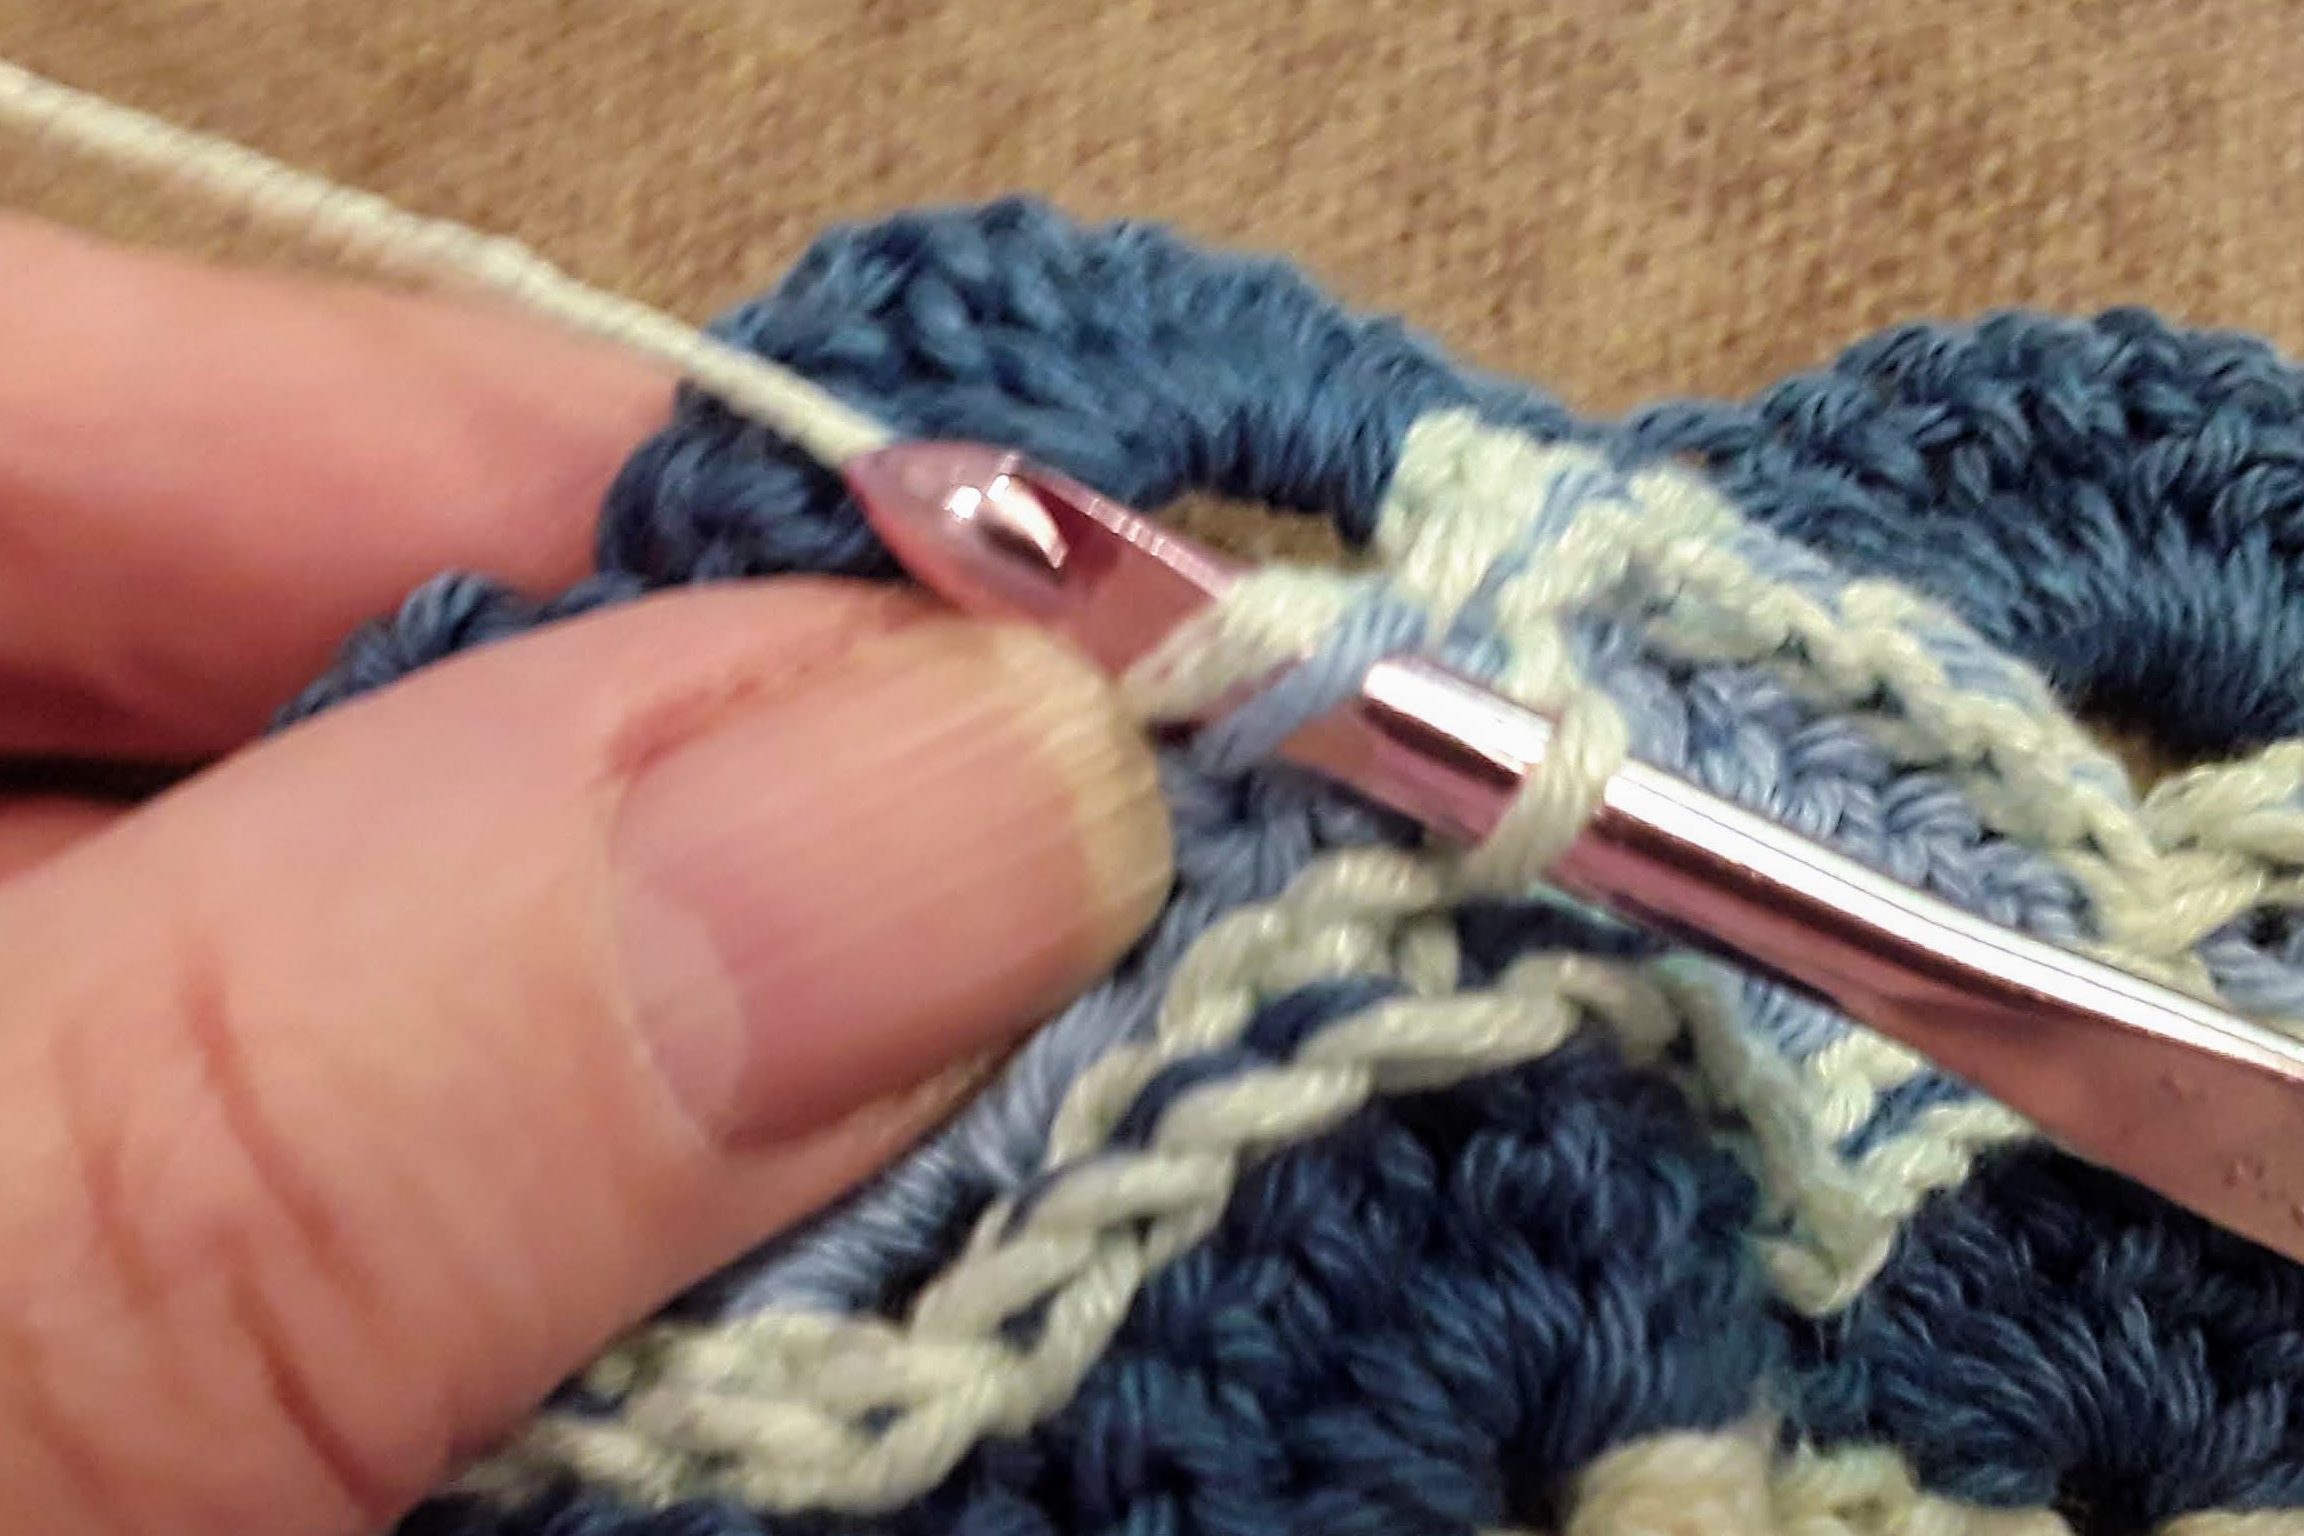
Work on Wrong Side — Work the Fan dcs in Front Loops Only (aka FLO. “Front loop” is the loop nearest you.) When inserting hooks into ch sts, use the back bump. Photos below the list of steps.
- Work a slip stitch through the first dc (FLO) of Fan and a lower loop from the side of the nearest dc of the V row above it.
- Slip stitch through the 2nd dc (FLO) of Fan and a higher loop from the side of same dc (of same V).
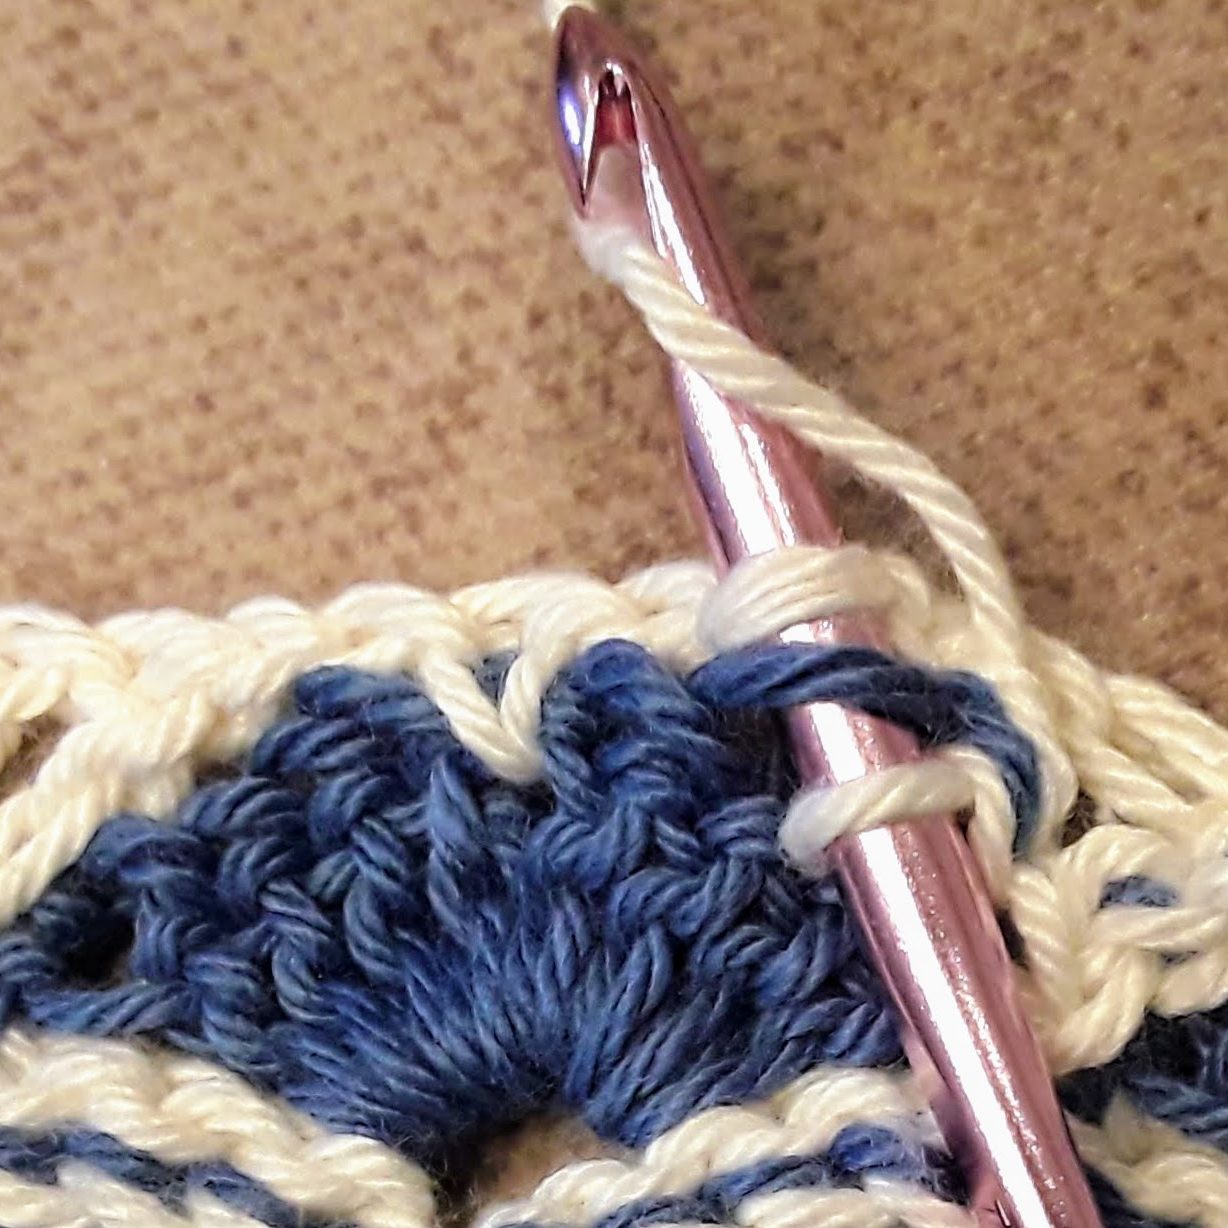
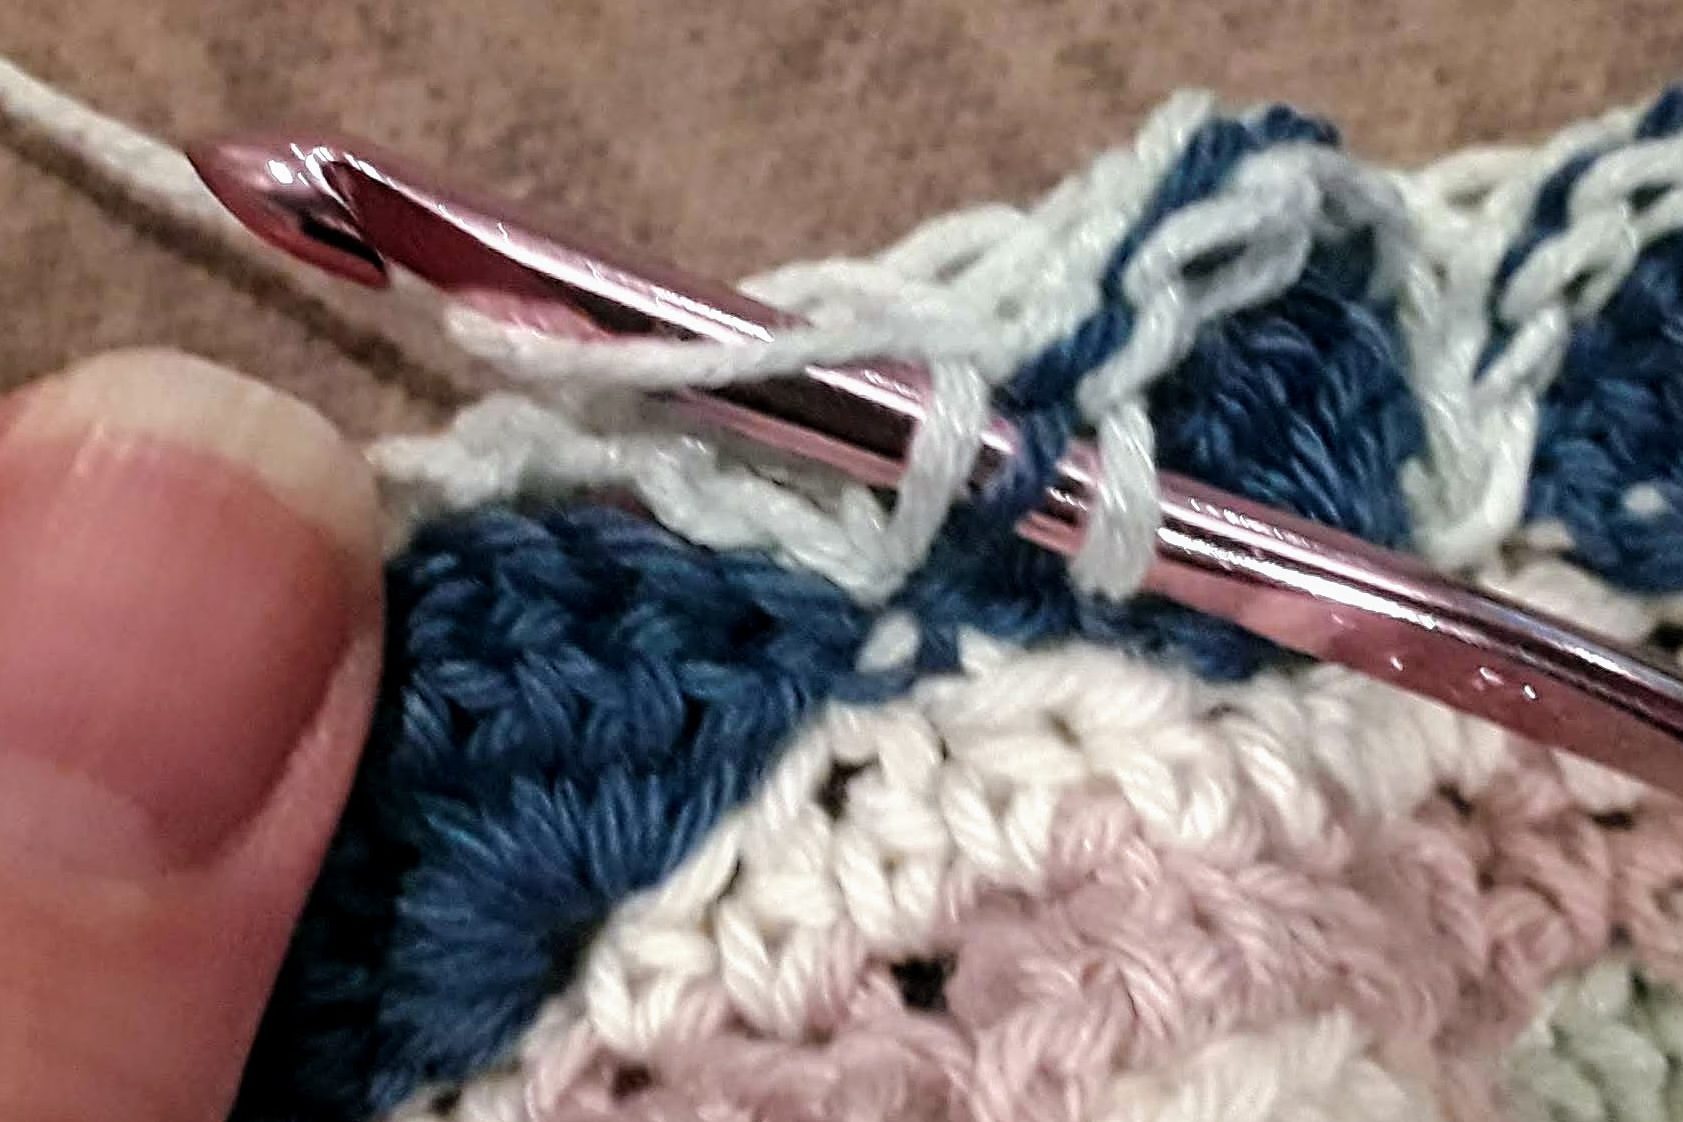
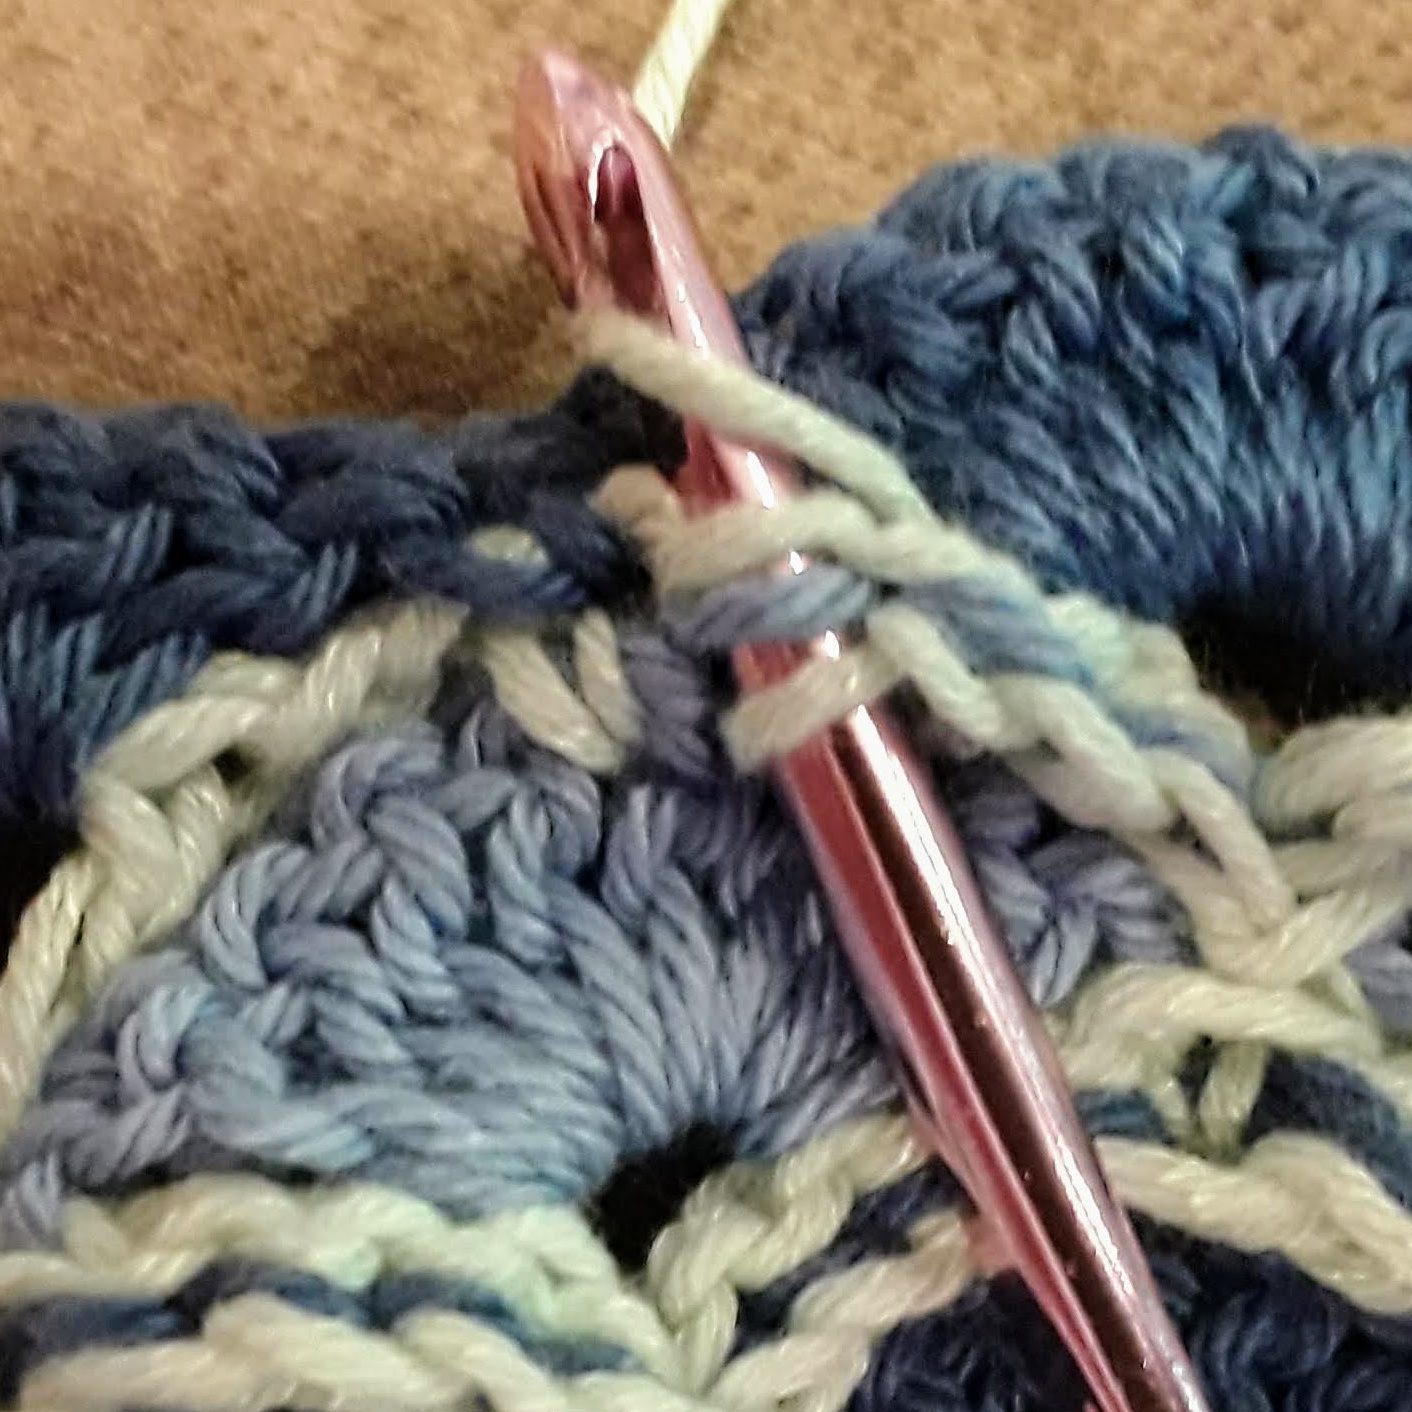
- Slip stitch through 3rd dc (FLO) of Fan and the next chain st of the V row.
- Slip stitch through the 4th dc (FLO) of Fan and the back bump of the next chain st of the V row.
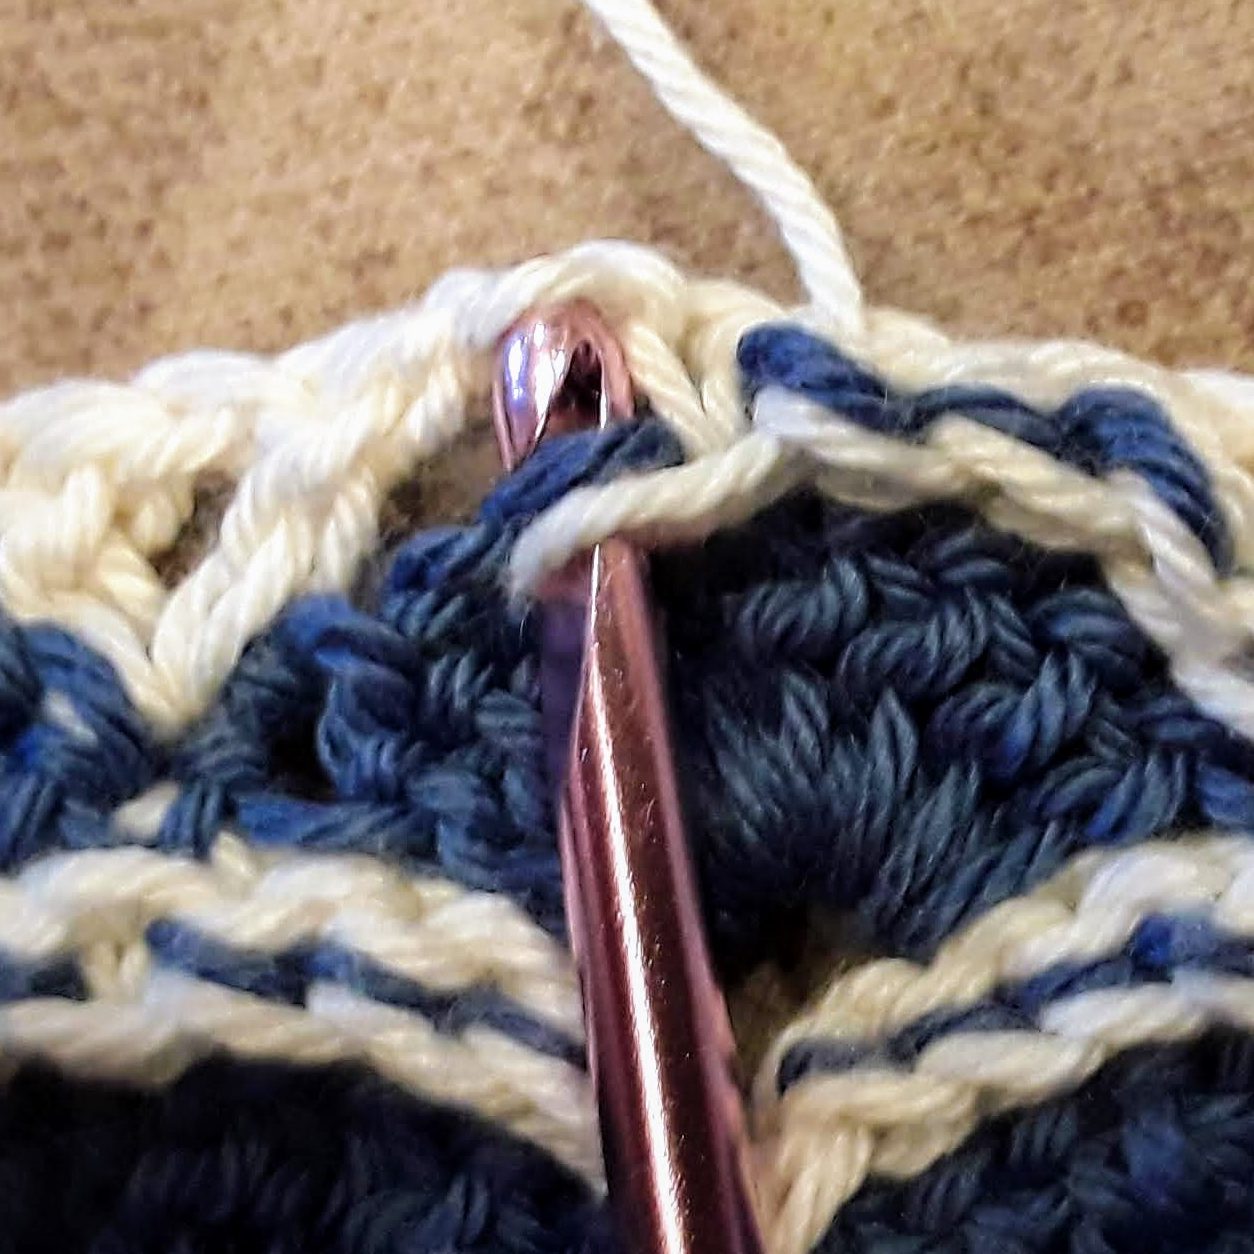
- Skip sc of V row (and ch sp of Fan);
Slip st through the 5th dc (FLO) of Fan and the next chain st of the V row. - Slip stitch through the 6th dc (FLO) of Fan and the next chain st of the V row.
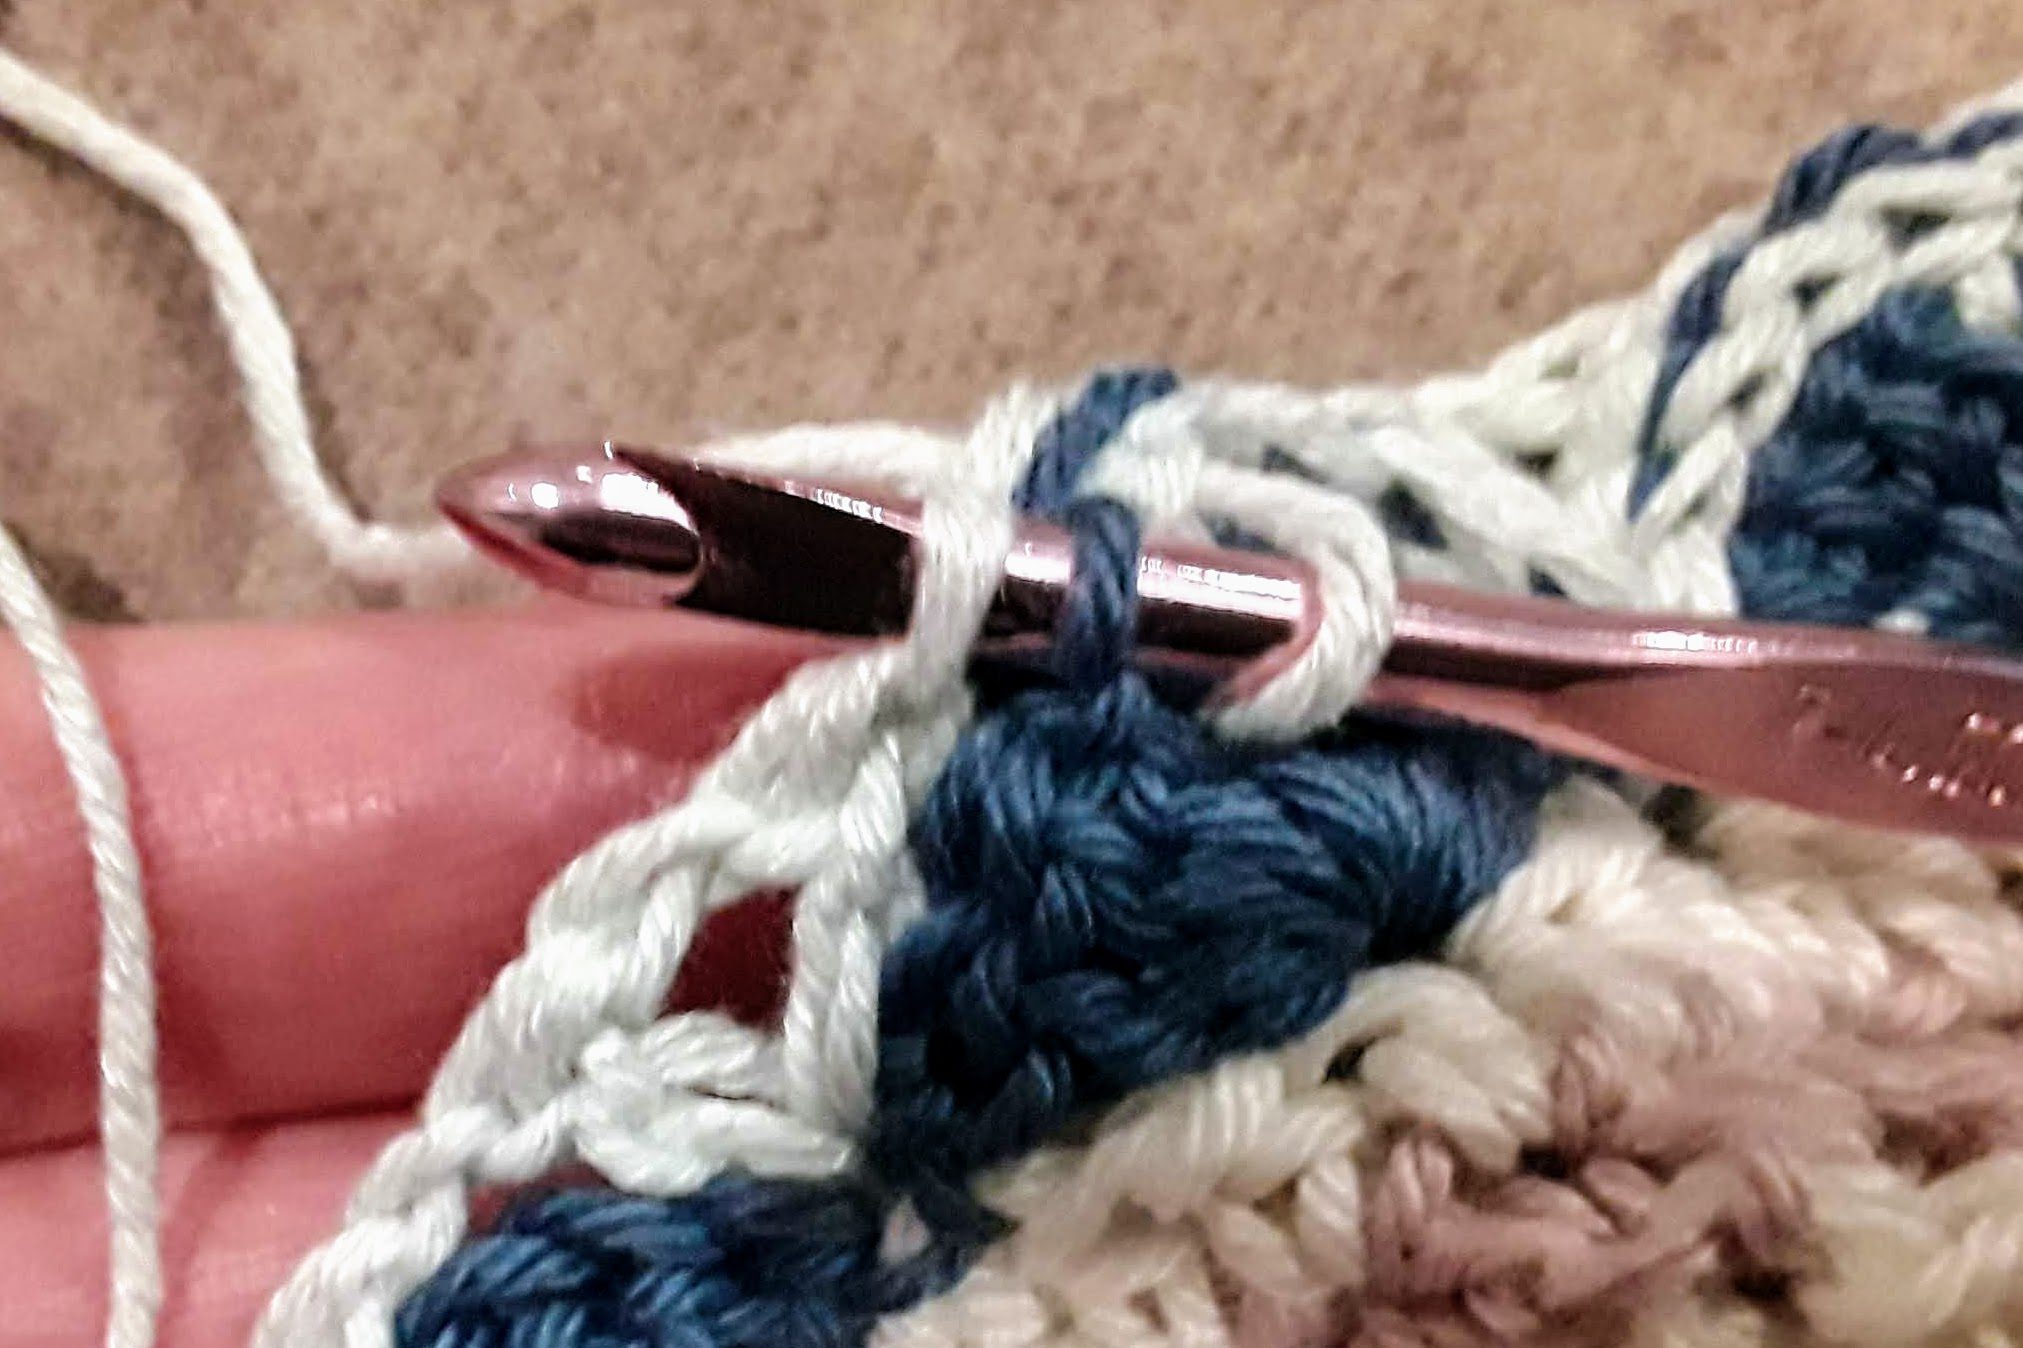
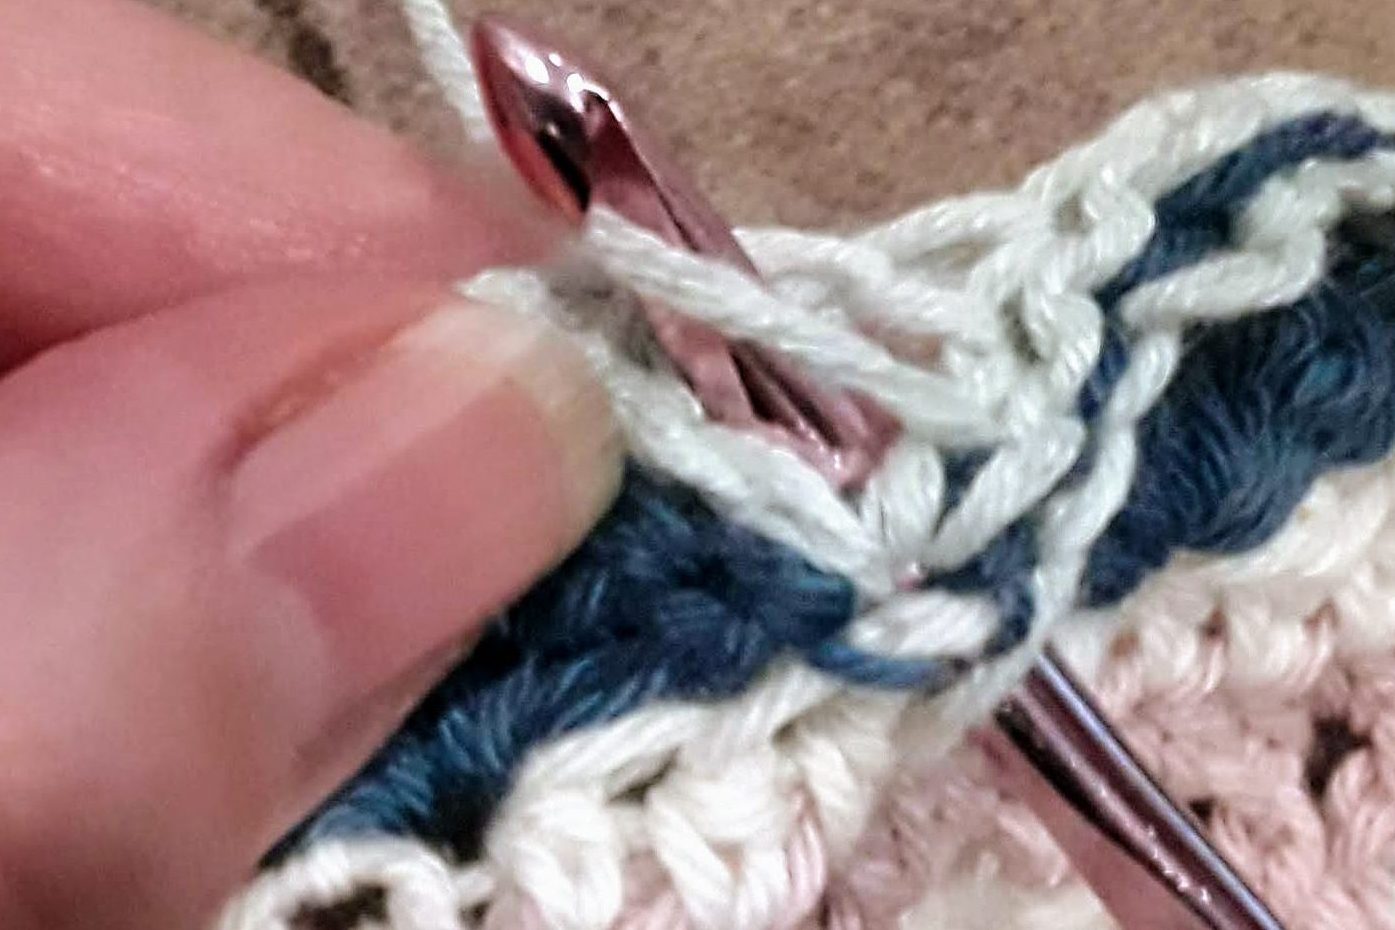
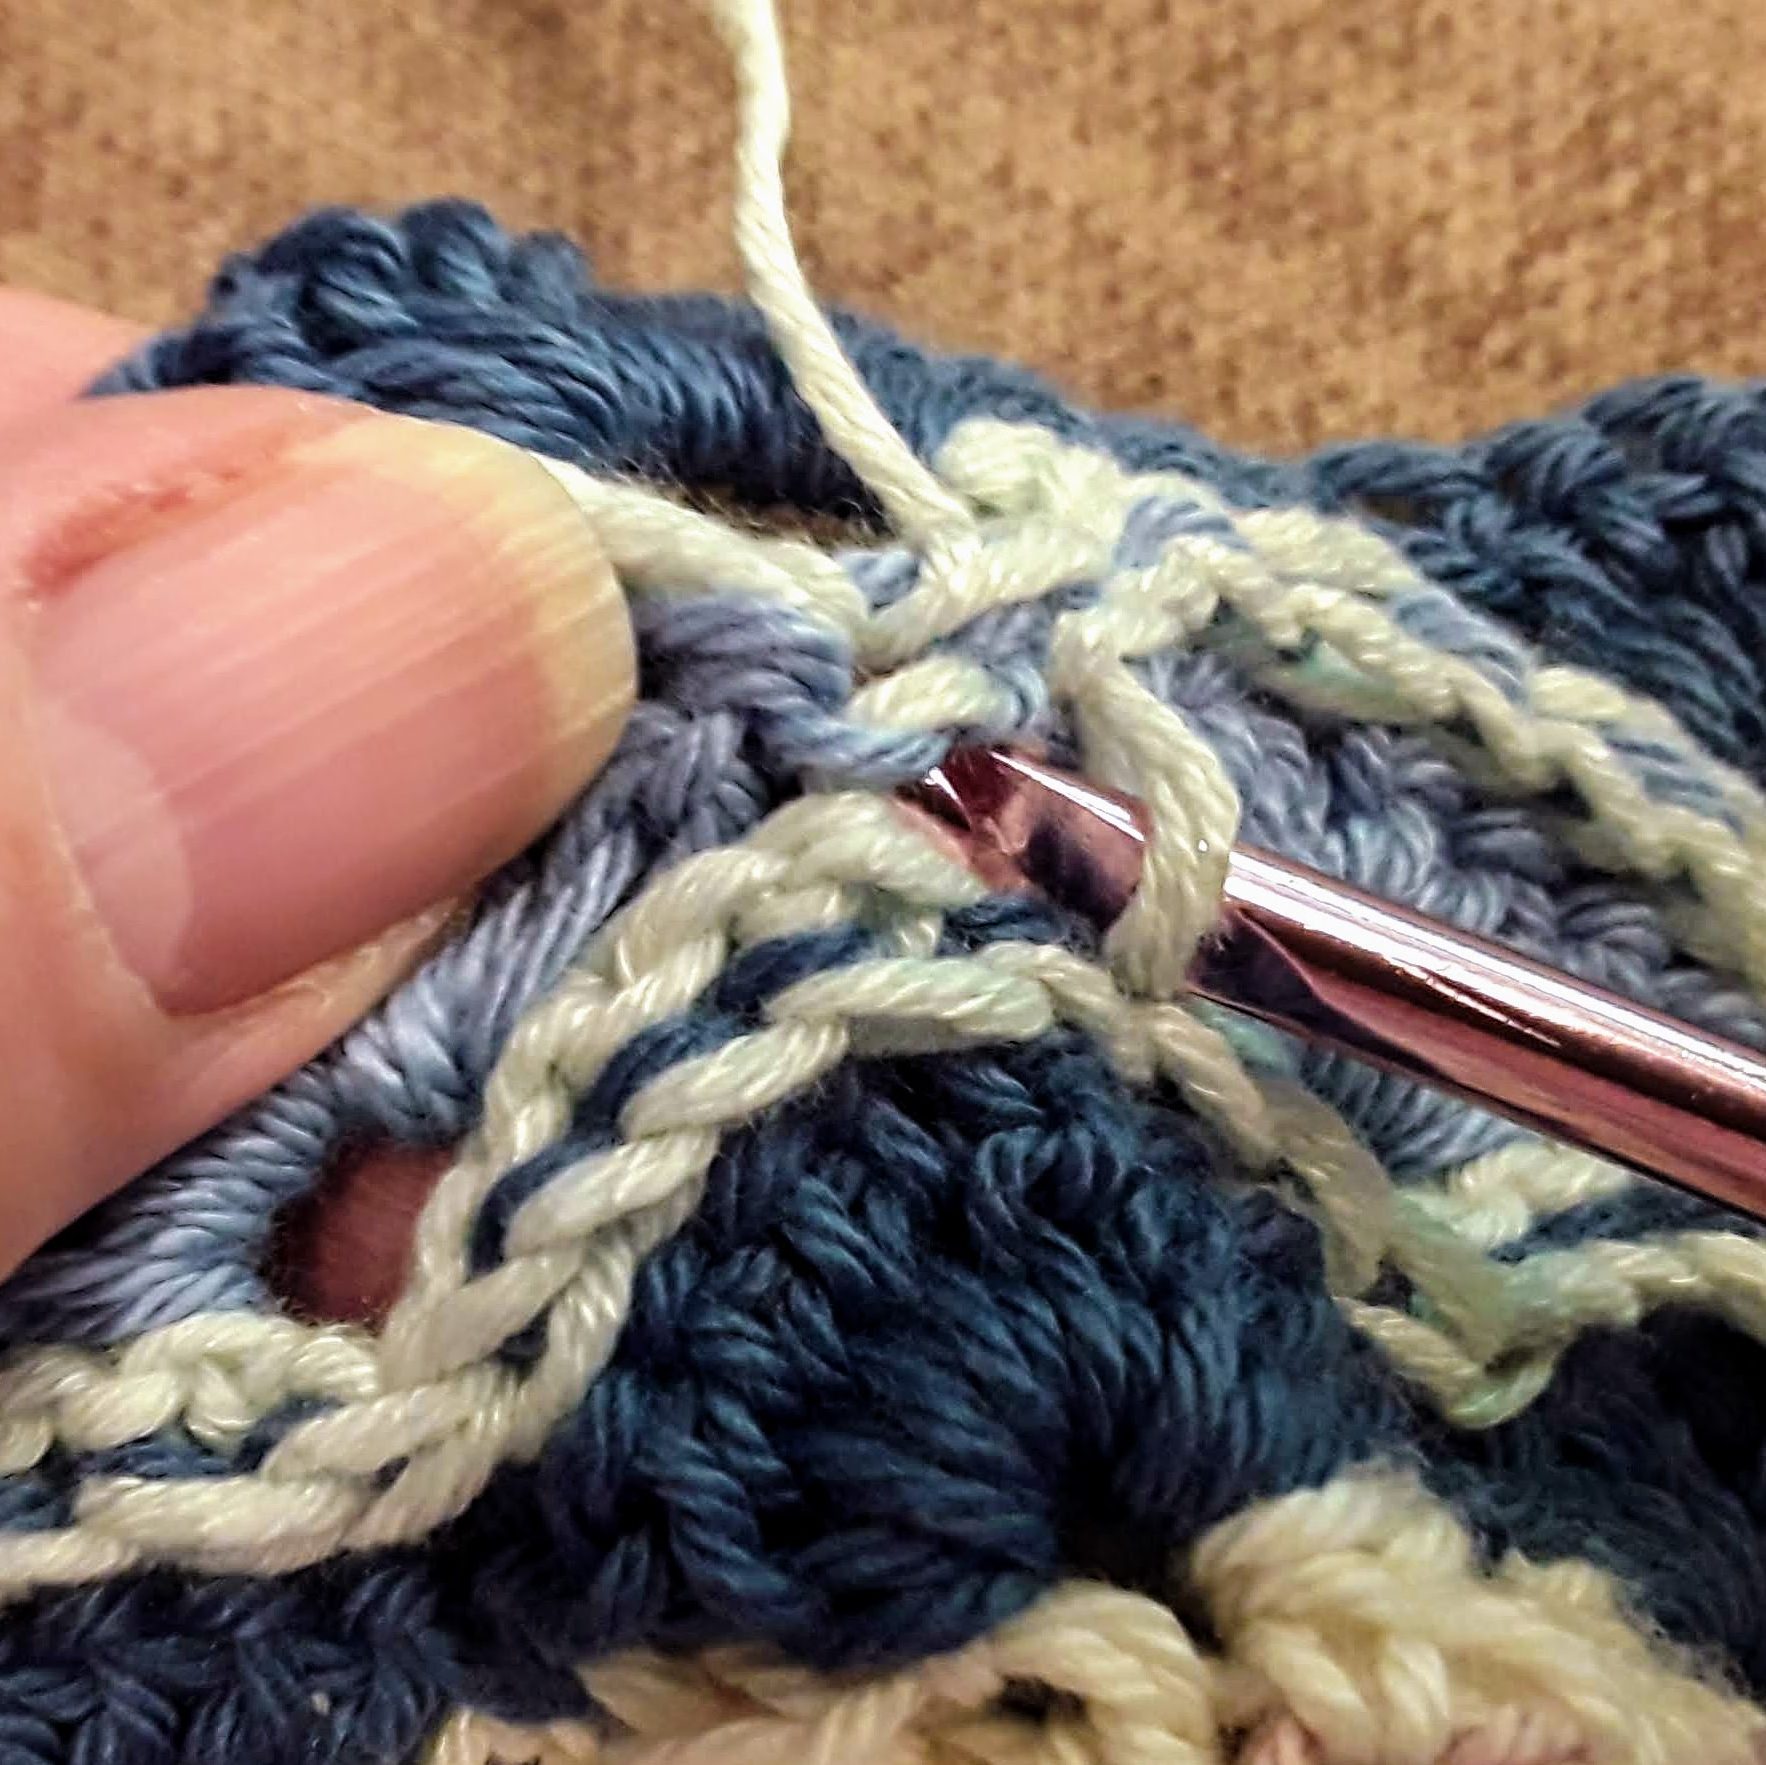
- Slip stitch through the 7th dc of Fan and a higher loop from the side of the next dc (of next V).
- Slip stitch through next dc of Fan and a higher loop from the side of the same dc (same V).
- [OPTIONAL] Insert hook through sc of previous V row and through the chsp V of working V row (back to front); pull through to complete a sl stitch.


Options
For most of my “wave” stripes, I have skipped step 9 on the very first pattern repeat, but used it on all the others. Can you spot where I forgot step 9 on one of the higher rows? It actually looks fine — provides a little interest to the overall look of the stripe, if you ask me.
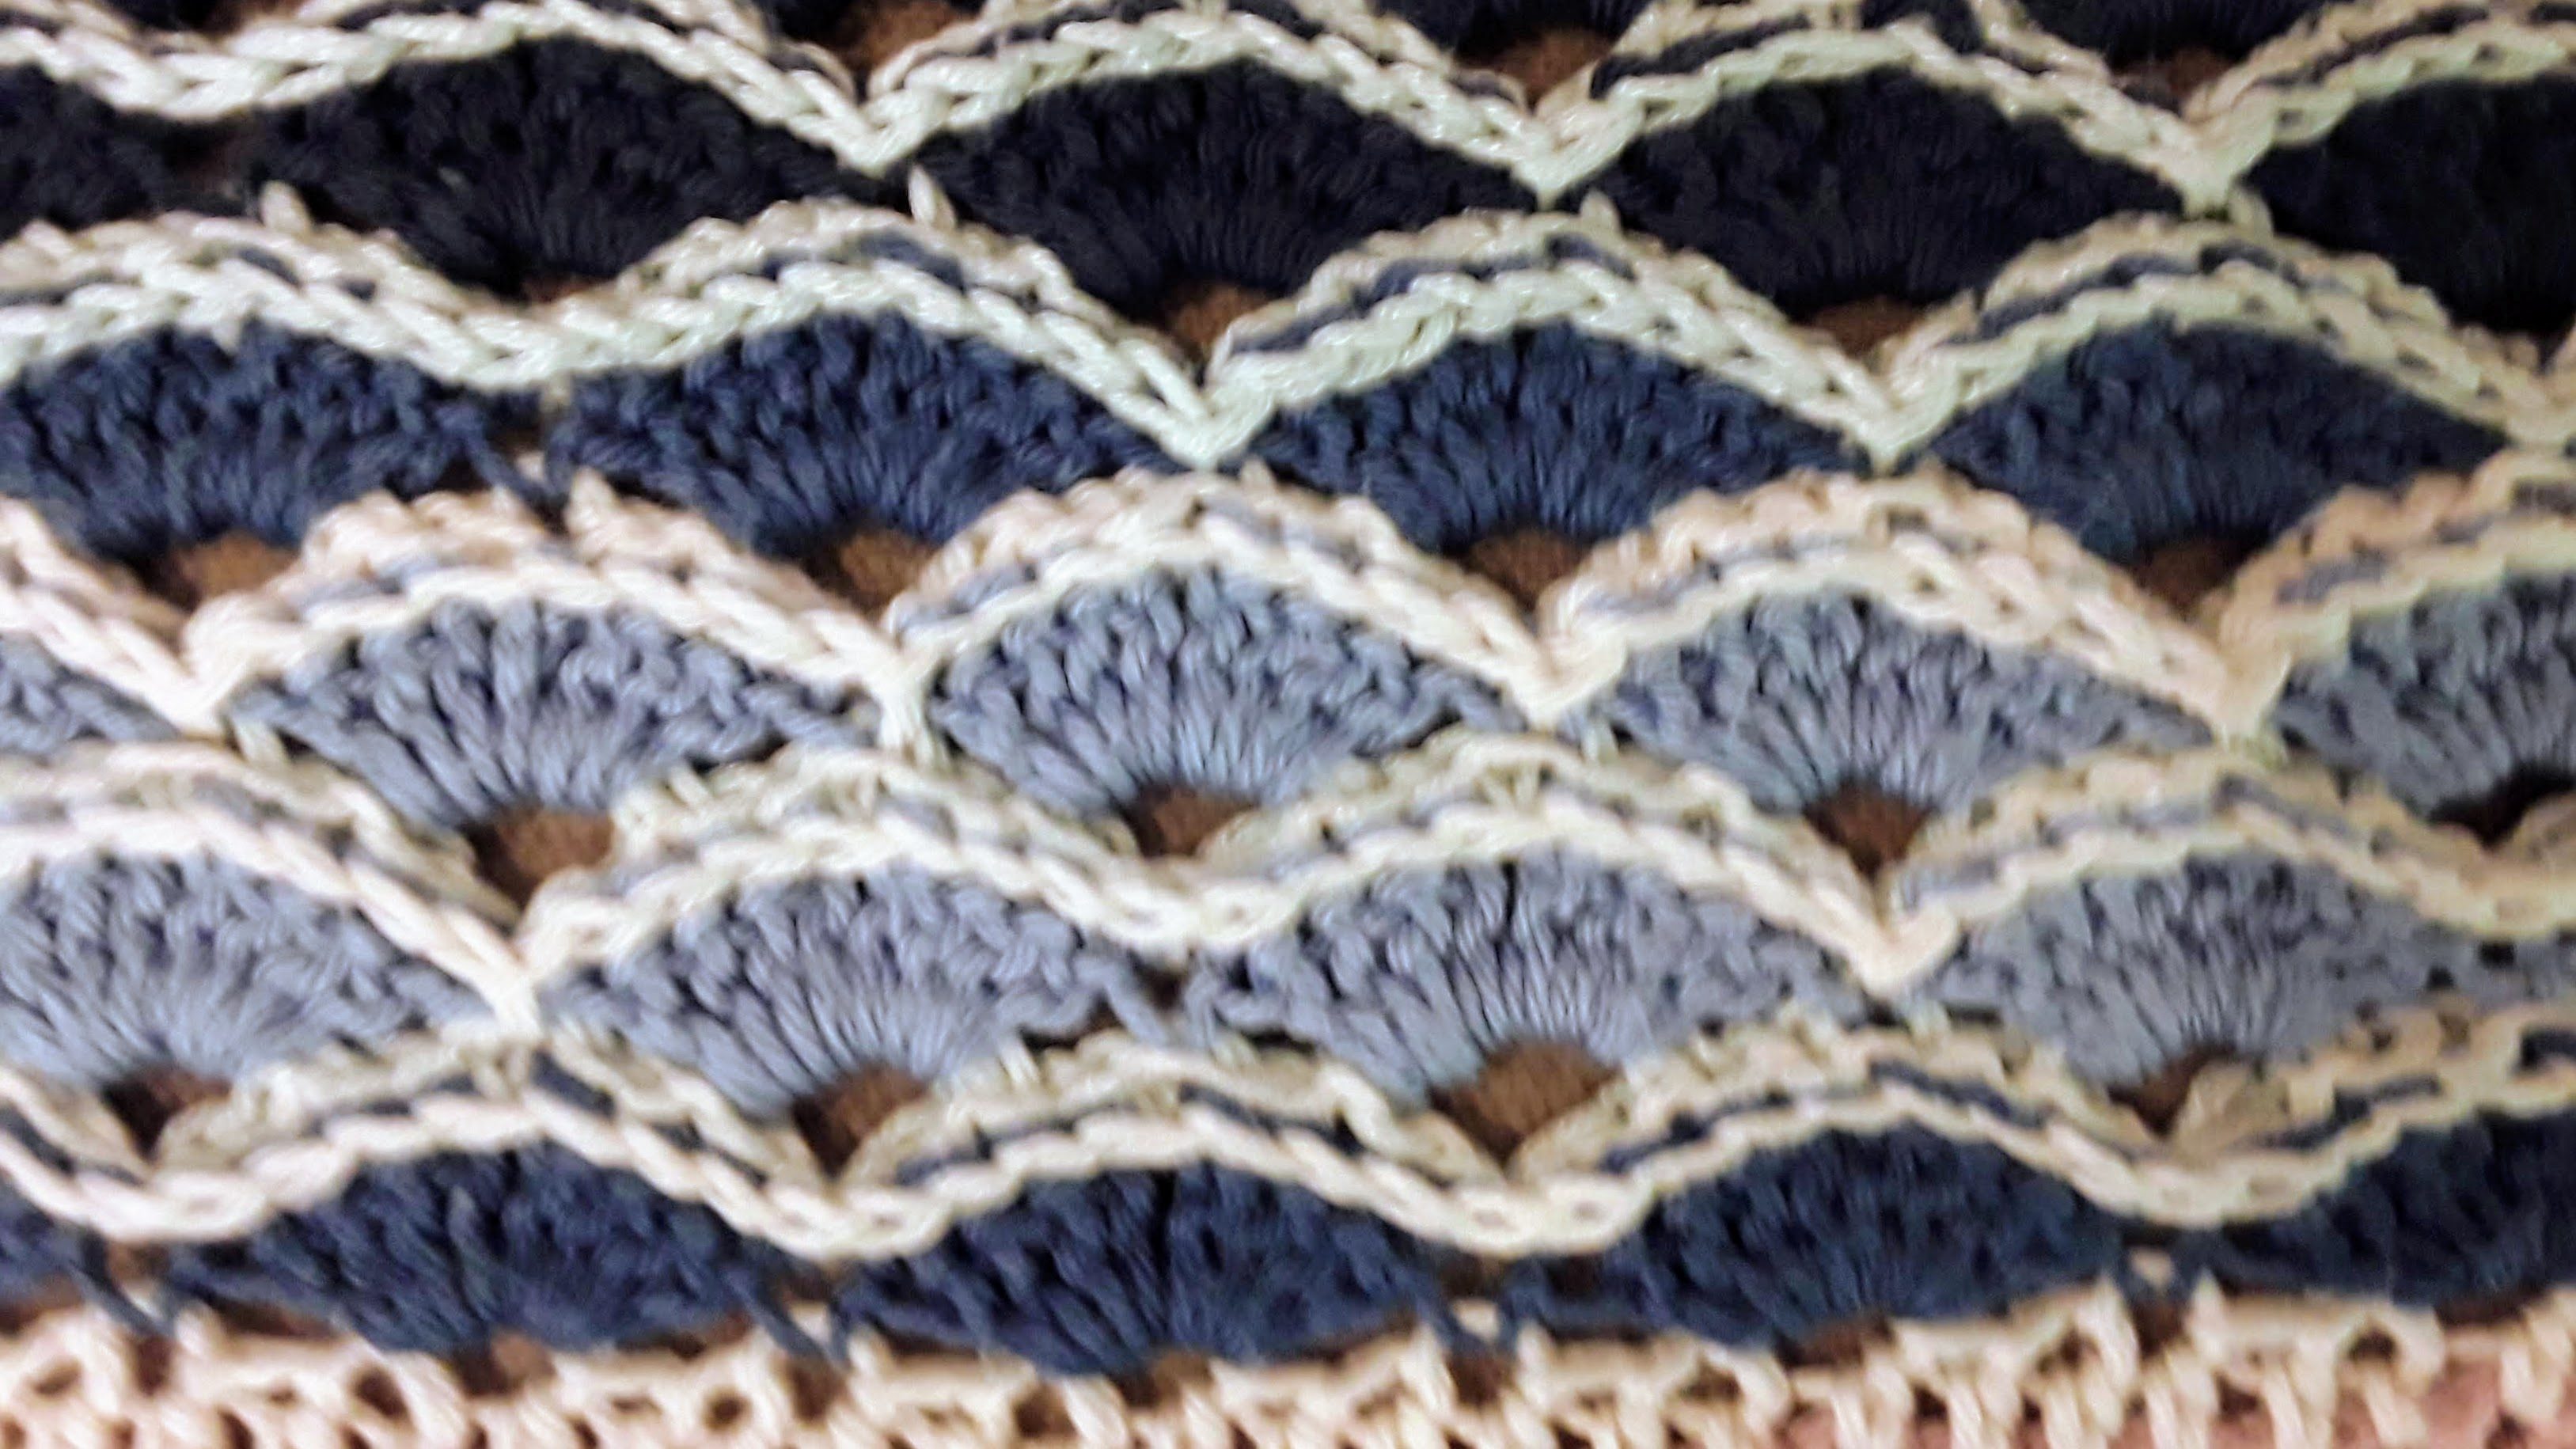
For the 2 stripes with the most repeats, I did step 9 on all of them. I have the idea that step 9 improves the overall sturdiness. But mostly, I like the way it looks.
Finally, I wanted to show how some of the steps look if you apply the slip stitches after the stripe is already done. I had to do it this way for most of mine, because I didn’t notice the problem until I’d already done most of them.


As it turns out, I’m really happy with the way this looks. Unfortunately, it makes the “waves” stripes take about twice as long to do. But the added texture looks pretty great, so that’s a win.
As always, if you have any questions or comments, let me know. I’d love to hear from you!


Leave a comment