
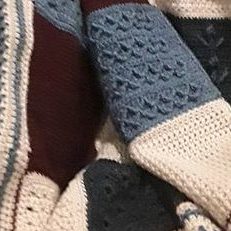
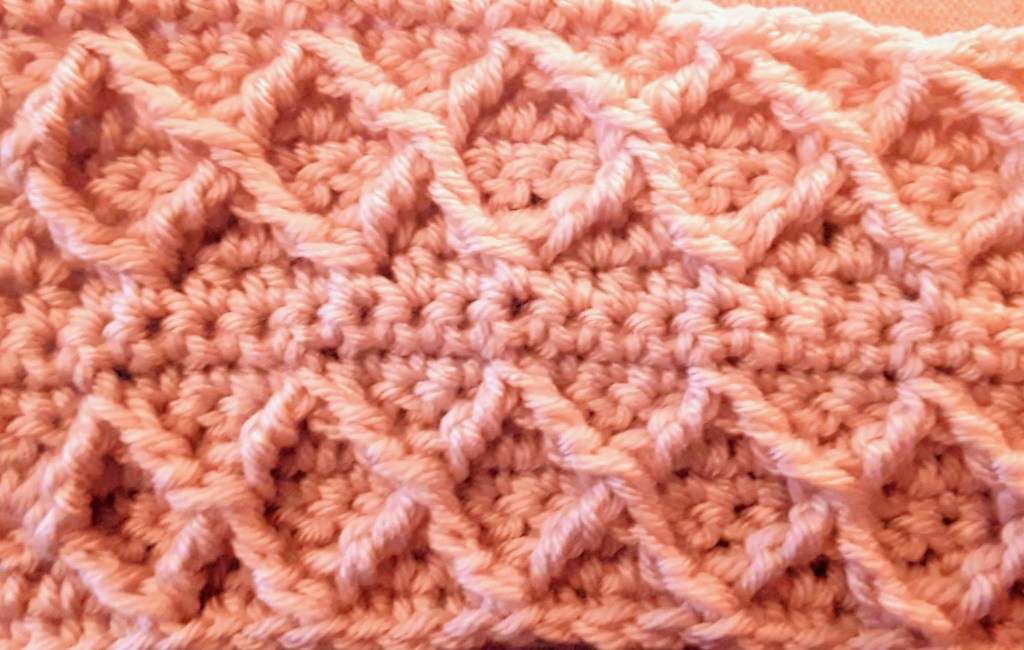
When working on the pattern for my Sampler Squares afghan, I wanted a square with separated rows of diamond stitch. As always, it took a few tries to make it look right. But I couldn’t be more pleased with the results.
I’d like to share what I did that’s different from the classic diamond stitch. And we’ll take a step by step journey through creating the diamond shapes. Understanding the stitch can be a bit tricky at first. But once you pick up what’s going on, it’s not difficult.
If you already know how to do diamond stitch, you can jump to the written pattern for all the rows.
- Laying the Groundwork
- Special Stitch: fptr2tog
- Working the Diamond Rows | A Photo Tutorial
- Just The Rows – A Summary
- Closing Thoughts
Laying the Groundwork
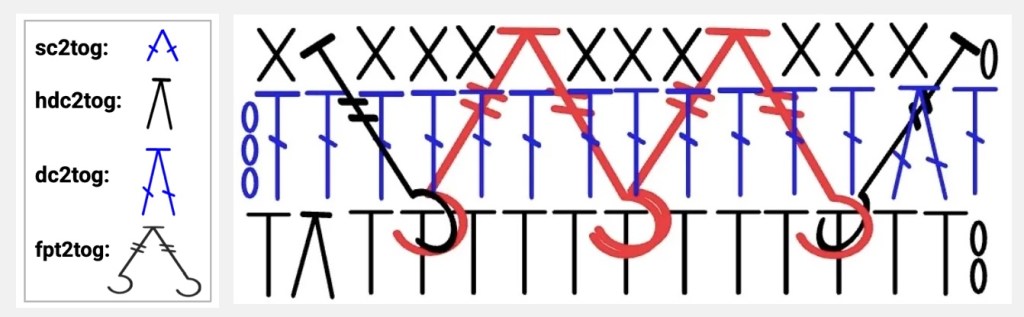
Note: A table of abbreviations and symbols is always in the sidebar.
Foundation
Start with a multiple of 4 + 3 chs, or multiple of 4 + 2 other-kind-of-stitches. (I’ll use a multiple of 4 + 2 scs)
For the first actual pattern row, it’s best if the stitch actually has a post. Some people do use scs. Some people use dcs. My favorite way is the hdc compromise.
1: (RS) ch2 (do not count as a stitch), work a multiple of 4 hdcs, hdc2tog over the last 2 stitches, hdc in the last stitch (the same last stitch you ended the hdc2tog in.)
Building Height
2: (WS) ch3 (do not count as a stitch), turn, dc in first hdc each st across, until you have only 2 unworked stitches, dc2tog over the last 2 stitches, dc in last hdc.
Special Stitch: Front post treble crochet 2 together (fptr2tog)
Just the name is a mouthful, right? At first, the name of this stitch kind of threw me off. It sounds like the name of a reducing stitch, right? But nothing gets reduced.
Why? Because you’re going to hook it to 2 post stitches, but it’s still only one stitch in the working row. A helpful way to think of it is that it makes an upside-down V shape.
So fptr2tog has the same basic mechanics of our familiar reducing stitches. You work most of a fptr around one stitch. Then finish it up by working around another stitch. This results in a single stitch in your working row.
Fair warning, I’m about to throw a lot of words at you. If written descriptions aren’t generally helpful for you, you can skip ahead to the photo tutorial Or start with this video.
Written Instructions for Fptr2tog
For context, you will start with a regular fptr around the post of a hdc 2 rows below.
Now the stitch:
- yo twice,
- insert hook around post of the same hdc you last worked 2 rows below,
- pull up a loop,
- yo, pull through 2 loops, yo, pull through 2 (2 loops still on hook.)
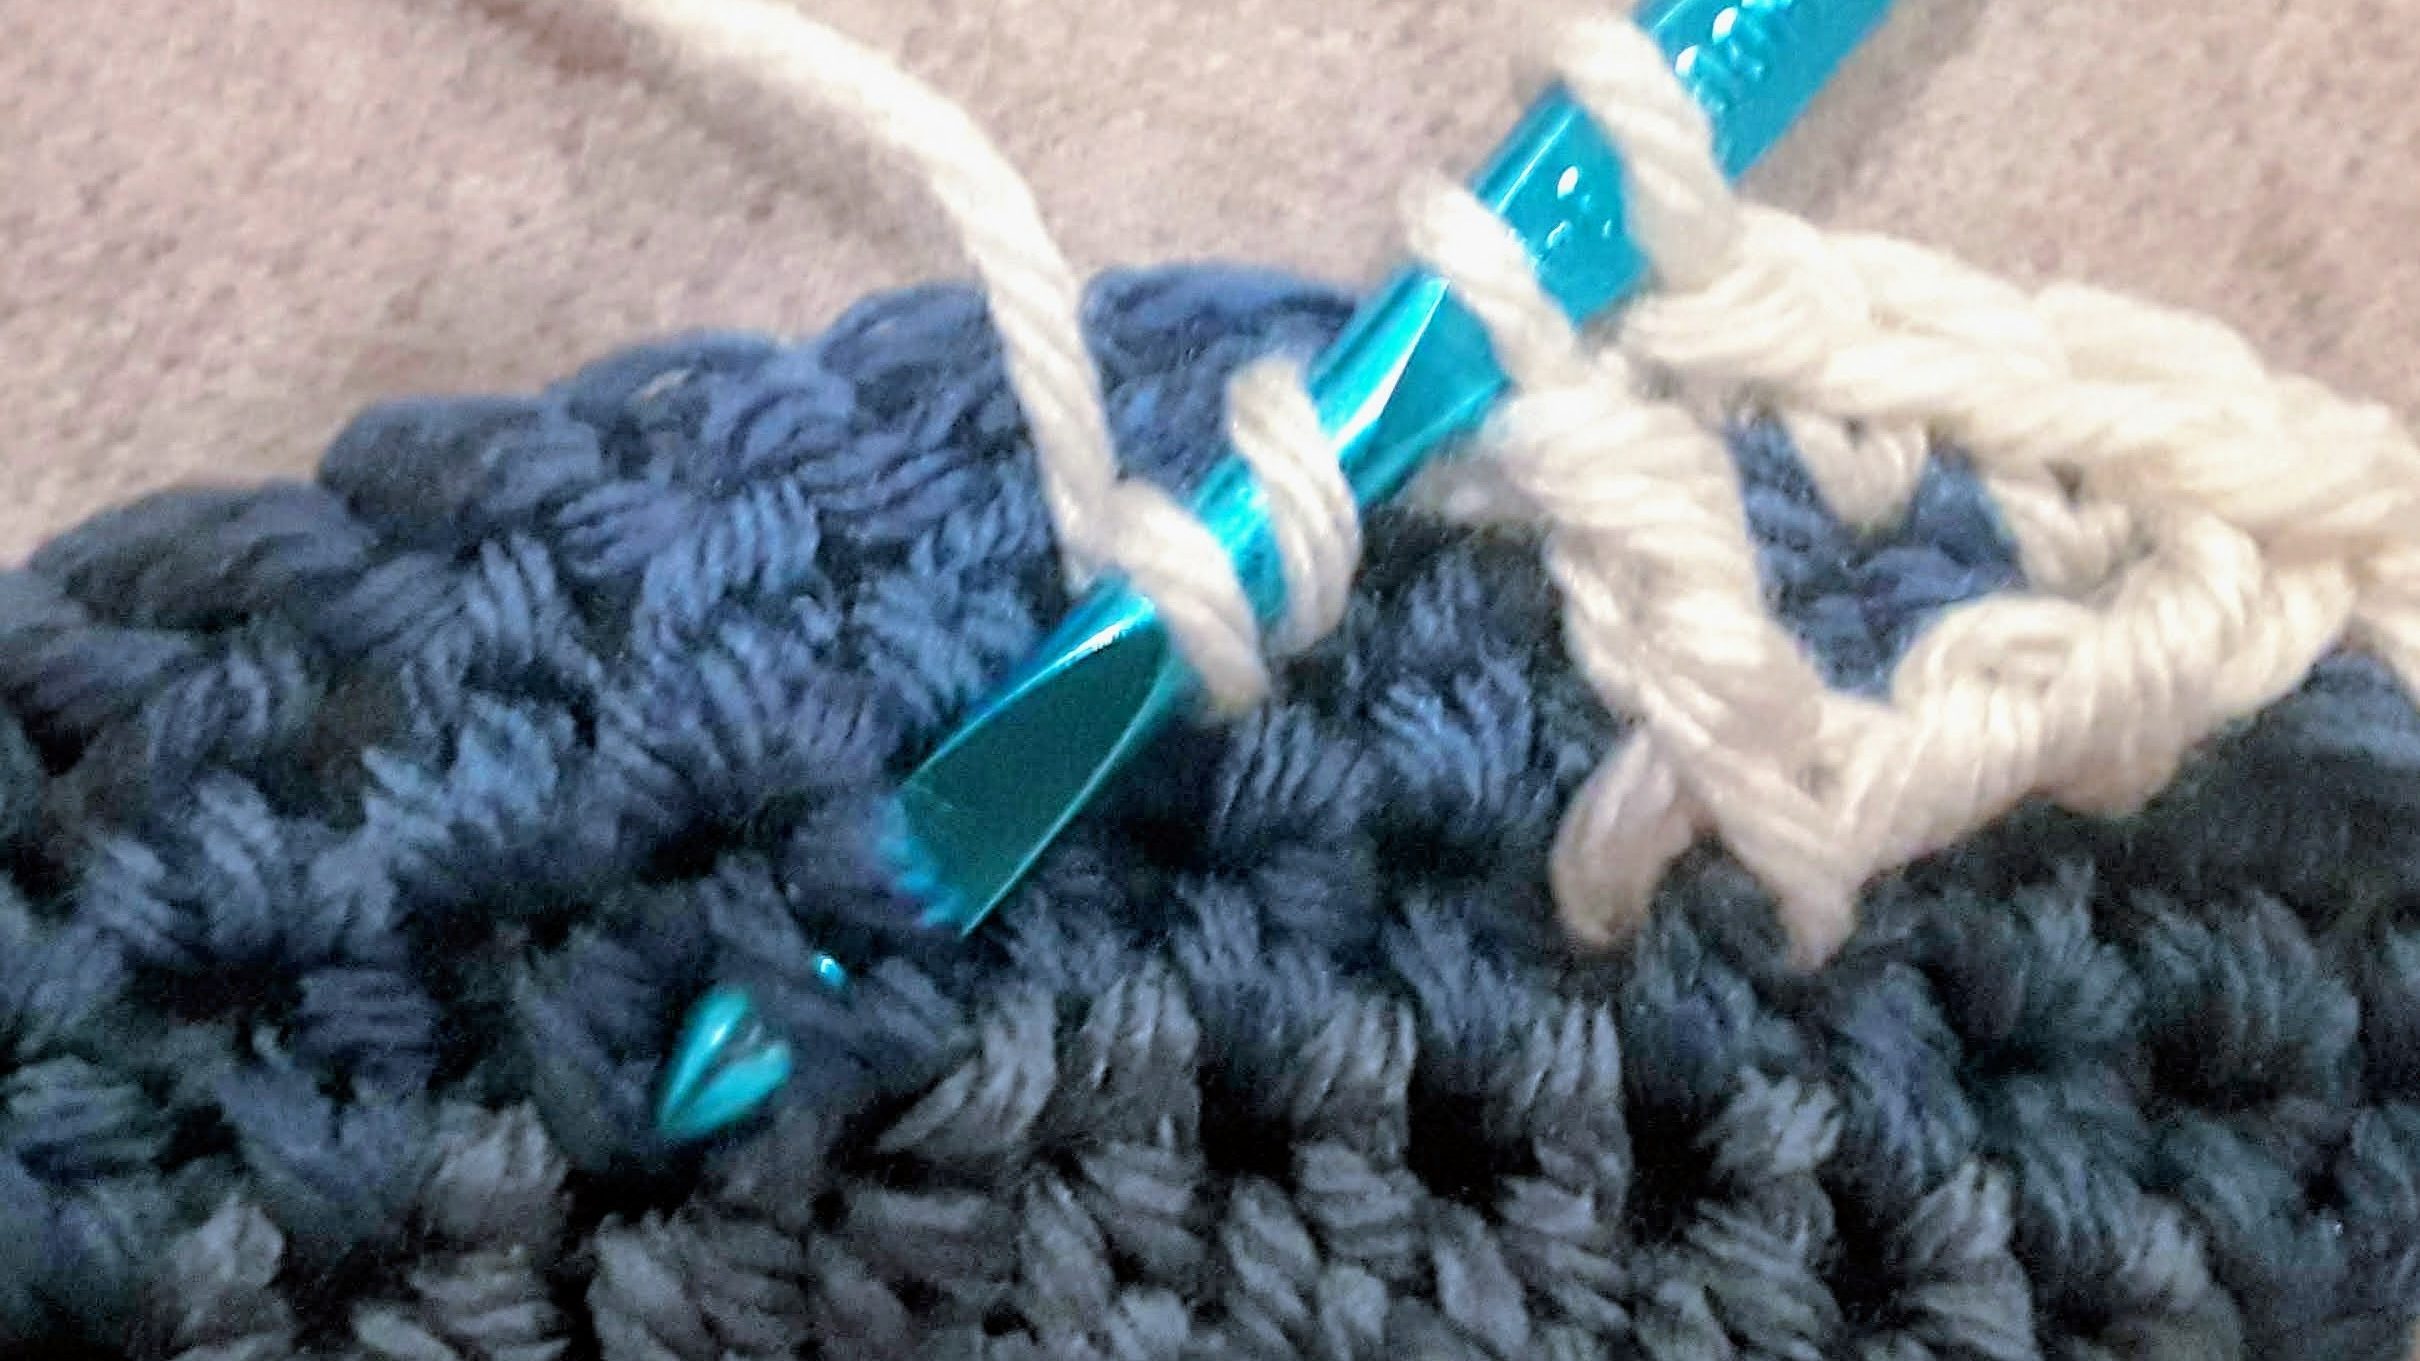
Now find the next spot you’ll insert your hook (in step 6). From the hdc you worked in the first half of this fptr2tog, you’ll skip 3 hdcs and work into the 4th. - yo twice,
- insert hook around post of the 4th hdc 2 rows below,
- pull up a loop, yo, pull through 2, yo, pull through 2
- yo, pull through all 3 loops on hook.
Was that confusing? Don’t worry, folks. When you get to actually working your 3rd row, with the help of some photos (and a chart if that helps you), it should start to make sense. If it still doesn’t, you could practice while following along with a good video.
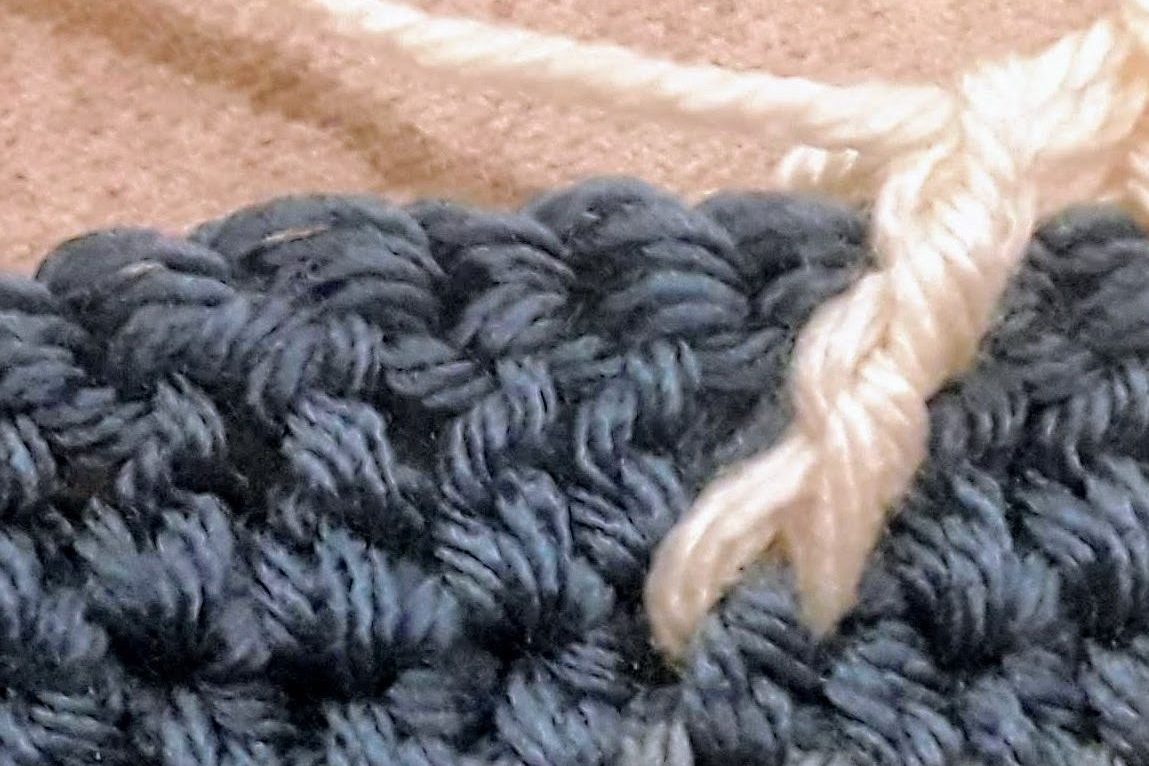
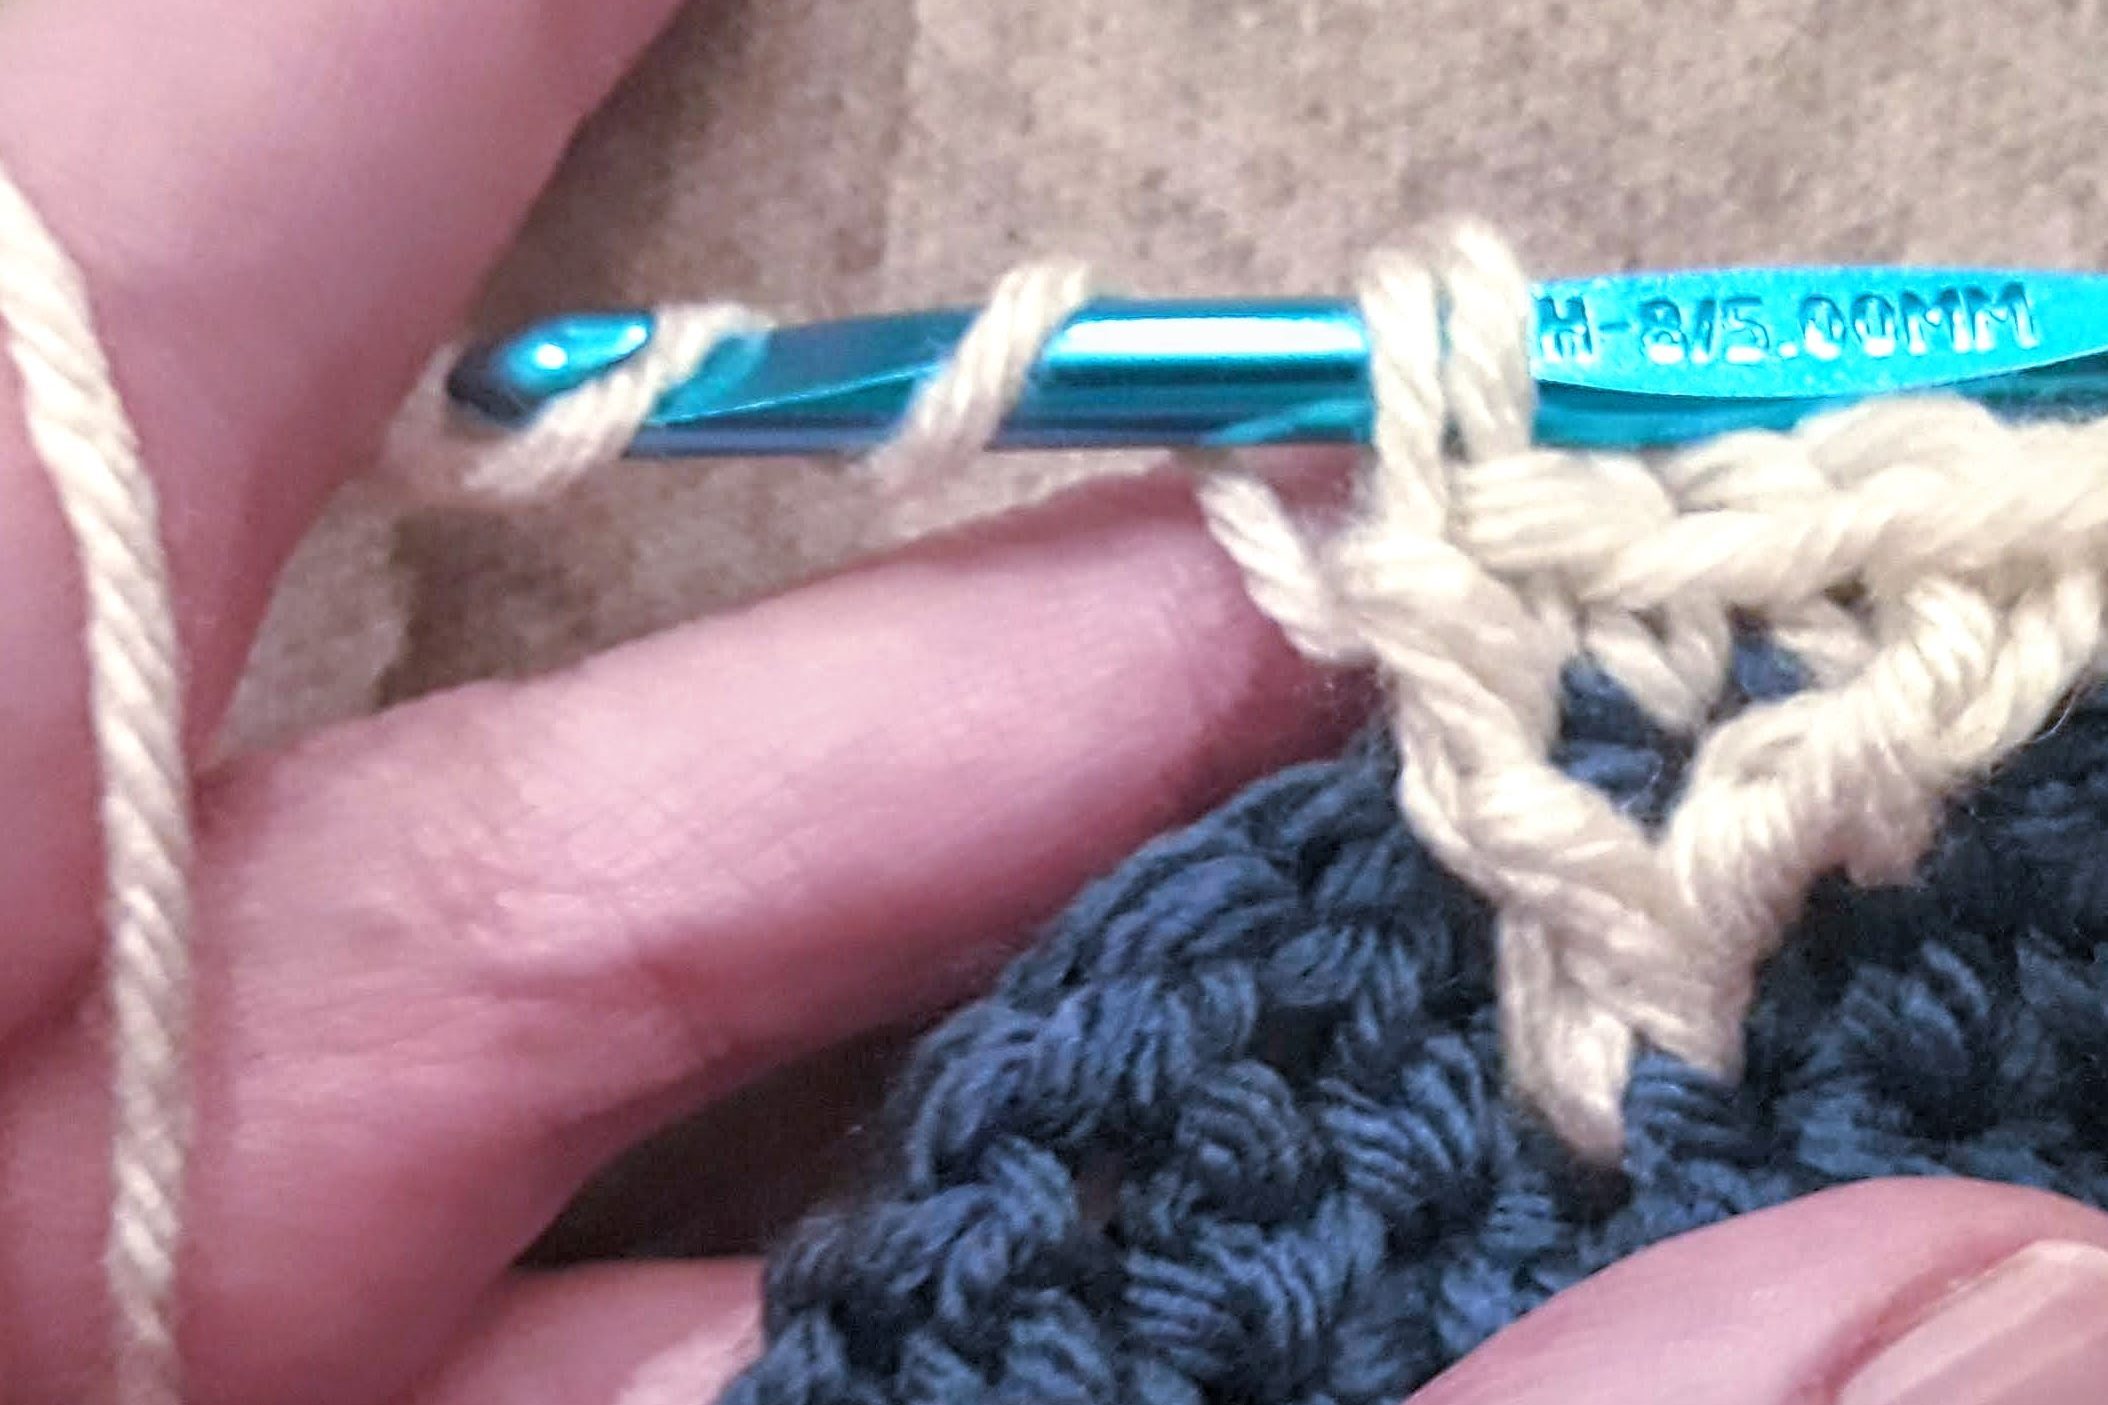
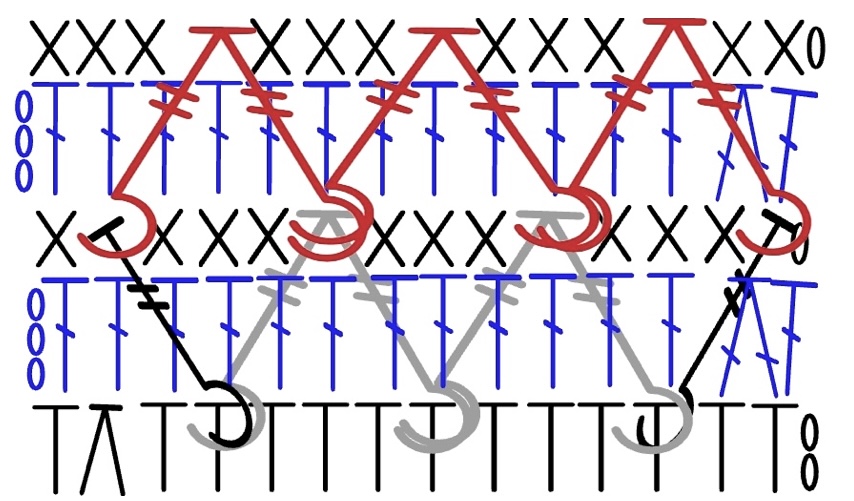
Working the Diamond Rows | A Photo Tutorial
Note that we do not work into the dc
behind a post stitch.
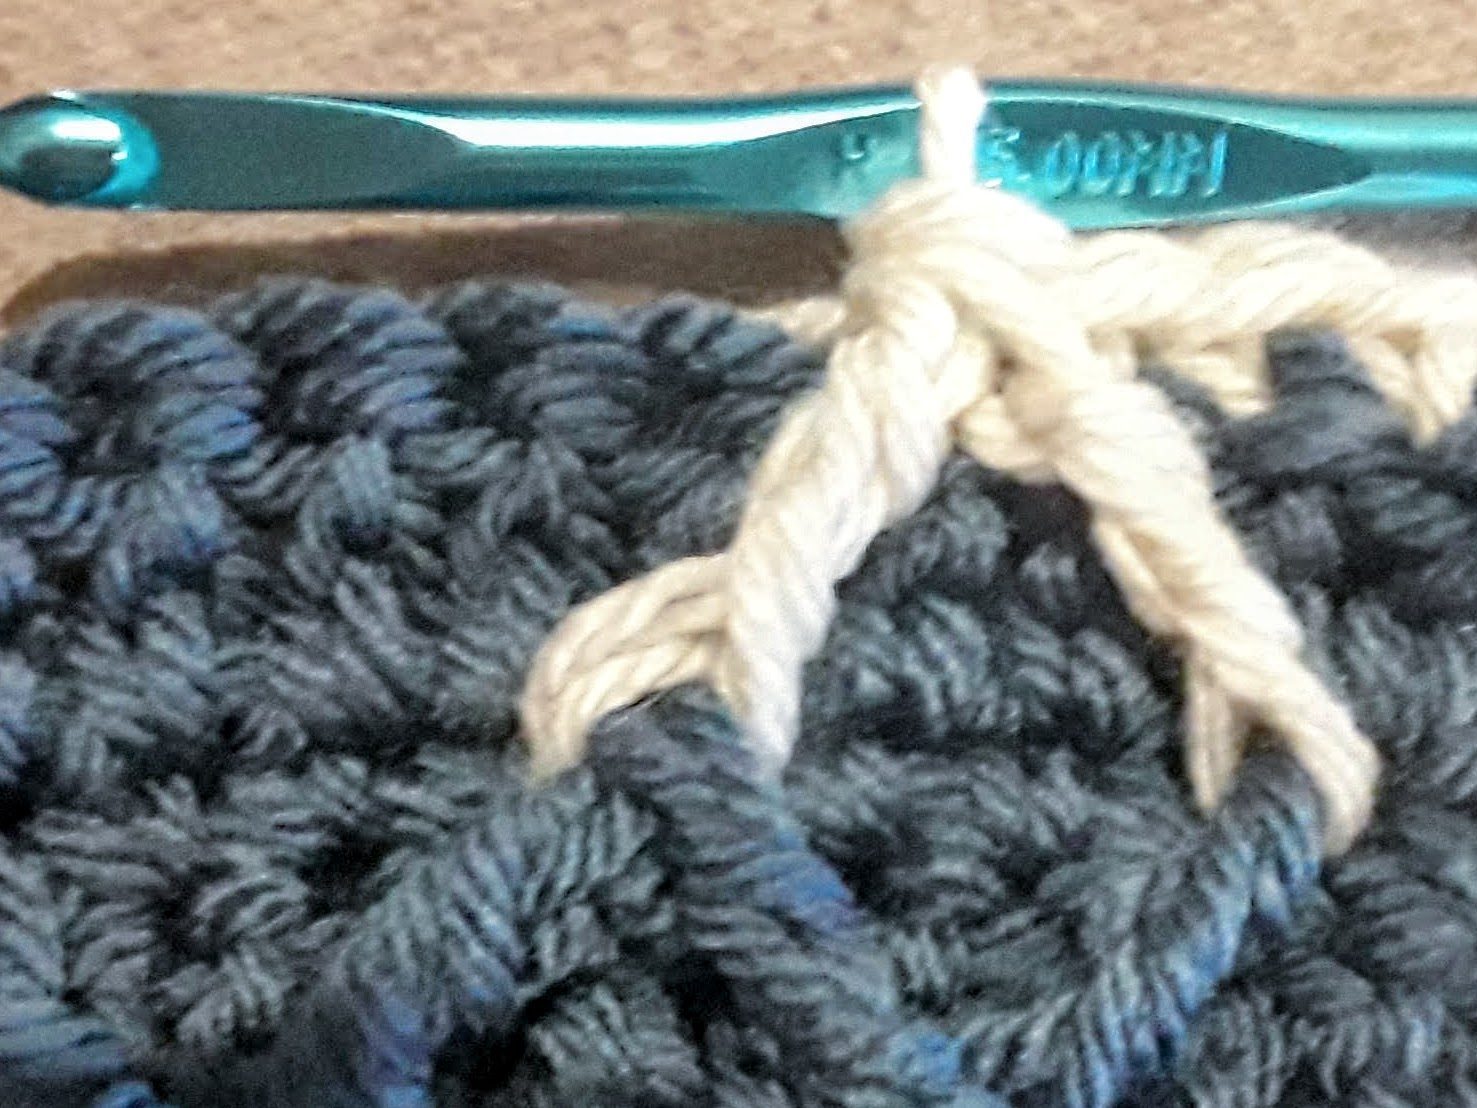
3. Bottom of the Diamond
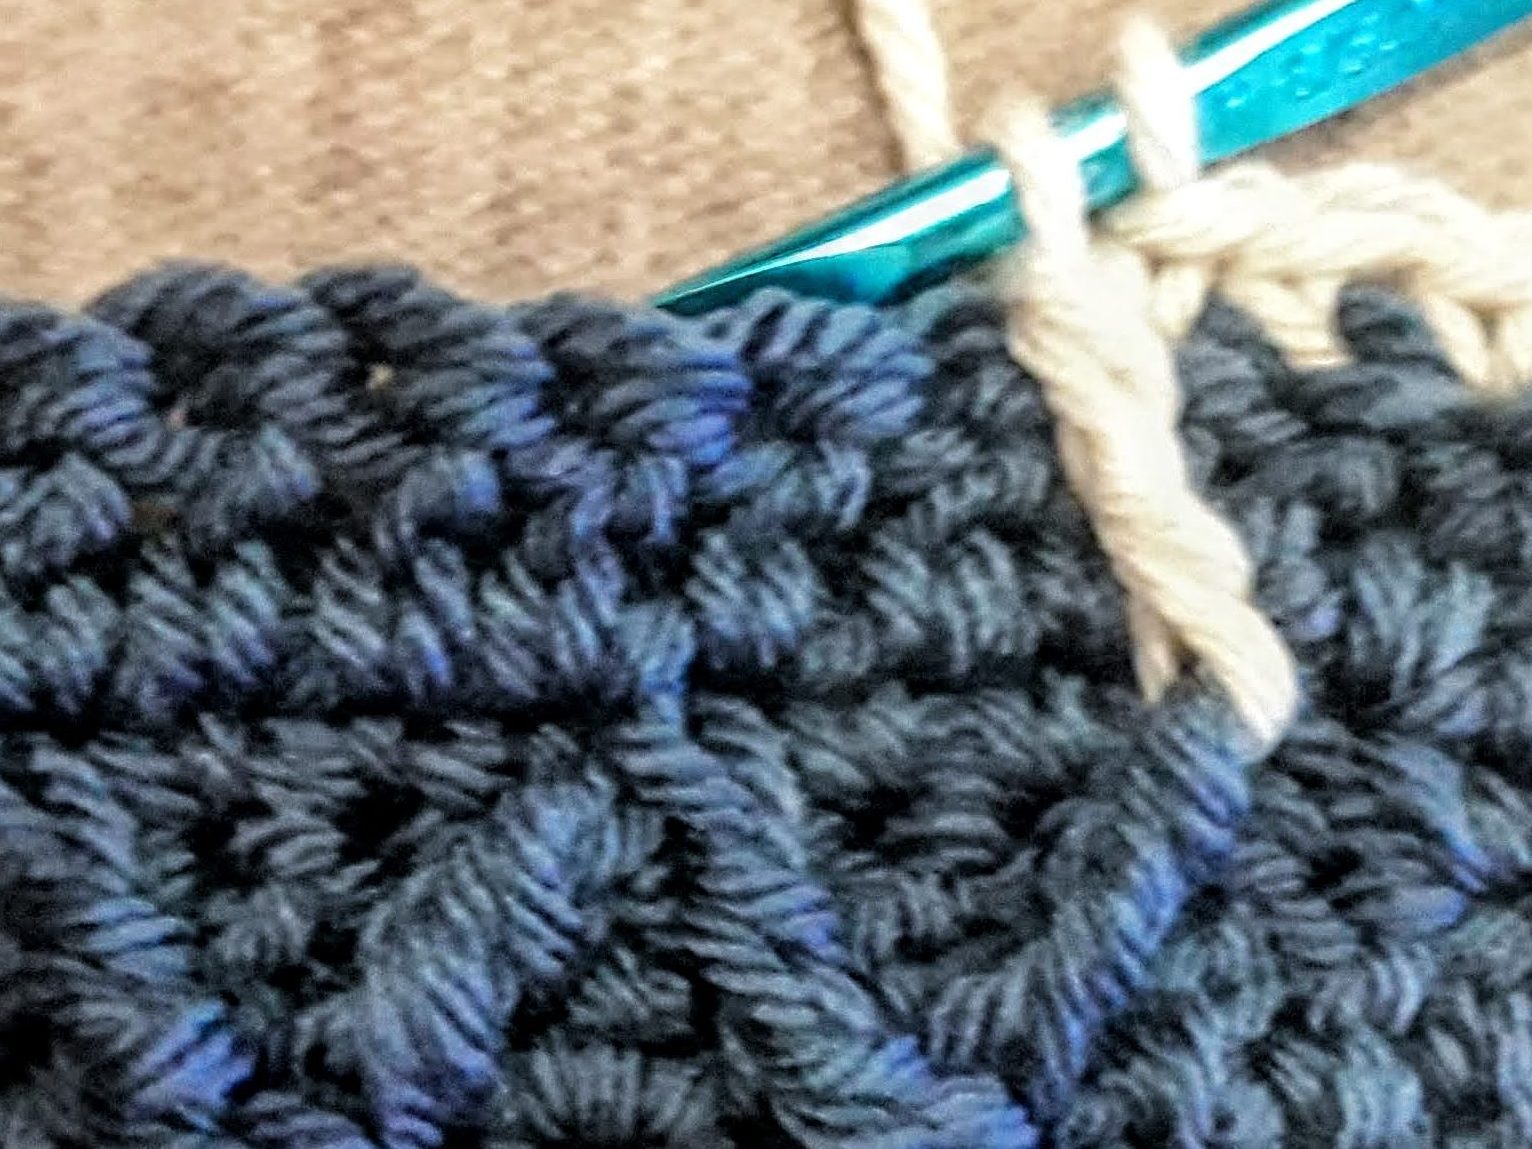
Beginning stitches:
ch1, turn,
tr around post of 3rd hdc 2 rows below, sk st behind the tr,
Color change is for clarity only. I do not recommend changing colors for this stitch.
Repeat : *sk st behind last post st,
sc in next 3 dcs,
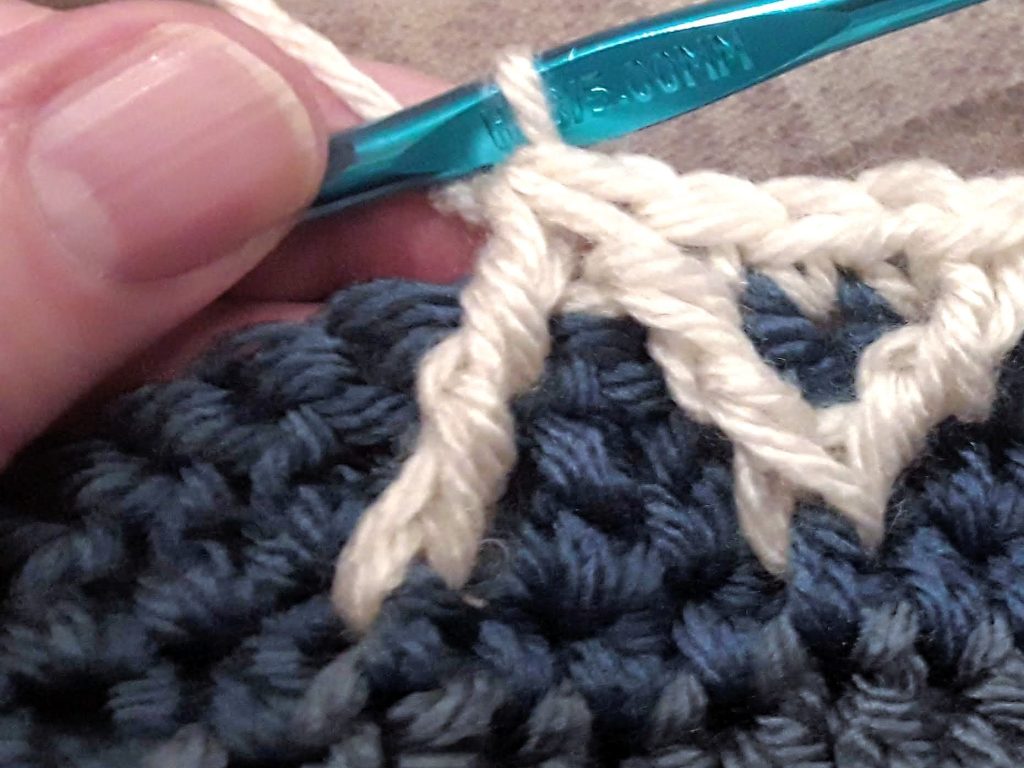
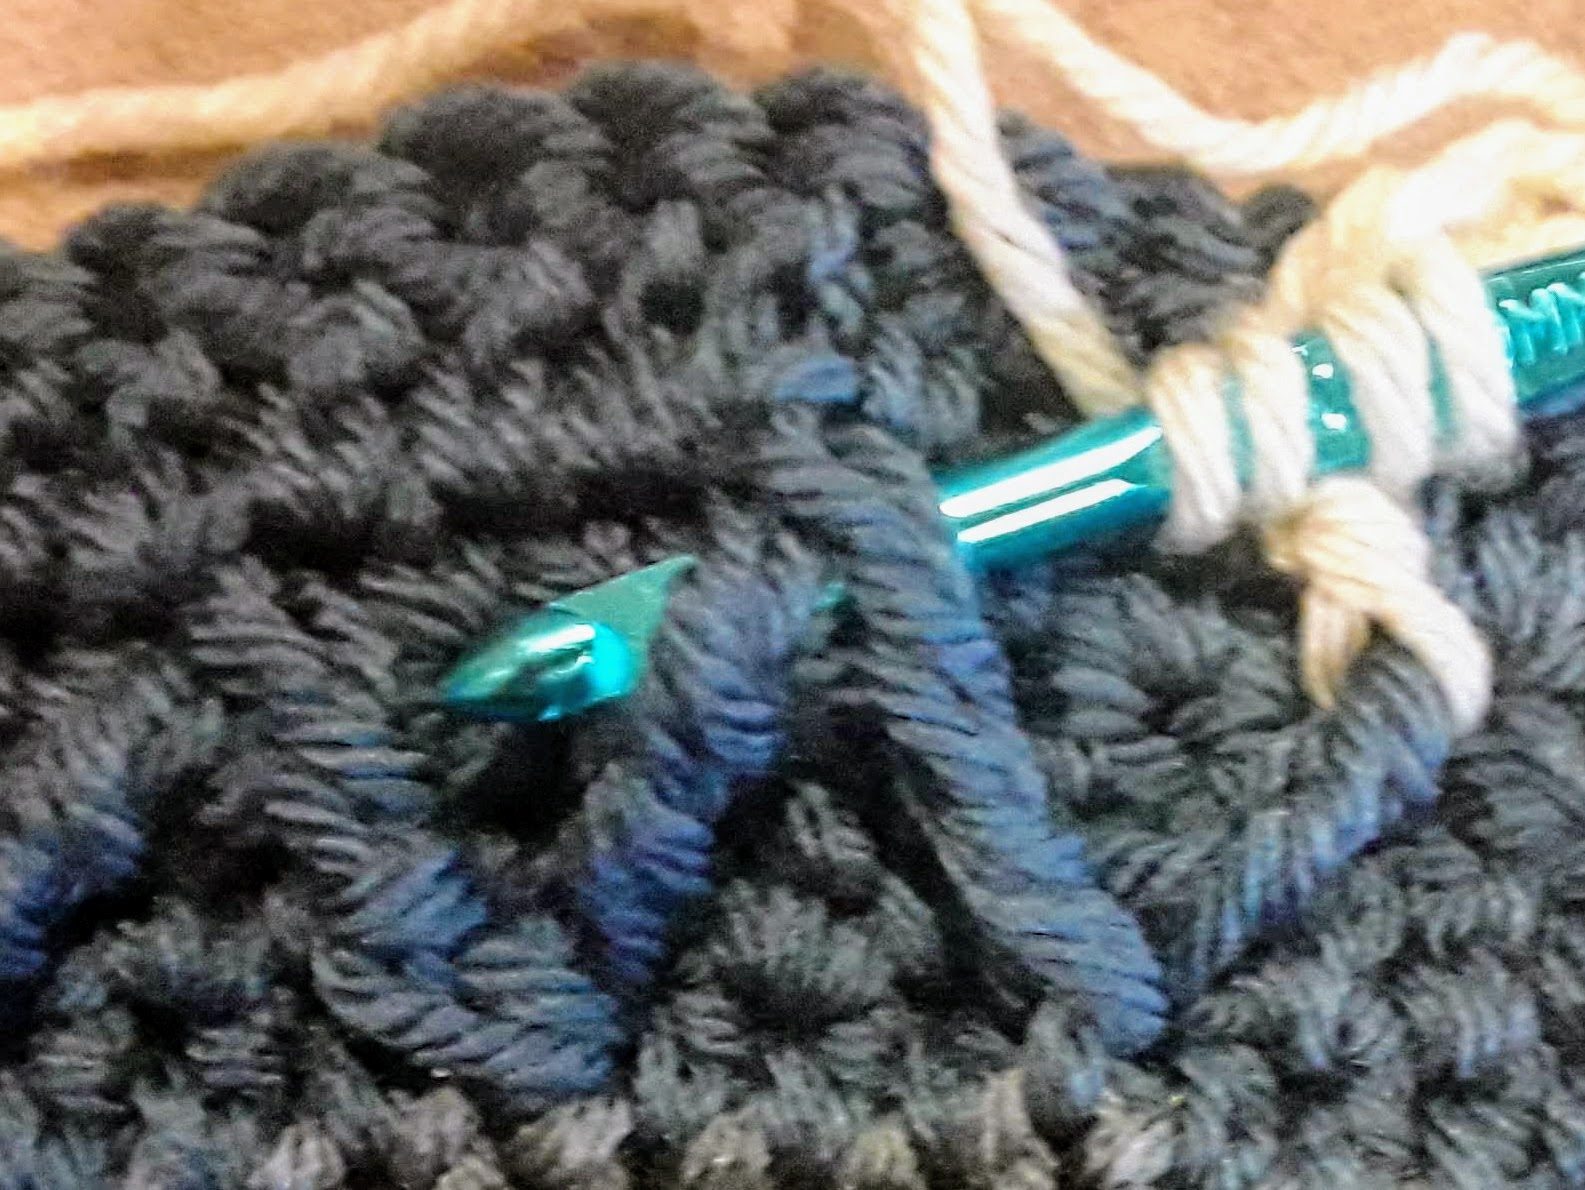
work a fptr2tog:
- starting around the same post as the previous tr;
- skipping next 3 hdcs 2 rows below and
- ending around the post of the next hdc two rows below*
Repeat between *’s until there are 5 unworked stitches left in row,
Ending stitches:
sc in next 3 dcs,
tr around same hdc post as previous fptr2tog ended,
sc in last st.
4. Making Height (again)
(WS) ch3 (do not count as a stitch), turn, dc in first hdc each st across, until you have only 2 unworked stitches, dc2tog over the last 2 stitches, dc in last hdc
5. Top of the Diamonds
R5 beginning stitches:
ch1, turn, sc in each of first 2 sts,
work a fptr2tog starting around post of first tr 2 rows below, and
ending around the posts of next fptr2tog,
R5 repeat:
*sk dc behind the fptr2tog, sc in each of next 3 dcs, fptr2tog, starting around same posts as last fptr2tog, ending around the posts of next fptr2tog*

Repeat between *’s until there are 5 unworked stitches left in row,
R5 ending stitches:
sc in next 3 dcs,
tr around same hdc post as previous fptr2tog ended,
sc in last st.
Just The Rows – A Summary
Foundation: multiple of 4 + 2 foundation scs.
1: (RS) ch2 (do not count as a stitch), work a multiple of 4 hdcs, hdc2tog over the last 2 stitches, hdc in the last stitch (the same last stitch you ended the hdc2tog in.)
2: (WS) ch3 (do not count as a stitch), turn, dc in first hdc each st across, until you have only 2 unworked stitches, dc2tog over the last 2 stitches, dc in last hdc
3: (RS) ch1, turn, tr around post of 3rd hdc 2 rows below,
sk dc behind tr, *sc in next 3 dcs, fptr2tog
starting around same post as last tr 2 rows below, skipping next 3 hdcs two rows below, ending around the post of the next hdc 2 rows below), sk sc behind the tr2tog, repeat between *’s until there are 5 unworked stitches left in row, sc in next 3 dcs,
tr around same hdc post as previous fptr2tog ended,
sc in last st.
4: (WS) ch3 (do not count as a stitch), turn, dc in each hdc across, until you have only 2 unworked stitches, dc2tog over the last 2 stitches, dc in last st.
5: (Top Diamond row) ch1, turn, sc in each of first 2 sts,
work a fptr2tog starting around post of first tr 2 rows below and ending around the posts of next fptr2tog, *sk sc behind the fptr2tog, sc in each of next 3 dcs, fptr2tog (starting around same posts as last fptr2tog, end around the posts of next fptr2tog)*, repeat between *’s to last tr, sc in each of last 3 sts.
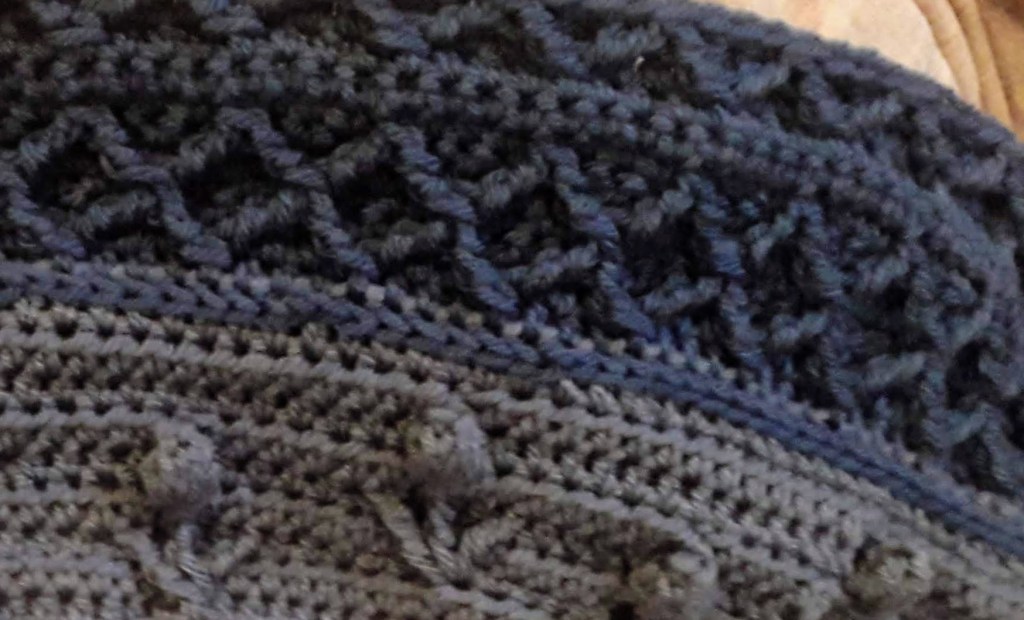
For the effect you see in my photos of finished work, I added a row of single crochets. Then started over with rows 1 – 5.
Closing Thoughts
If you’ve checked out any of my social media, you know that I’m working on a very special blanket for my daughter. I like the effect of diamond strips so much that I’ve decided to use it on her blanket as well.
Now that I’ve worked with separated strips of diamond stitches, I can imagine so many ways to use them. It would be great for a trivet. Maybe a pretty textured washcloth. You could have one diamond row along the bottom edges of a scarf, and maybe include a ring of diamonds around a matching hat. What if you framed a blanket with a row along the top and bottom? You could also use regular fptrs to work diamond shapes up and down the sides if you liked.
Whoa, am I getting carried away here? Well, I truly hope you found something helpful in this article. Better yet, I hope you use this stitch. I’m sure you have great ideas of your own. Let me know what you think. Send photos!
As always, if you have any issues or questions about this tutorial, ask them. I want you to succeed!


Leave a comment